Got mine - they look GREAT! Thanks Fern.
Beiträge von rogbmw
-
-
8/17/2014 UPDATE
--------------------------------
I was able to get back to the car this weekend. Marcia is still at her father's home settling the estate along with her sister, so it gave me the weekend to get alot done. Plus, the doctor finally said I could lift more than 10 pounds after the recent surgery!Here is what I accomplished:
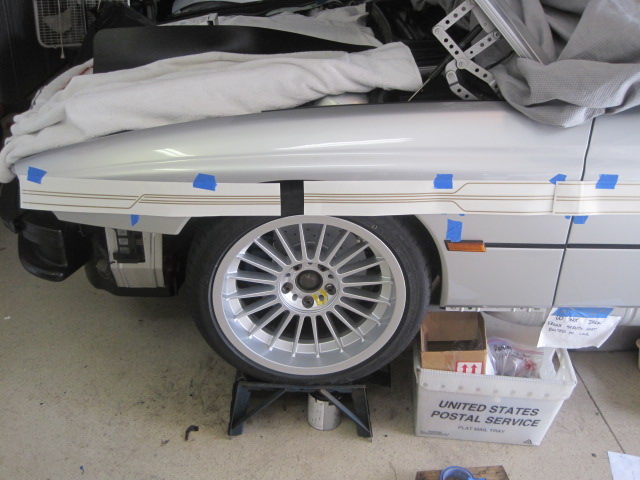
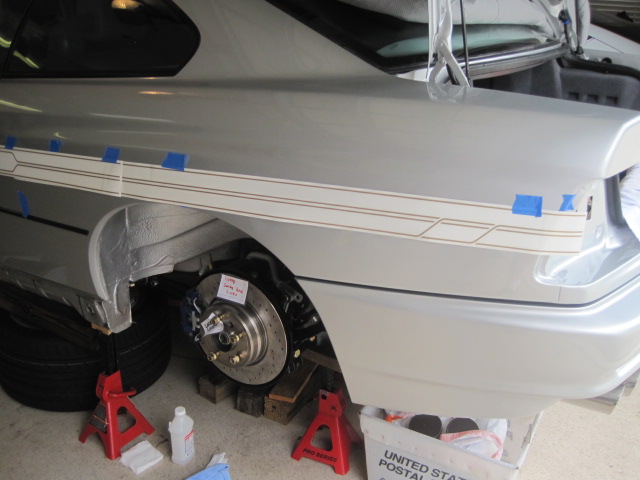
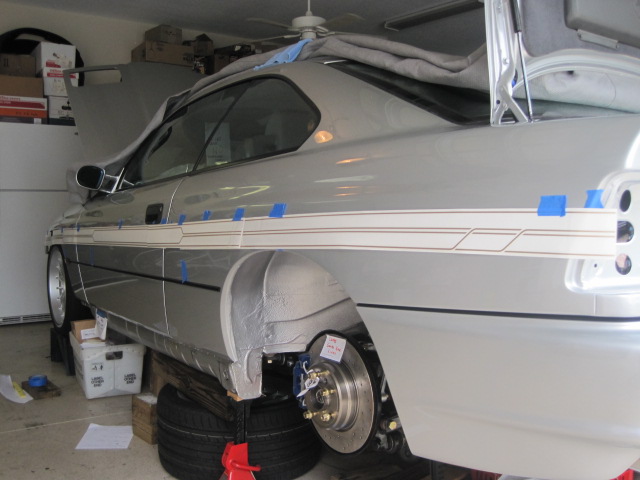
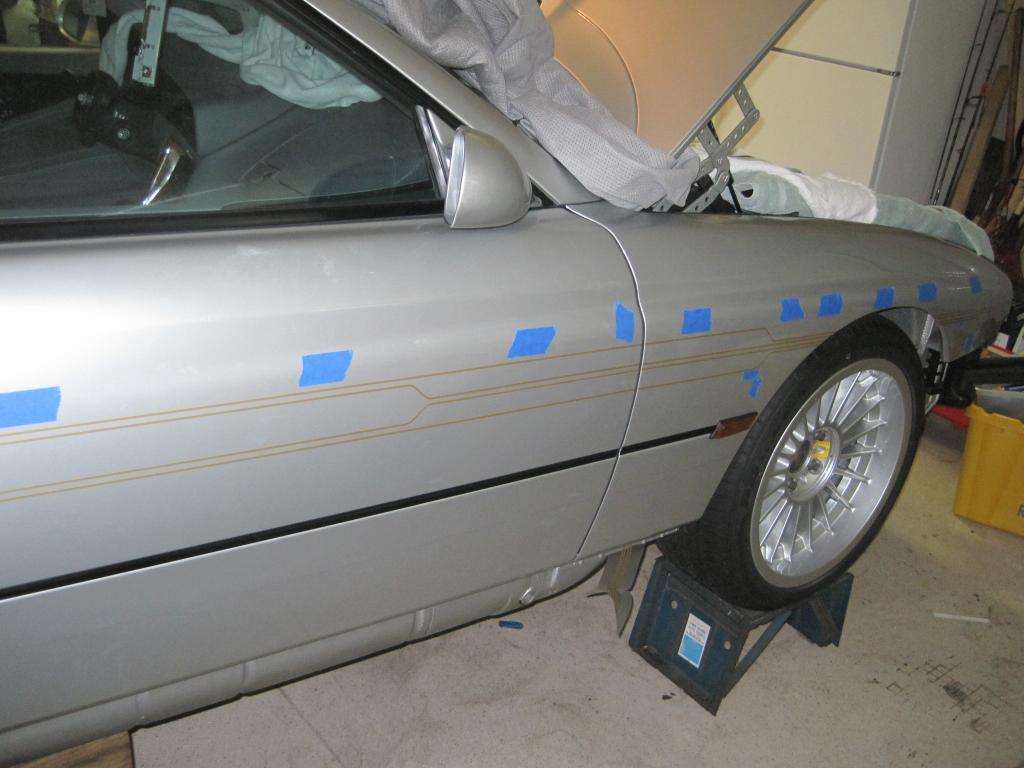
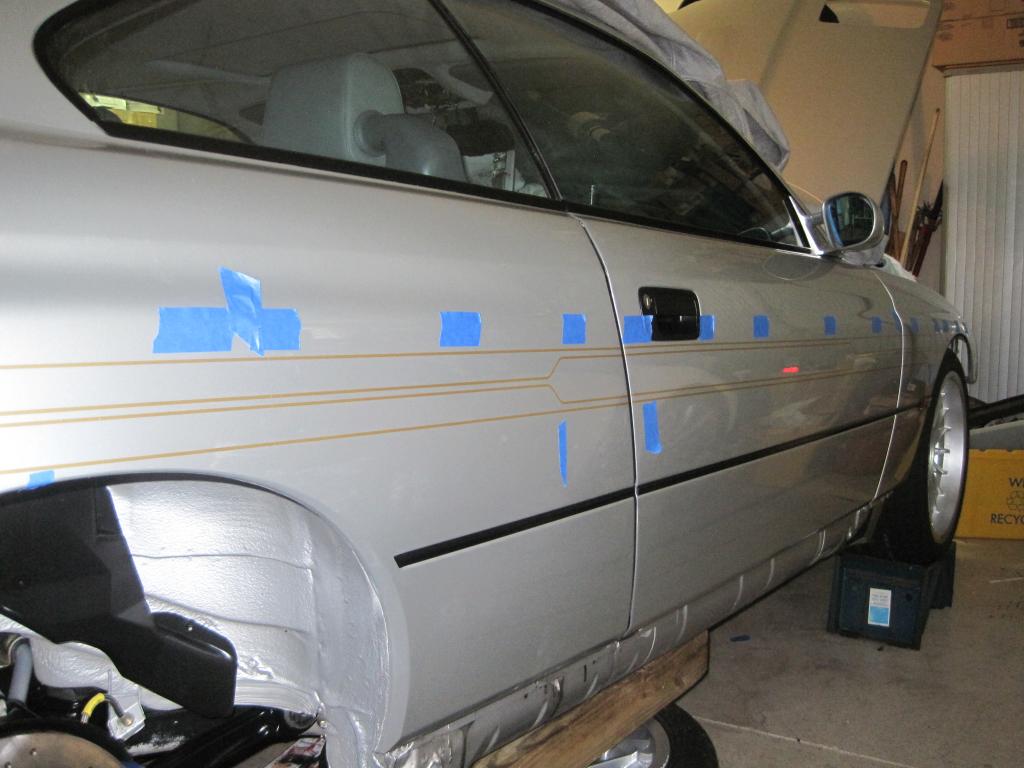
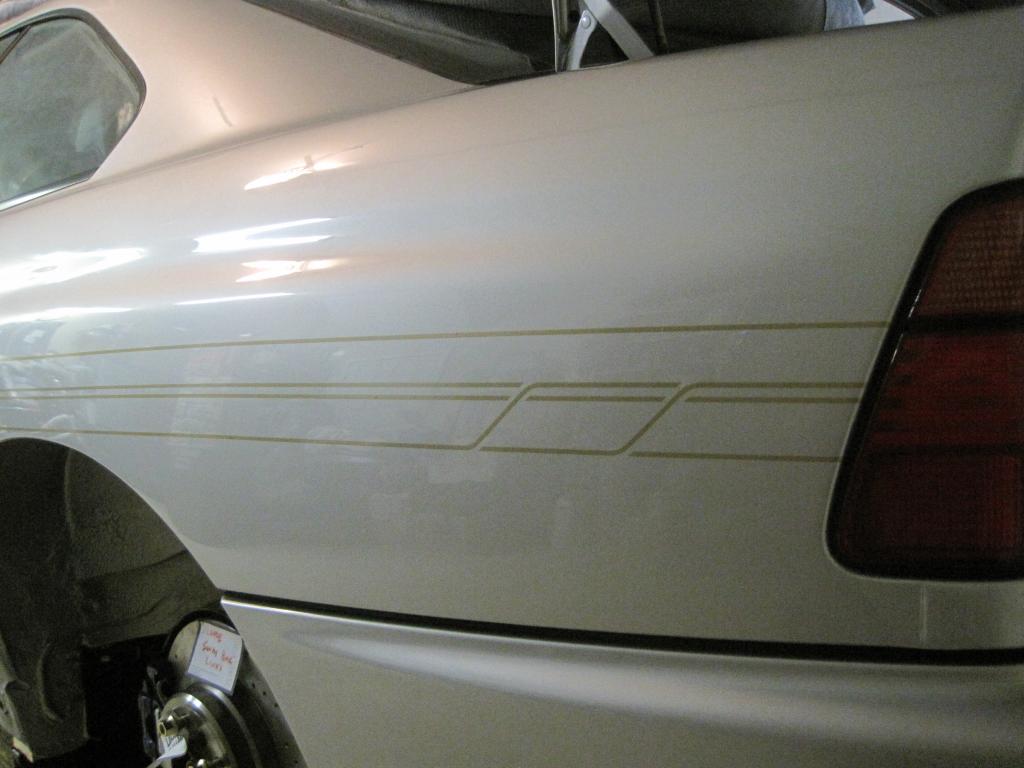
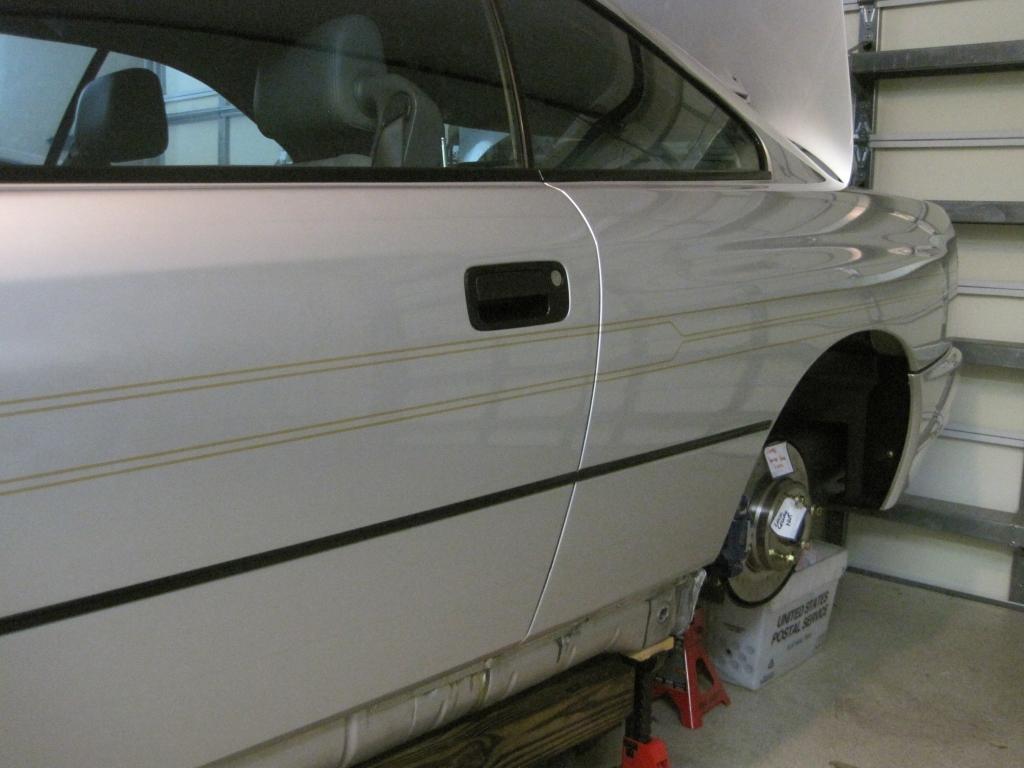
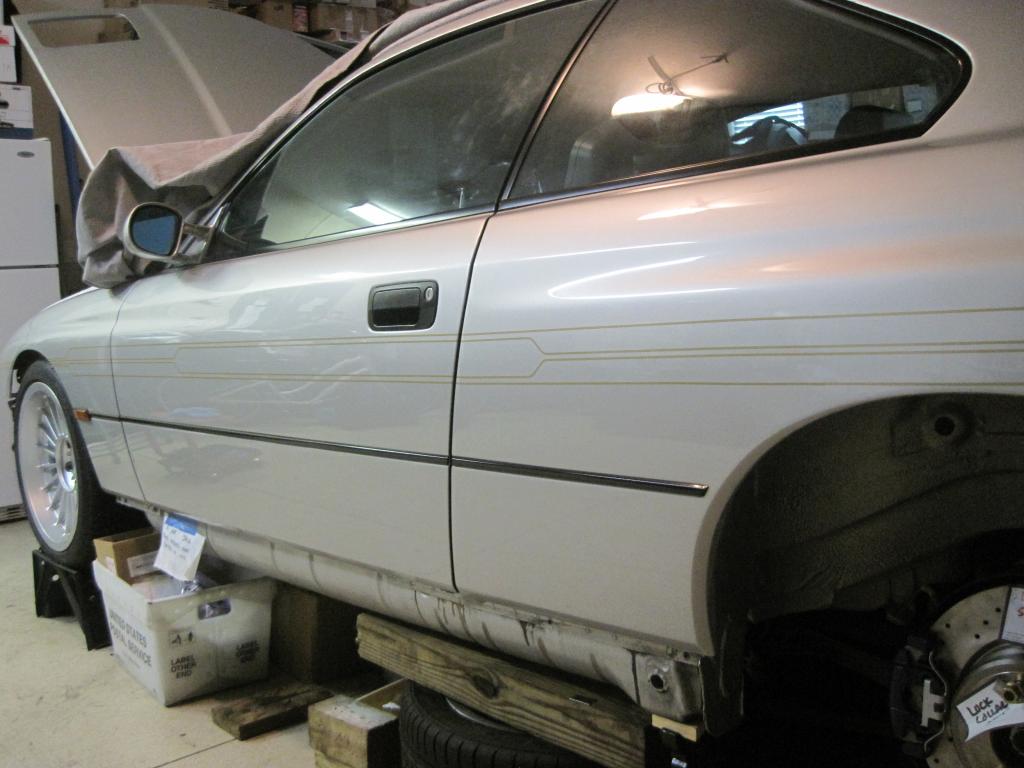
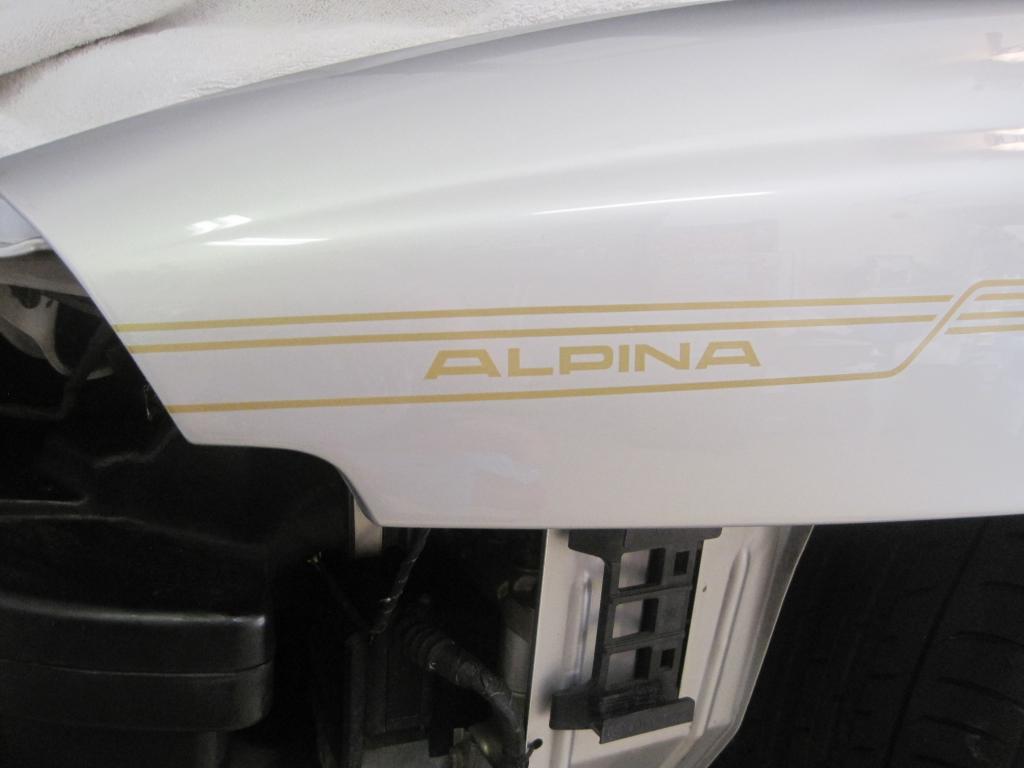
1. Got the ALPINA strip kit on. This took almost 8 hours measuring, re-measureing, setting everything up, and finally going for it.
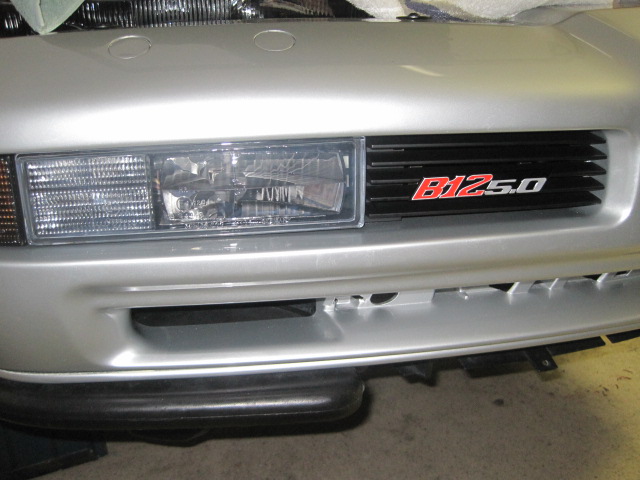
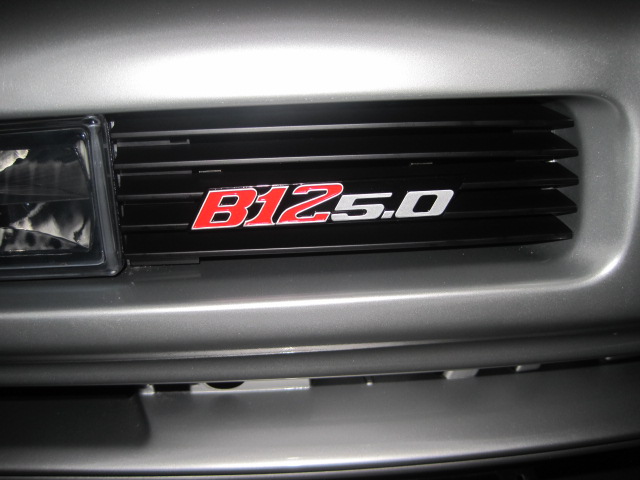
2. Got the front bumper on complete with new center grills, grills, and New Euro FTP strips in (I have had these waiting for several years). I also replaced the trim at the front edge of the fenders and put on tape pieces along with the new 5.0 badge.
3. Completed the rear valence.
4. Tightened up some of the remaining bolts in the rear end that were not torqued yet
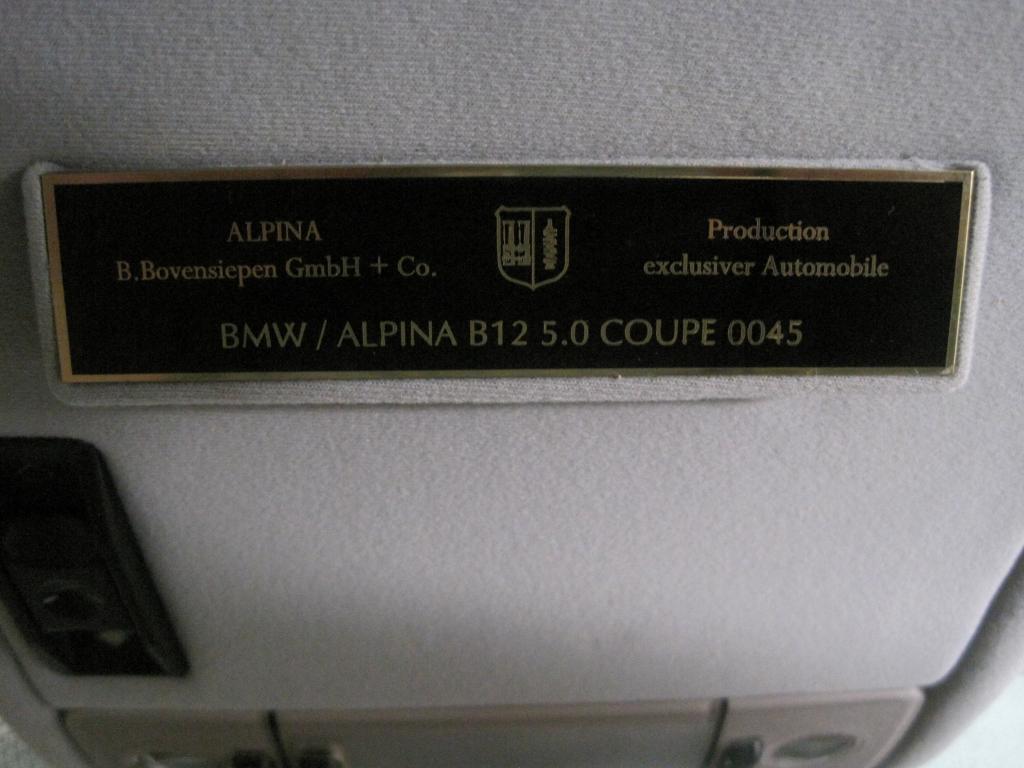
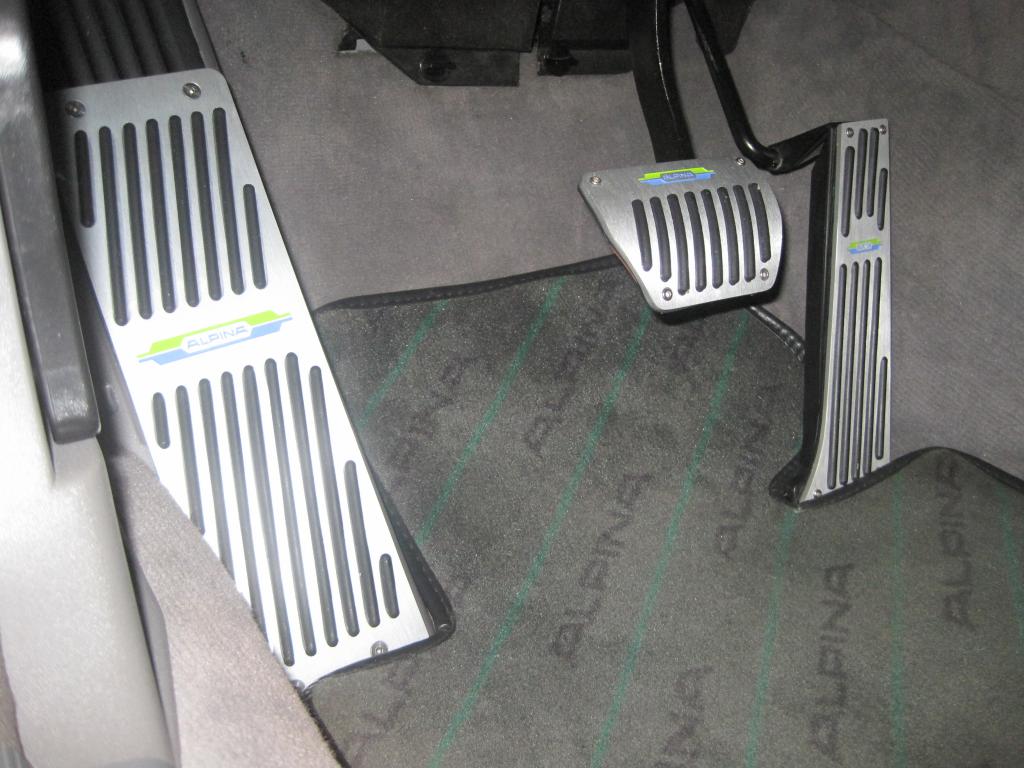
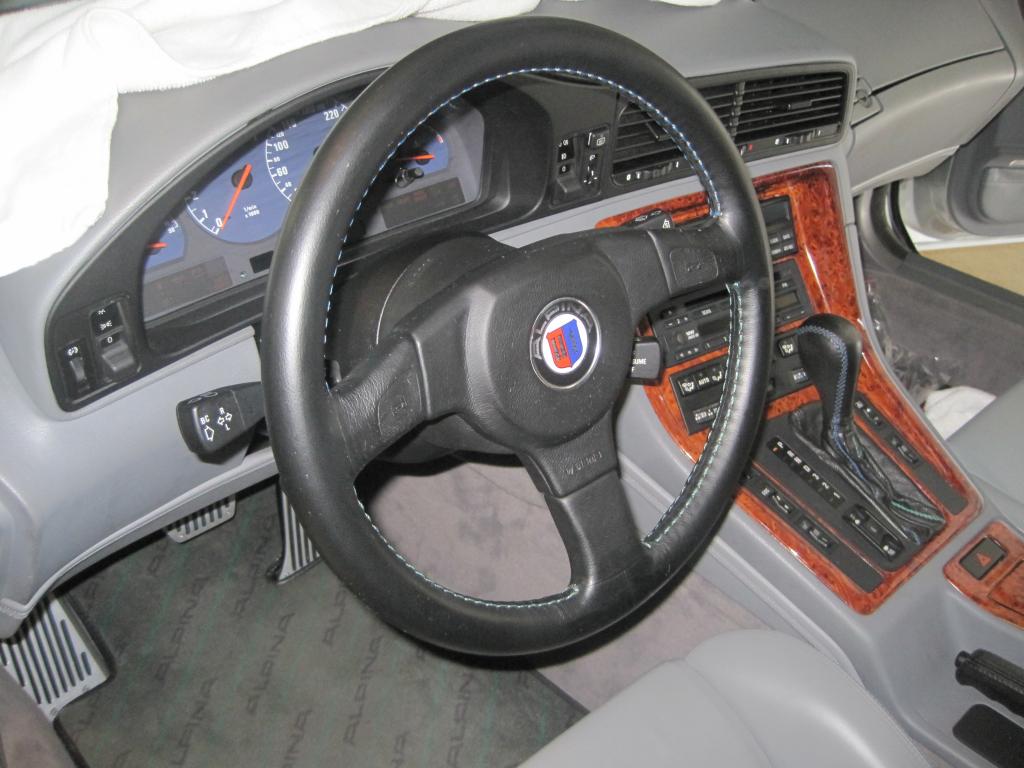
5. Finished up the interior. I put the steering wheel back in, uncovered the pedals I purchased 3 years ago ( I have had them on and covered with tape), and placed the sunroof cover with the refinished ALPINA plaque. Plus some other items. It is good to have the interior done!!Here are some pictures:
Placing the tape stripes - notice all the blue tape where measurements were marked out.
Front Bumper, trim and new badge:
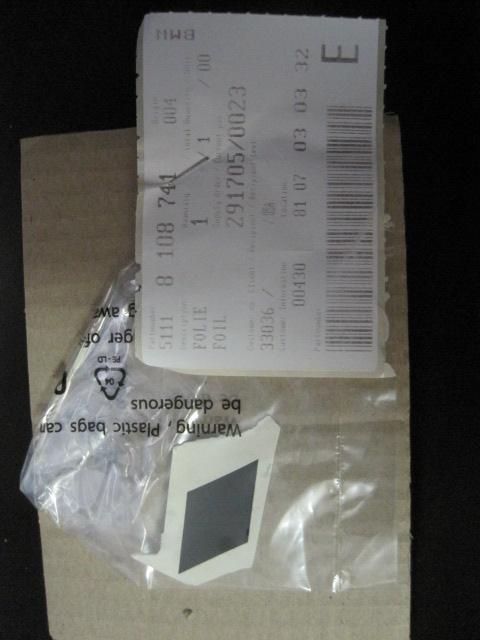
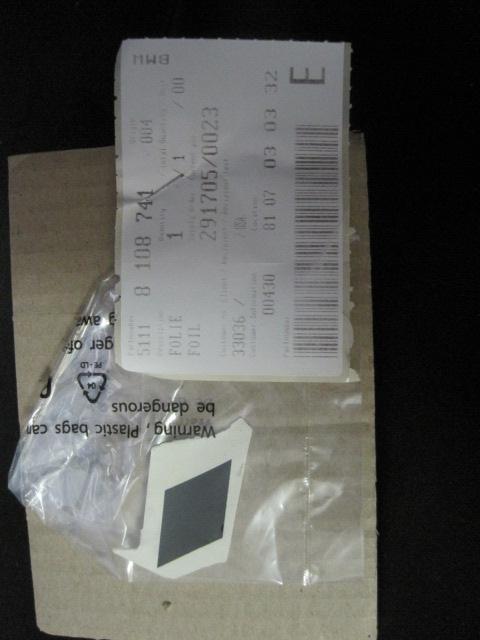
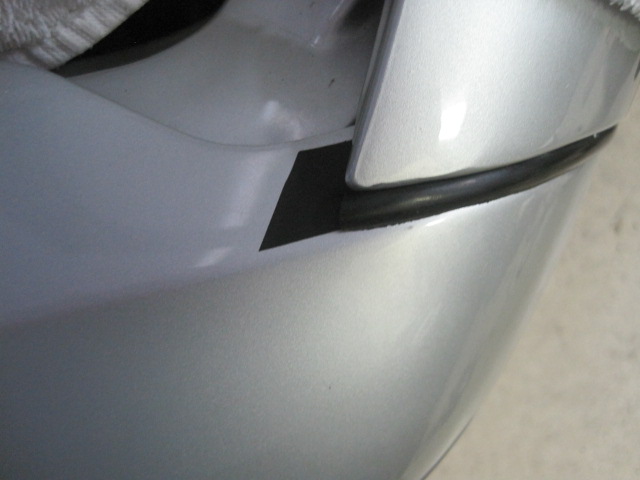
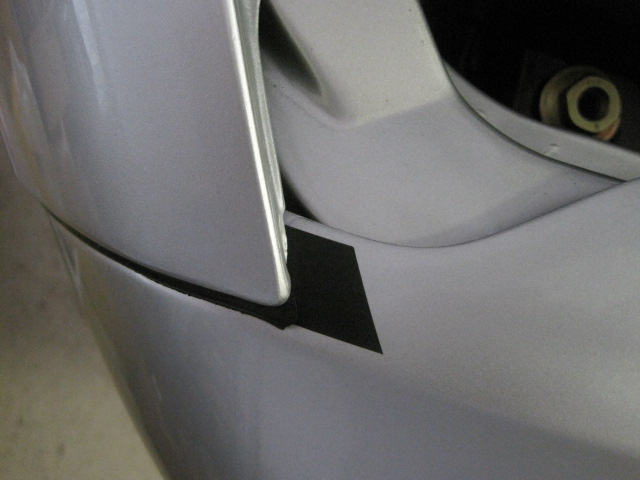
The two small black tape pieces at the corners of the hood. These make sure the black line is continuous when you close the hood (especially noticeable on lighter cars). In retrospect, I think I would have just cut them out of black electrical tape - it looks like the same stuff you get from BMW:
On the car:
ALPINA plaque.
Pedals. Also note the Original ALPINA floor mat. You can not get these anymore - I am just lucky the car came with the mats:
Steering Wheel. I took the airbag wheel out and put in an original wheel I found from Europe, as this is the way the car was delivered in Japan:
So I accomplished alot this weekend, and now I need the week to recover.....
More to come....got to get this done for Eurofest!
-
-
Dear Jack. Our thoughts and prayers are with you.
We too lost a loved one yesterday - Marcia (my wife)'s father passed away yesterday morning. -
7/14/2014 Update:
---------------------
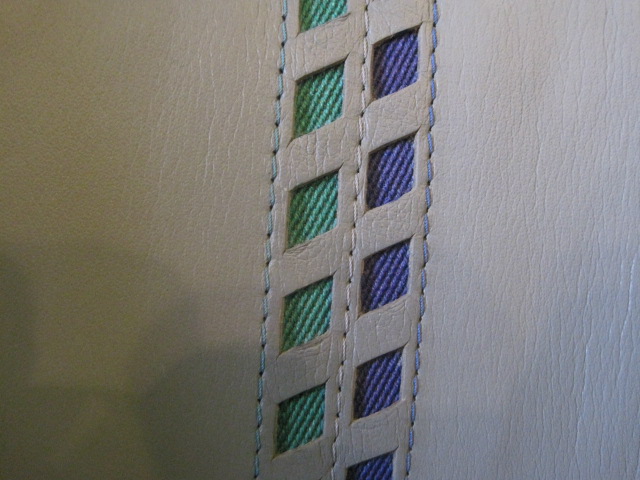
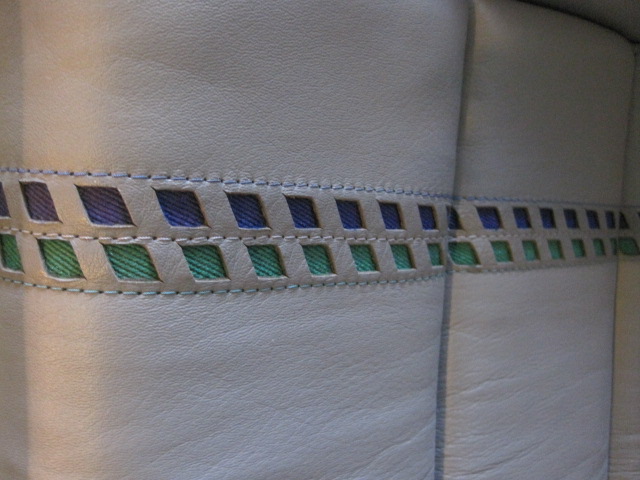
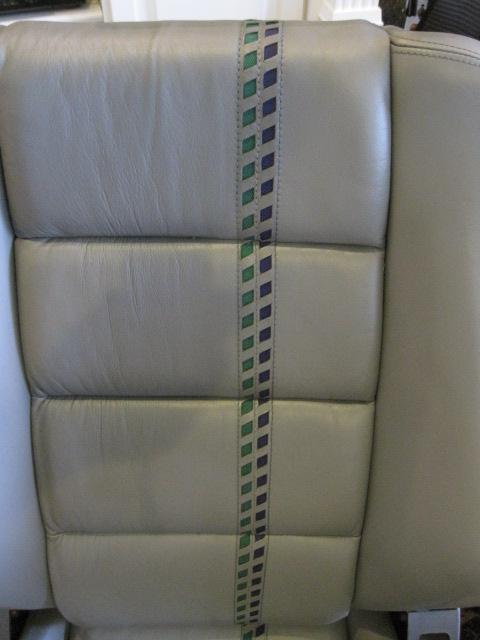
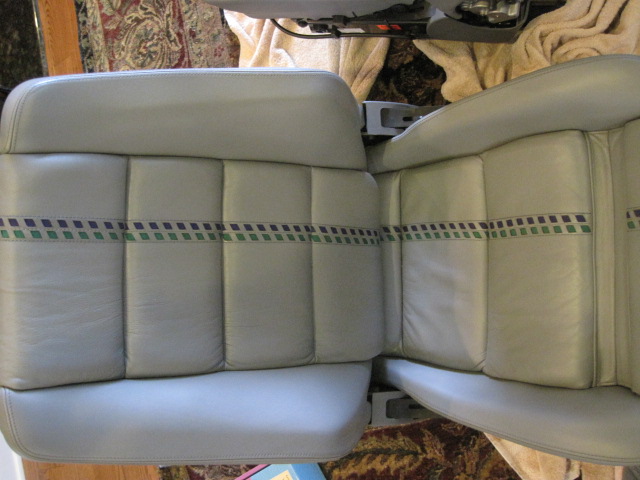
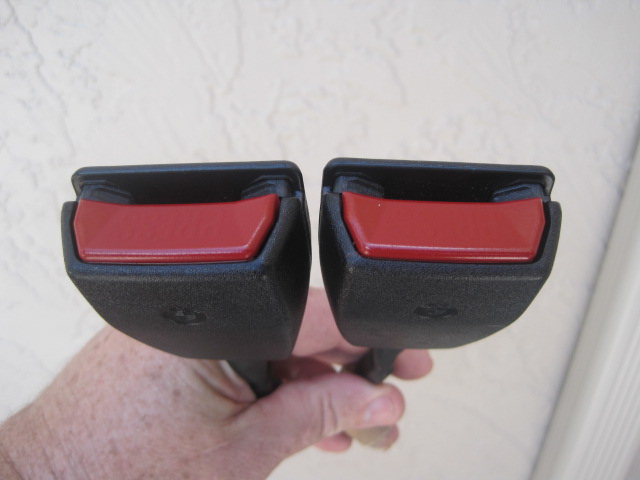
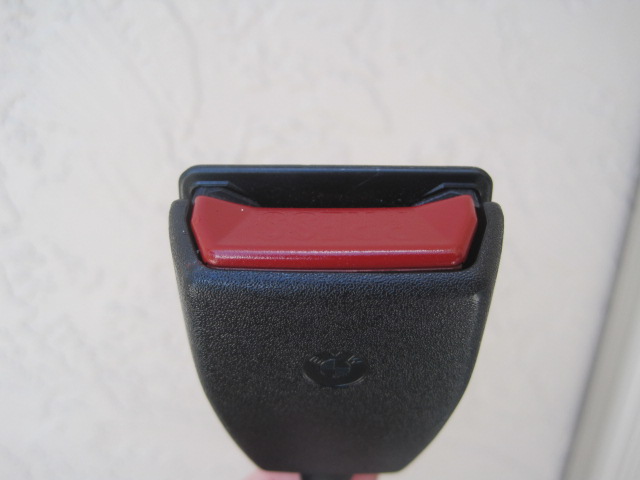
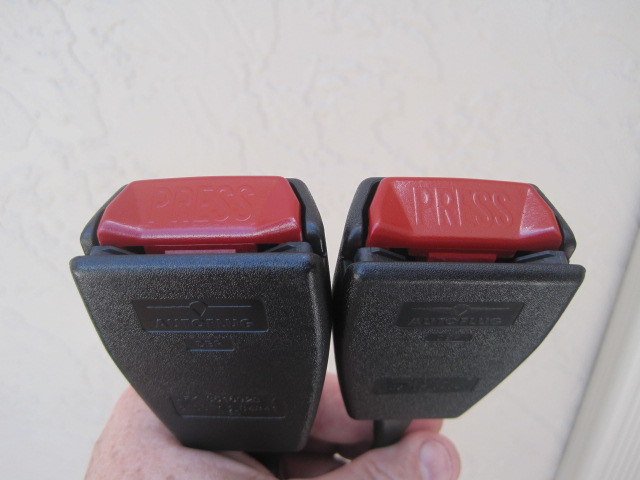
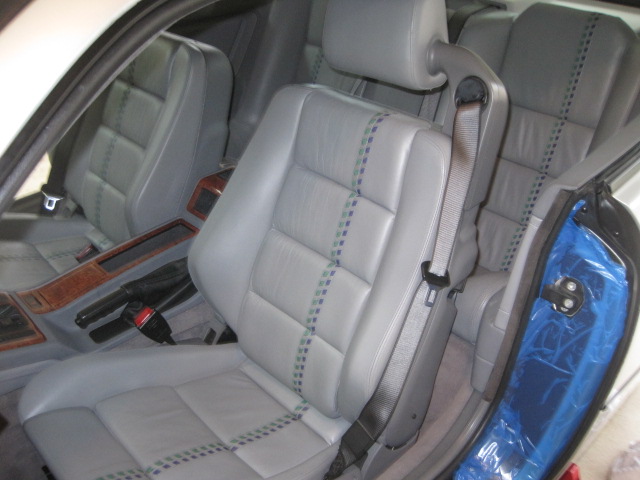
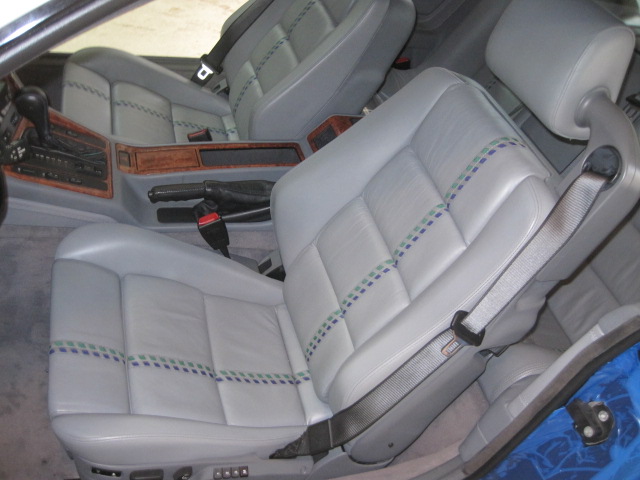
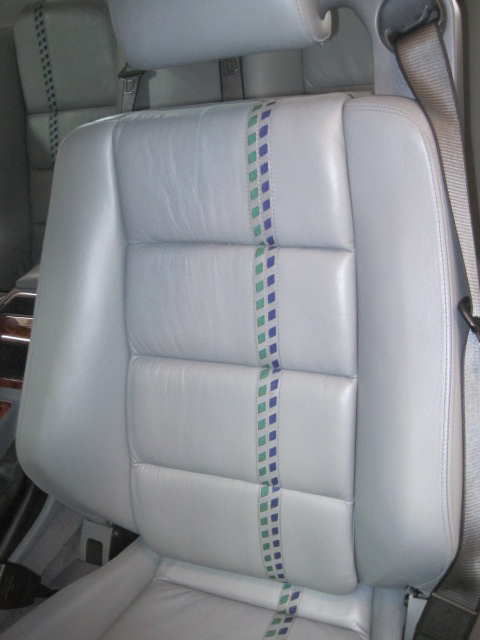
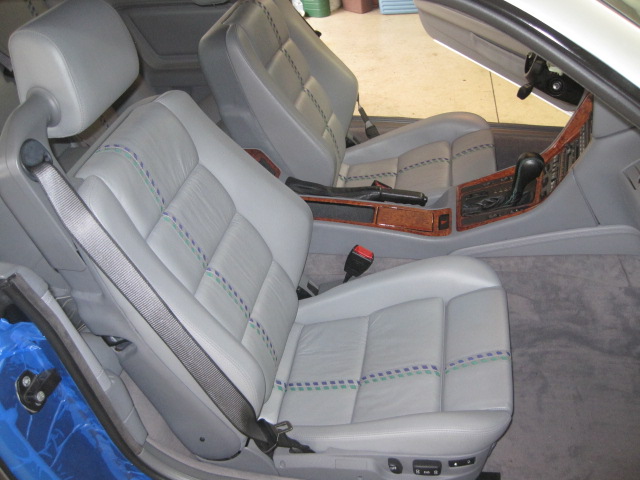
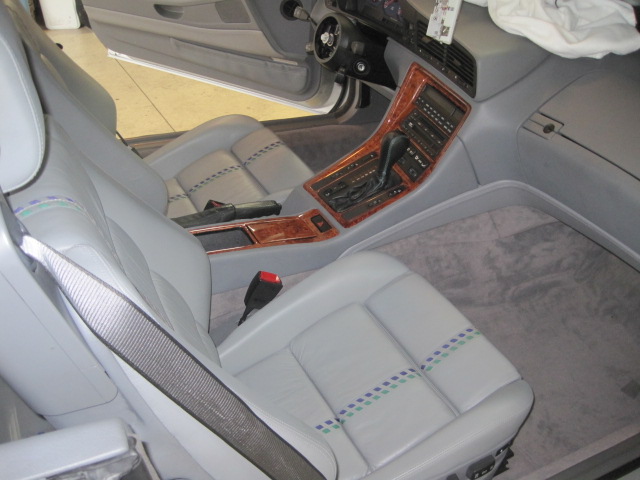
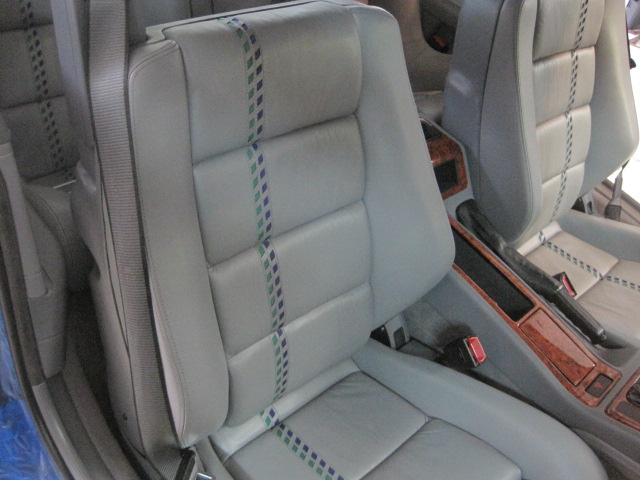
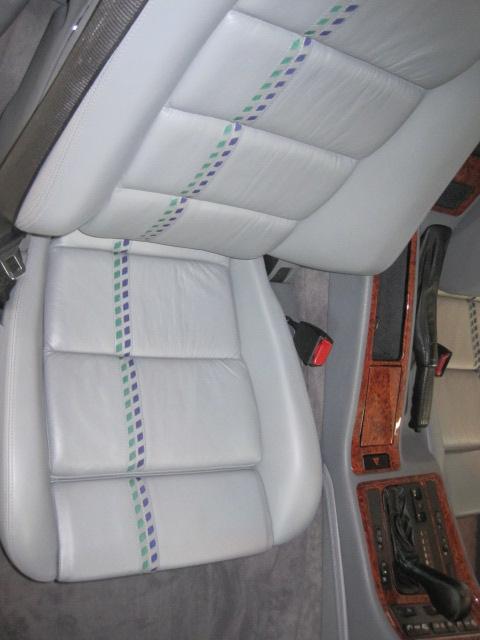
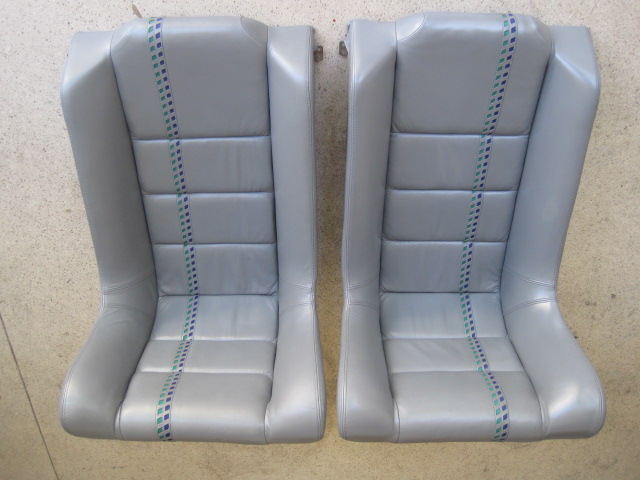
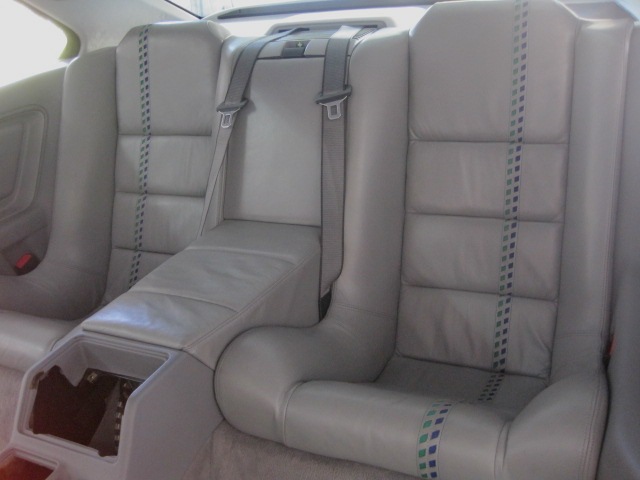
Had a productive weekend, and after over 2 years the seats are back in the car!!! On Friday I picked up the seats, which had been touched up - they were in good shape originally, but after 22 years needed just the bolsters redyed. Of course, all the small Alpina Blue and Green squares had faded, so after picking up the seats and putting them in the family room (Thanks Marcia!), Friday evening and Saturday afternoon was spent redying each square by hand. As I had all the trim and headrests off the seats, they were all cleaned prior to re-assembly. The red buttons on the seat belt latches were faded, so they were refinished. After all the reassembly, the seats went back in Sunday afternoon... Man those seats are heavy. I have to finish off several small things in the interior (place the steering wheel, place the sunroof motor cover with the Alpina plate and light) to finish it off, but that should be fairly simple and quick. Here are some pictures of the seats:Here are the refinished seats, with the blue and green squares before redying:
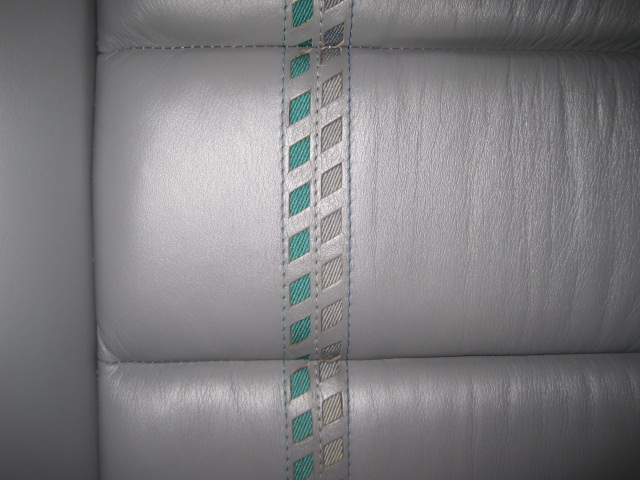
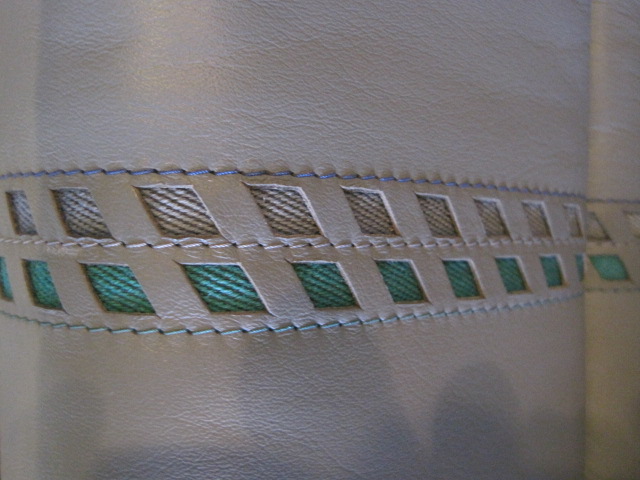
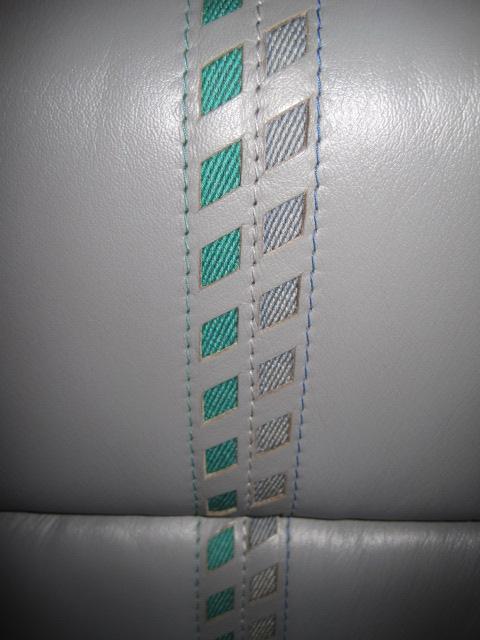
After Redying all those Blue and Green Squares:
The refinished seat belt buttons (I know...trivial, but they look better

The seat trim cleaned prior to reassembly:
And...FINALLY....back in the car after 2 years!!!!!
The light at the end of the tunnel is getting bigger!!!! More to come.
-
Welcome to the madness...once infected there is no cure!

-
Thanks for the pictures. Looks like everyone had a great time.
-
Zitat von revtor;120376
The MID takes over the language the EKM module is coded to. So the proper way to change the language is by recoding the EKM with NCS Expert, but there's an easier way through the MID's service menu. See e31.net for instructions on how to enter the service menu. The function you need to change is service menu 11.
Thanks!
-
Can the MID be switched from one language to another (German to English) on the settings, or does it need to be changed out?
-
-
Can't wait to see some pictures!!!
-
Terje - looking clean!! I LIKE THAT LIFT!
-
Terje - I did not start out to do that. In fact, I was not going to even do the rear suspension until I saw the shape of the rear bearings, which needed replacement. One thing led to another, and this is what it ended up with!! By the way - your car looks great!!
-
Zitat von 8Harry8;119643
 Roger
RogerAmazing!
I wonder if your Alpina will be more than a trailer queen or a museums very best star in the future since it seems to be better than new in the meantime...Harry - I had a true garage queen - a 1973 3.0 CS Coupe that I sold in 2004 ---with only 27,000 miles. I was afraid to drive it! I always swore that I would never have another car I was afraid to drive. My 850 Csi that I sold to purchase the Alpina was not driven all the time, but I enjoyed it, and will do the same with the Alpina.
-
Zitat von reinhard;119527
.
Have a close look at e.g. Roger´s rear axle rebuild and think it over going only half the way. It is just too much work to skimp out on consumables here.
ReinhardJust got finished with this as Reinhard said. Lots of work you have going on there, and I did not have the AHK. Here is the 8er.org link:
http://www.8er.org/forum/showt…-Alpina-Restoration/page9 -
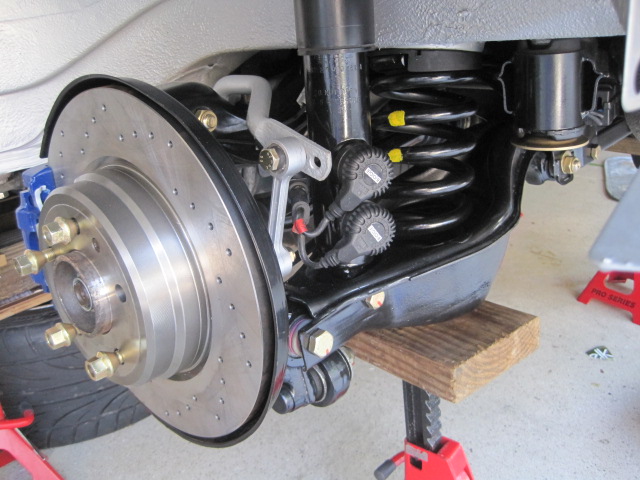
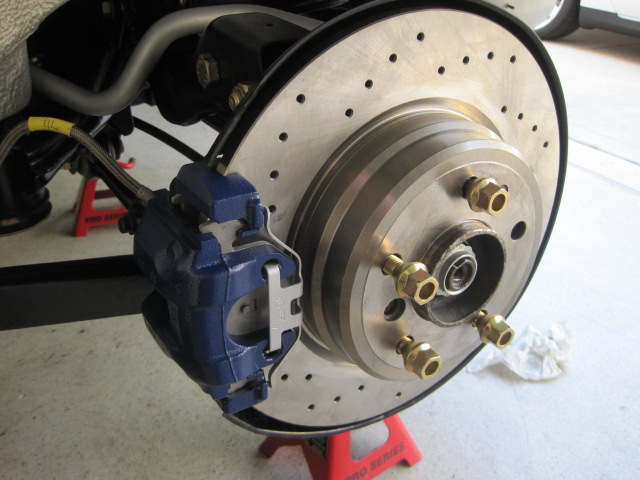
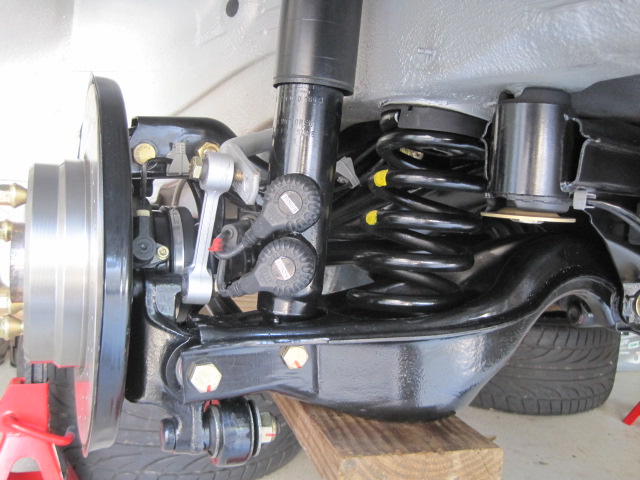
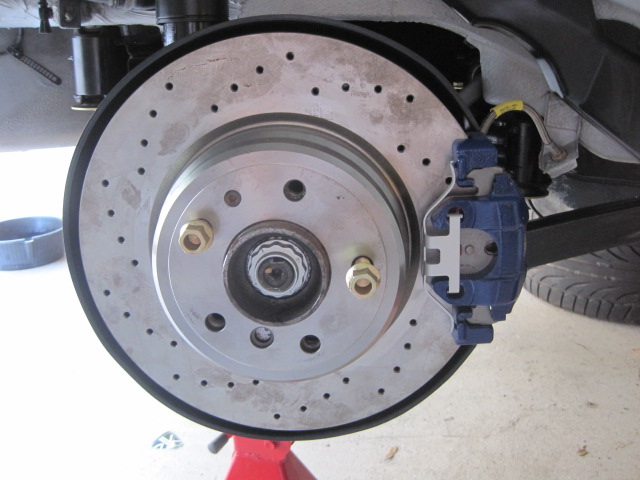
Update 5-5-2014
----------------
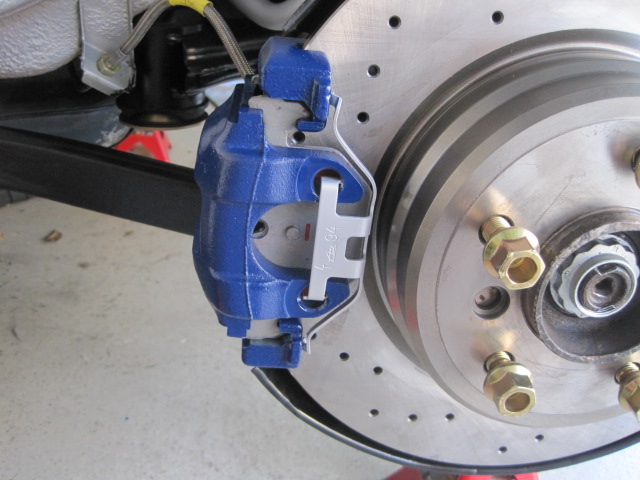
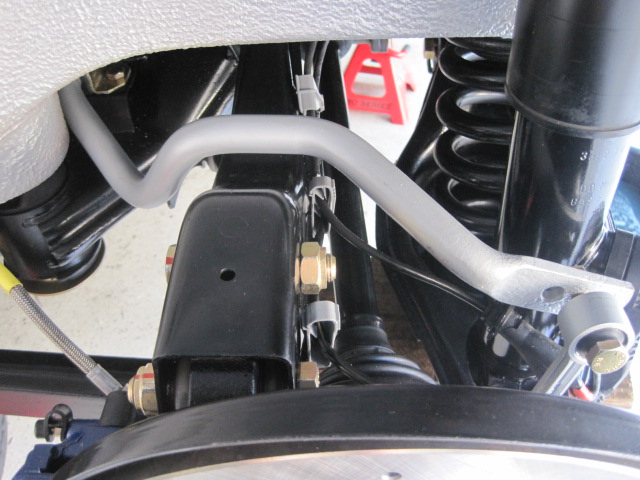
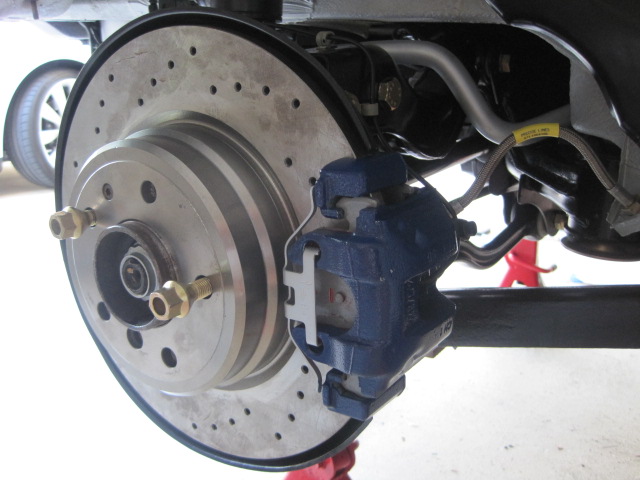
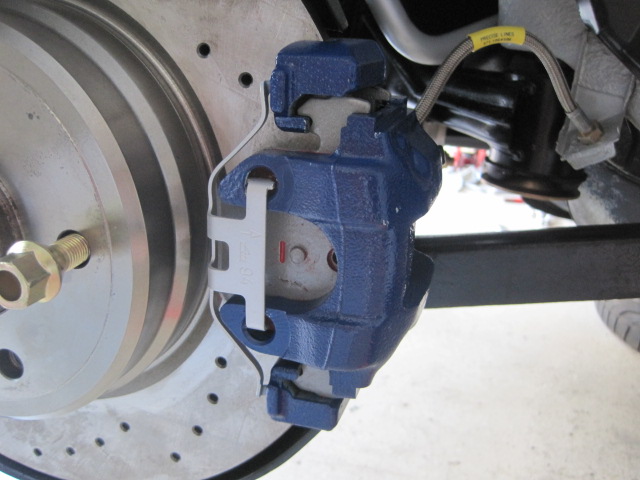
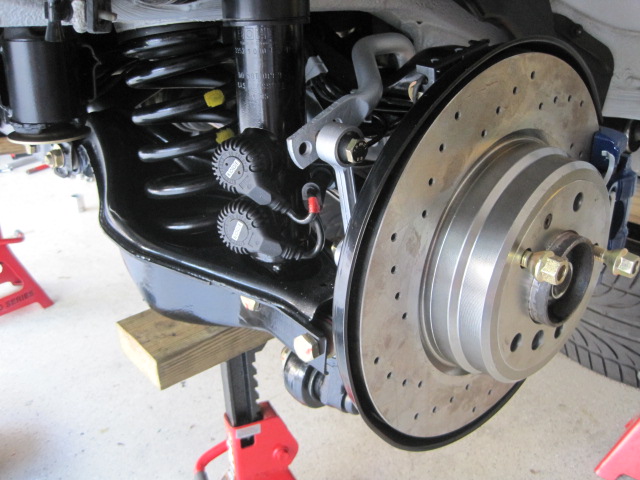
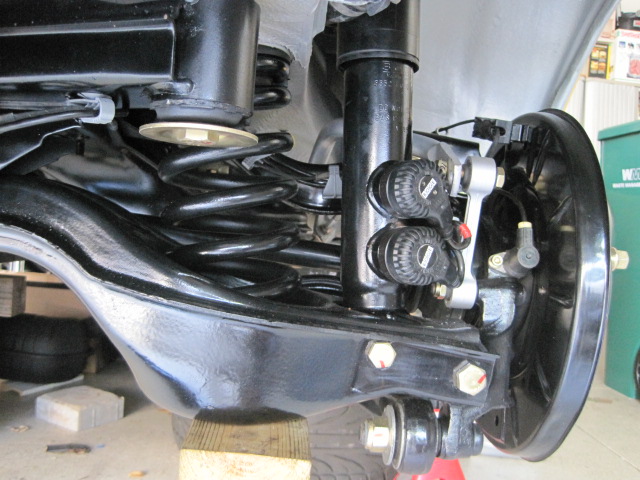
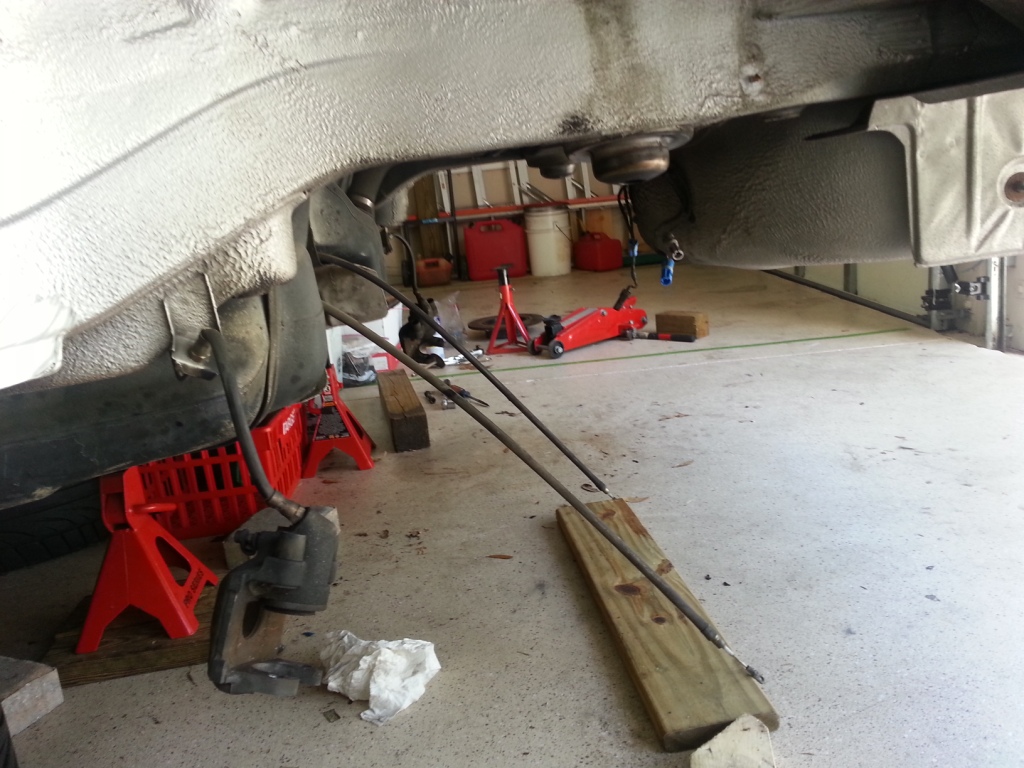
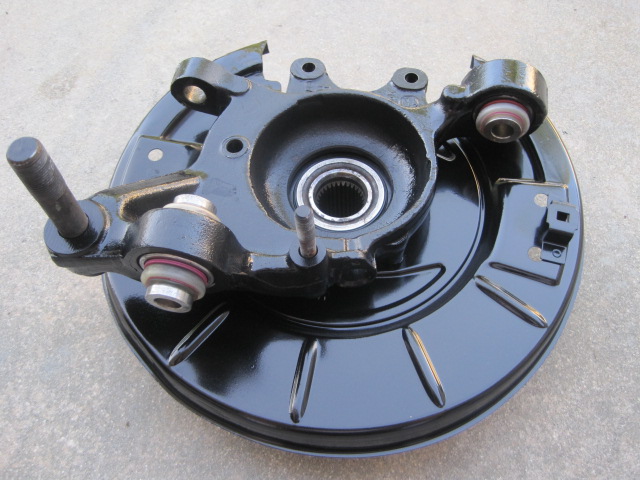
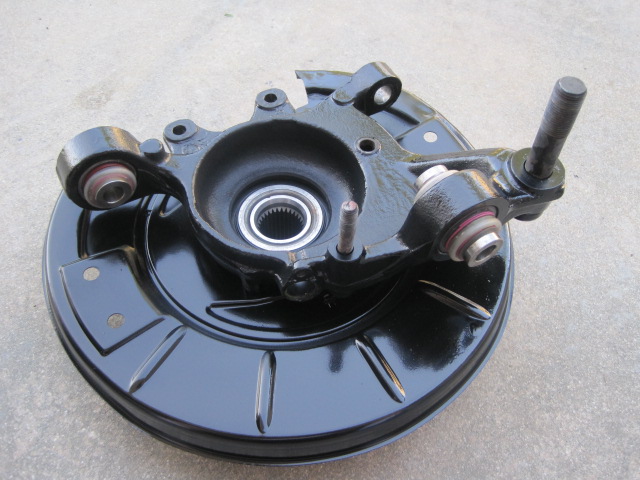
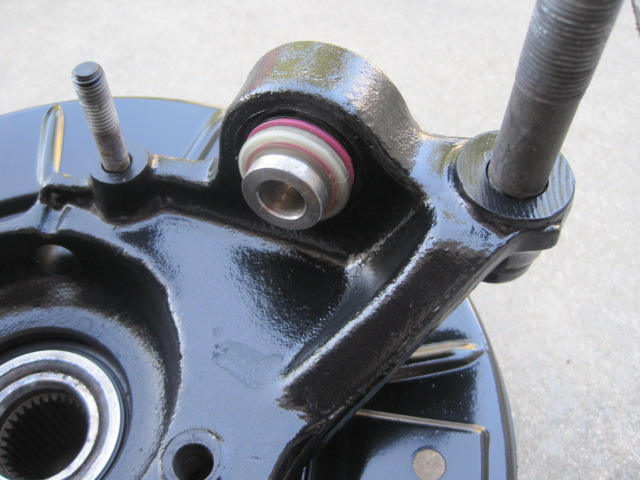
I was able to get everything put back on and torqued back down. the only things I have not torqued back is the top of the sway bars and the ecentric bolts, which will have to be set when the alignment is done. Note the red marks on the bolts - when I torqued them back to their settings I marked each bolt with a red mark. Brakes have been rebuilt and the calipers done in Alpina Blue. MWrench Stainless Steel brake Lines (which I have had new sitting in a box for several years) went on. New rotors and pads are now on as well. I will be replacing the rear end fluid as well as flushing the fluid with ATEBlue fluid. New bleeders were placed on the calipers as well. I still have to crimp down the collar nuts....did you guys know that those are torqued to 300 Nm!!!!!!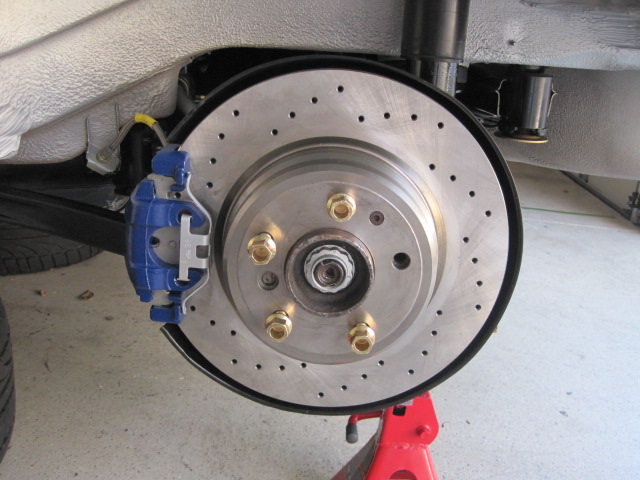
-
I just received this note from Jud Spencer - the BMW 8 Series Registry Agent Emeritus - 8/2010. This is a huge accomplishment to Reinhard and the 8 Coupe Registery Team:
Because of Reinhard’s tireless devotion along with worldwide team, the 10,000 mark of cataloged 8er’s was crossed last month. The charts and stats are remarkable. If you feel so inclined, be sure to share this link in Bimmerforums and elsewhere. It’s an amazing achievement.
As the article hints at, we may be nearing a time when our ability to catalog 1,000+ new 8’s per year to the archive may be hampered by age/years of the 8’s themselves. A large majority of the 8’s to be cataloged are in Europe where identification and vetting are more difficult than elsewhere. Anyone that can help the effort is most appreciative.
One more statistic. It seems 75%+ of the 8’s in North America are still on the road after the 1990-97 importation. We have verified that statistic through various reports (e.g. AutoCheck, etc.).
Here is the link to the article: http://www.8coupe.com/About/Ne…e-8Coupecom-archives.aspx
-
Zitat von reinhard;119122Alles anzeigen
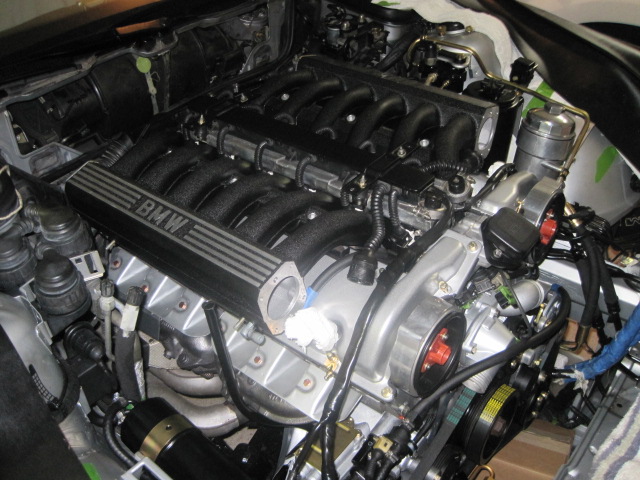
What happened to the acoustic cover to make it look like the intake runners?

Front of engine is missing part 1723620 but I am sure this is well tucked away in a box

Looks like you´re on a straight to the finishing line here

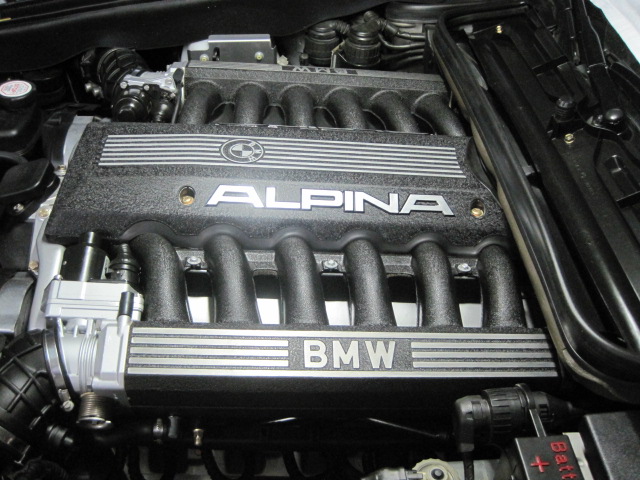
ReinhardI have two acoustic covers, so I refinished one the same as the intake runners. I have the other one cleaned up to use too. I have the 1723620 new, and it is now on, just not in that photo.
Thanks again!
-
Zitat von 8Harry8;119115 Nearly +1 on Timm's opinion, but what the heck made you use the Lucas instead of Bosch injectors, Roger?!?
Harry...I know better than that. Evidently I put a "before" picture up. The new ones ARE Bosch!

-
Been a while since I updated this thread, so I thought I would try to add some pictures and say where we are now. I have to say that I have received some excellent support from members of this board as I have progressed (Reinhard and others)
New fuel injectors and rails cleaned:
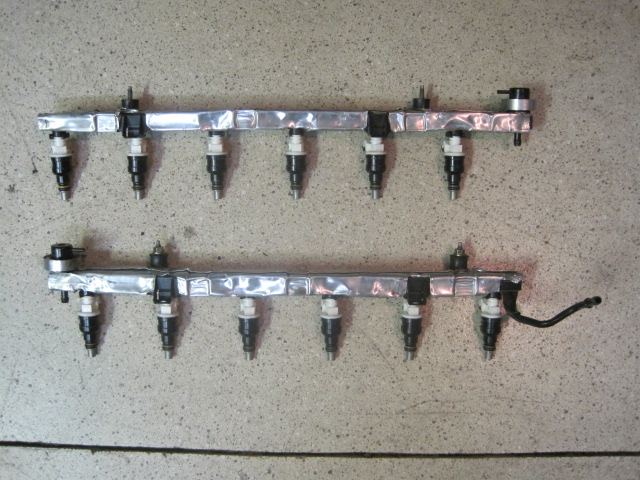
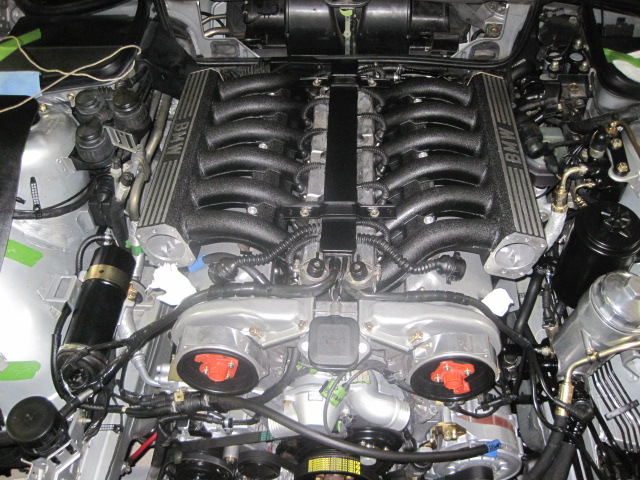
Fuel rails in place
7/7/13 Update
-------------
Was able to get some more things done over the 4th weekend. It seems unfair though...after cleaning and doing all the work, it seems like a lot if it is covered up...oh well. Here is a list of things I accomplished:
1. New dist caps and rotors, and placed the plug wires on
2. Vacuum hoses
3. New radiator, new radiator hoses, and new overflow tank installed.
4. New fan clutch, fan placed
5. I realized that after placing all the items that I had not installed the bracket for one of the hoses that is made to fit on the 2nd Alternator bracket, so off came the fan and lower radiator hose to put the bracket on, then back on....
6. Replaced the refinished front horns with newly painted brackets and reran the wiring.
7. Finally figured out how to replace the transmission mounts (thanks Timm for the write up I found from you), so went through the procedure. The Alpina Cats were in the way, so I dropped down the exhaust with the cats, and the associated heat shield was removed. Transmission bracket came out..so of course all were cleaned, and the mounting bracket was repainted then put back into position. Exhaust hanger coming off the back of the transmission was cleaned and placed.
8. Cabin filters were replaced (the old ones were AWFUL!!!!), the housing was cleaned and put back on with all the bolts and screws which had been cad plated again.
9. Refinished DK motors were placed back on with new gasketsNext will come the front end with all the housings, intakes, air filter housings and hoses, then the lights.....
Update 7/29/13
--------------
Was able to do a few more things this Saturday.
1. Cleaned and refitted the MAFs and airfilter housings
2. Cleaned and fitted the Right and Left air boxes. For those who have never seen them out of the car, they are huge. I had one which the seam had partially split, so I repaired that.
3. Cleaned and fitted the center intake air duct
4. Cleaned and replaced the front bumper
5. Cleaned and refitted the front crash sensorsI have decided to use Evans waterless coolant in the car, as everything was removed, all new hoses and heater core replaced, and the two drain plugs removed from the block for drainage. I have never used it before, but have researched it with very good results. There is a round sticker on the radiator cap, but I have a second cap without the sticker on it.
Next will come putting back together the front headlights. Everything was taken apart and the brackets were repainted when the car was painted.
Here are a few more pictures:
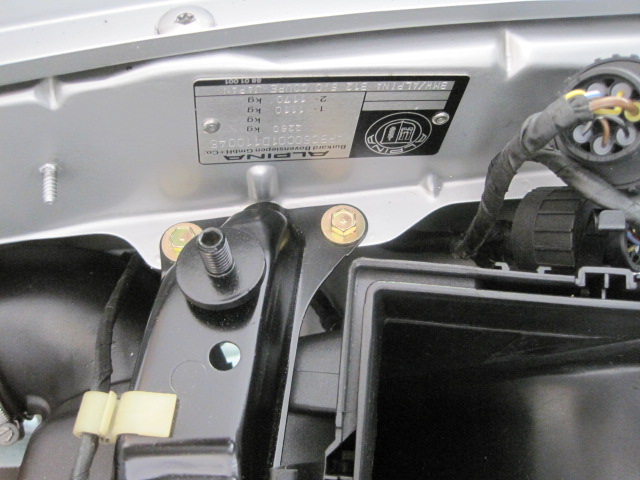
Right air filter housing and bracket
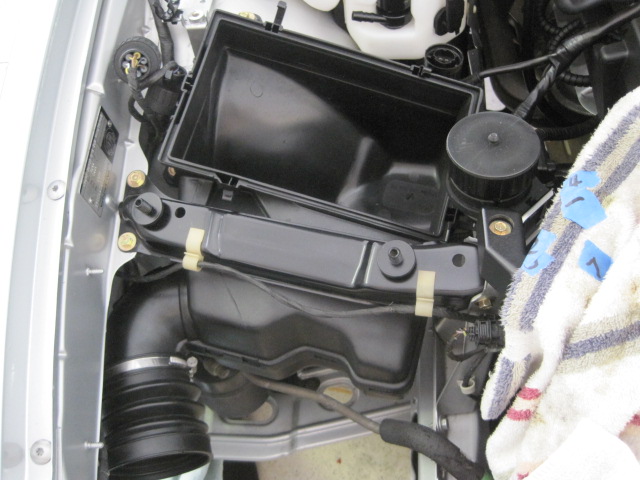
Left Air Filter box and bracket:
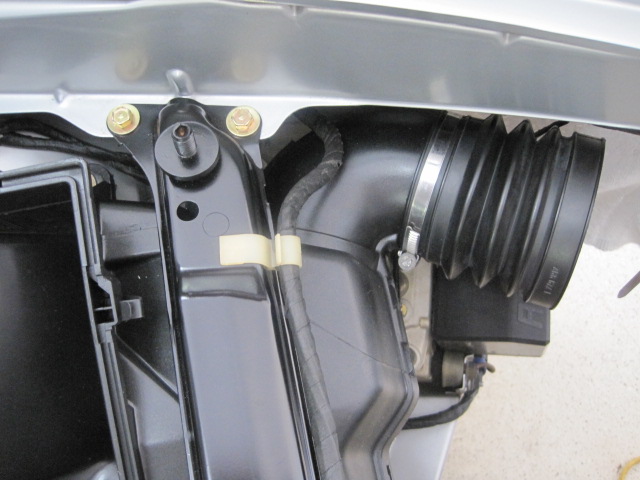
Right Bracket and Alpina Plate:
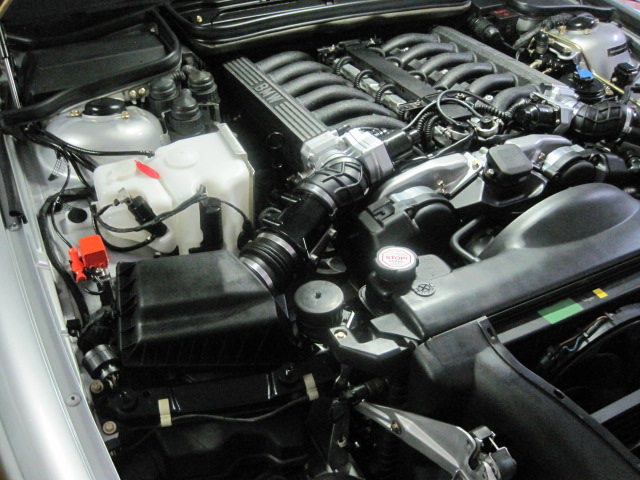
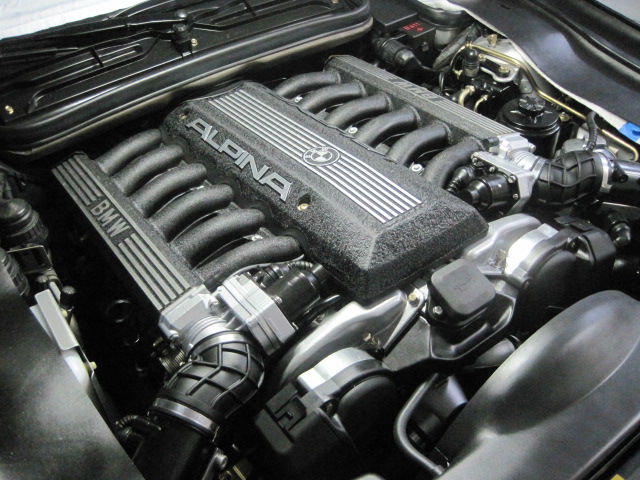
Air boxes and center vent duct installed with the bumper installed:

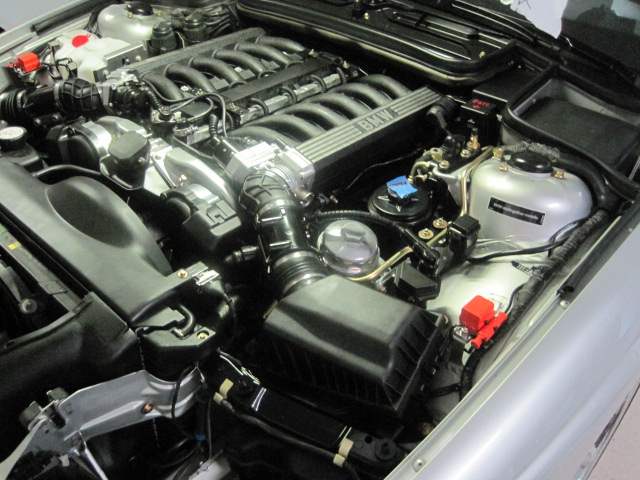
Engine pics:
Update 8/26/2013
-------------------
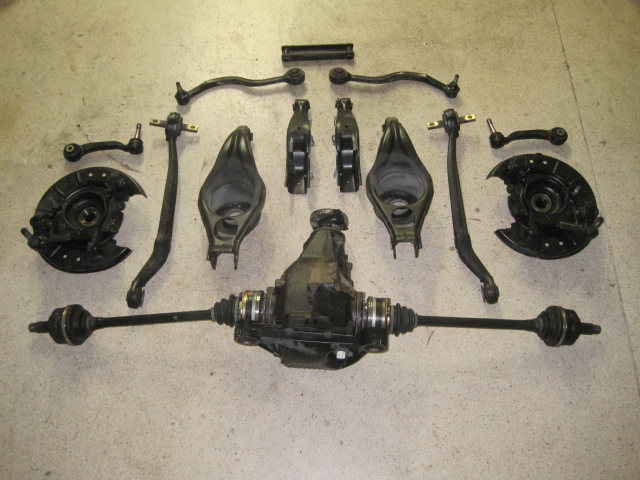
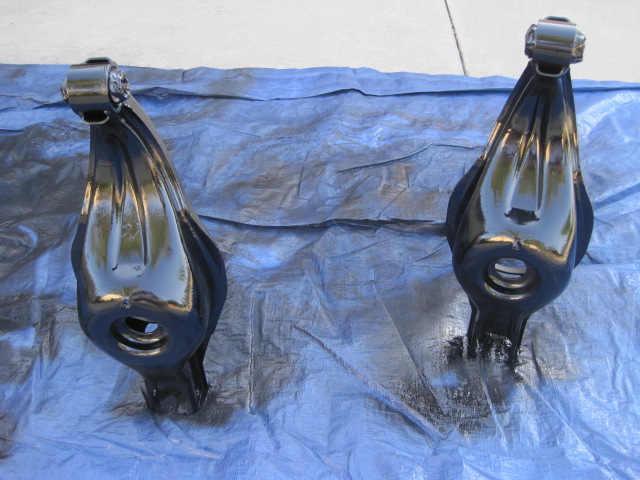
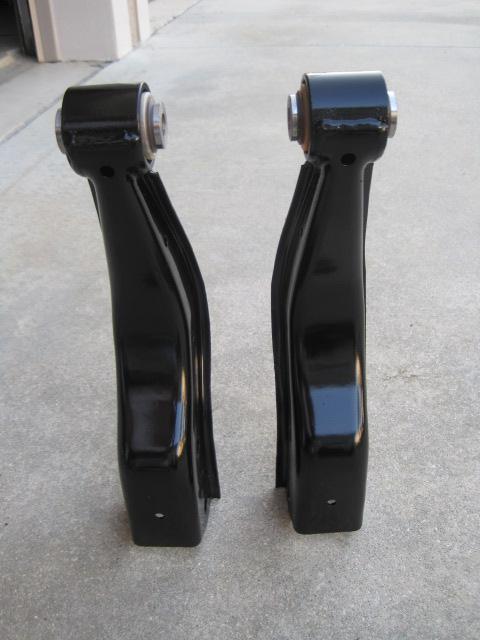
Most of the engine compartment is "almost" done, so I have just ordered a few things to complete it and sent off several items to be replated. The headliner, sunroof cover, A and C pillars and rear deck are at the shop (Headliner Express - highly recommended) being recovered and custom installing a 3rd brake light surround. After reading Steffen's rebuild of his rear subframe, and knowing what I wanted to do in the rearend, my only choice was to drop the rear subframe. Not that hard to do since the exhaust is off the car. So...several hours later it was out and on the dolly. Granted the car will be 22 years old in September (original BMW Build date was 9/91, and the Alpina build date was 11/91), but I thought everything would be in really good shape - especially since the car only has 23,000 miles. Well...was I wrong. Rubber bushings wear out as much from age as use, and I have attached a couple of pictures. So what started out as a cosmetic refresh/repaint and replating of all the bolts has turned into a full blown replacement of all the bushings. I think I am way past my mission creep turning into the Indianapolis 500!Rear end and subframe out:

All the parts:
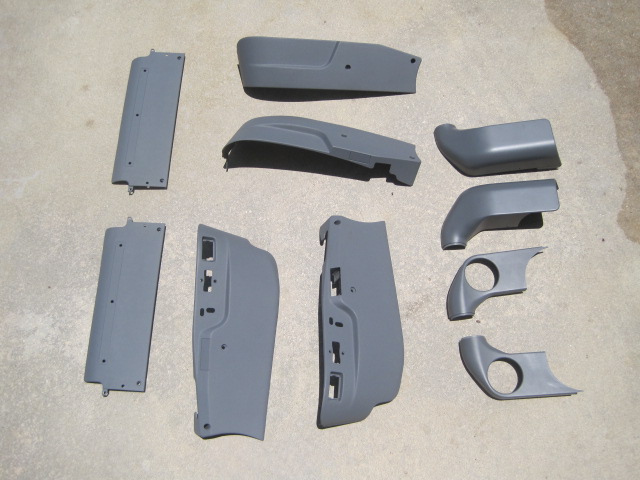
Due to "stuff" I have not had the chance to get to much, but am finally getting back to it. This past weekend I picked up the custom headliner from Bill at Headliner Express, and will pick up the remaining A and C pillars, rear deck, sunroof panels, and sunroof motor cover today. My car did not come with the 3rd brake light, and for federalization it was installed on the rear deck. As the rear deck had to be recovered, I decided to move the LED strip up to the top of the window. Bill had to custom design a housing unit that totally looks factory. I have been waiting for to get the headliner and pieces done so I can start putting the interior back together. The rear pieces are out getting new ball joints pressed in. The remainder of the underhood items are at the CAD platers, and will be ready by Friday so I can finish under the hood.
12/16/2013 UPDATE
__________________Stuff accomplished this weekend:
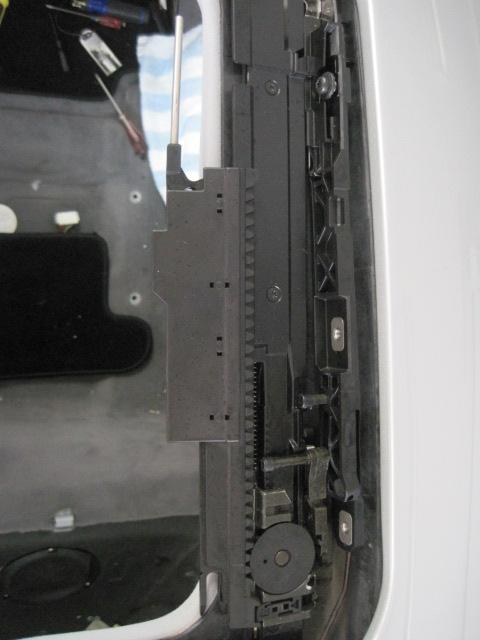
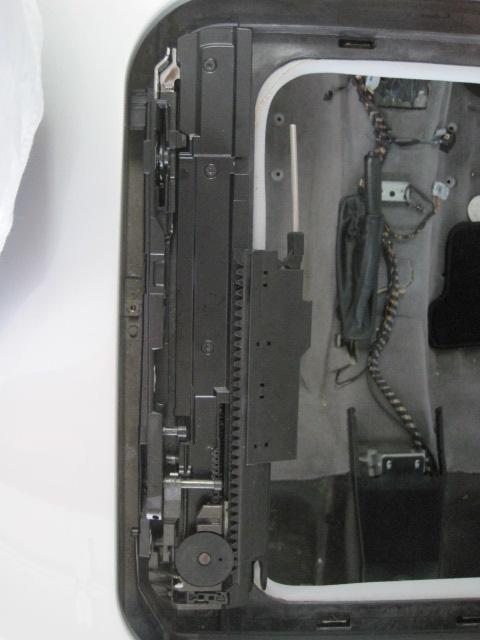
-- Placed new gates on the Sunroof cassette, and reinstalled the cassette along with a recovered sliding panel.
-- Installed the new headliner with the modified third brake light installed. I did not get to the rear deck, A and C pillars as this took longer than expected, especially putting in the new gates, plus finding them in the various stashes I have place throughout the garage.
I was not able to pick up the plated parts as there was a glitch at the platers, but they should be ready later this week.I also forgot to addd that a couple of weeks ago I got the dash back in place.
Here are some pics:
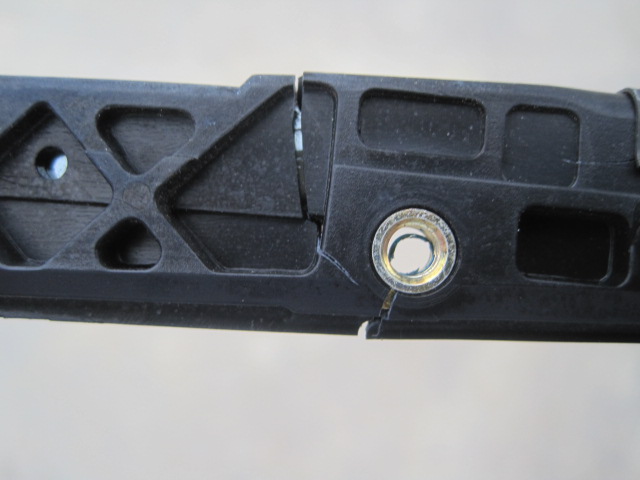
Broken sunroof gates. Both sides were cracked all the way through.
Installed sunroof cassette and new gates:
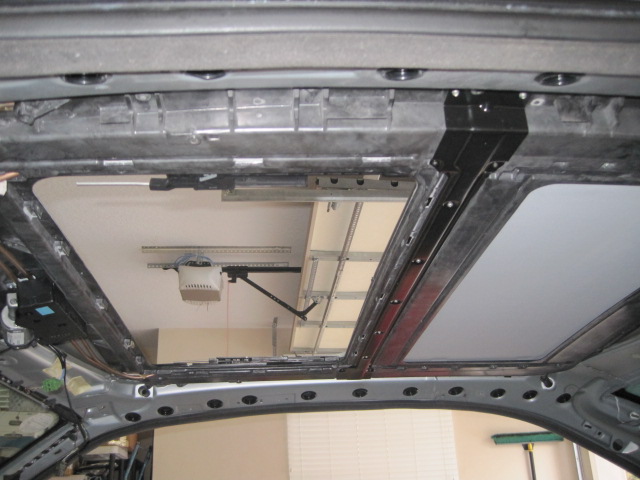
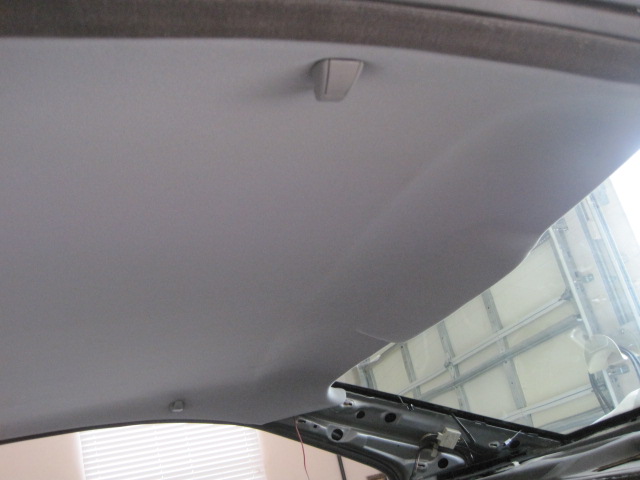
Here is the new headliner with the high 3rd Brake light incorporated. Bill and the team at Headliner Express did the custom work and recovered the board:
12-28-13 Update
--------------------
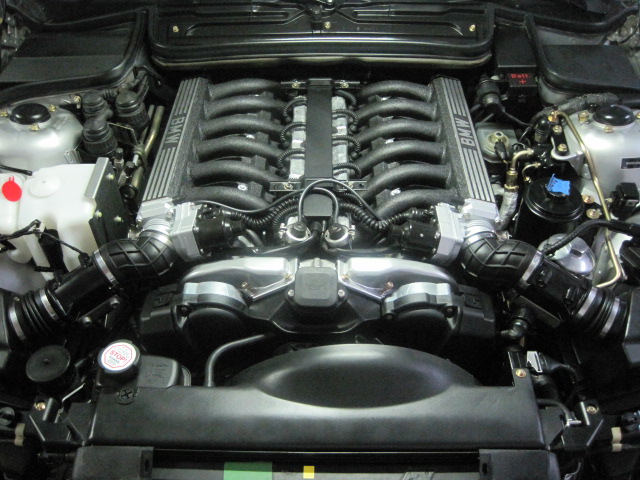
Not able to do too much as it is the Holidays, plus a full work schedule, plus spending time with the family, but I was able to finish the acoustic cover. I have the black plugs for the screw access holes, but have not put them on yet. The cover was refinished to match the intakes. Screws were replated. New emblems were added. The Rubber seal was taken and cleaned and reattached. I found the best way to clean it after experimenting with several different methods to get the yellow sealer off was simply to sit down and carefully scrape it flat with a flat razor blade. Then, simply clean it with Dawn soap.
I do not have the front air baffle on yet in front of the cover, but it will go on soon. Hope everyone is having a Happy Holidays and here are some pictures: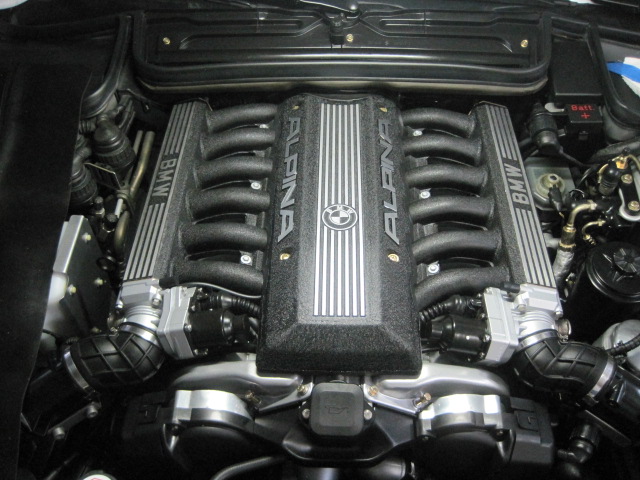
Here is what I accomplished on Saturday:
-- New hood pad installed
-- More cleaning on parts of the rear end (the car's, not mine
-- Rear deck shelf, rear sunshade, rear seatbelts installed with all the trim
-- New C-pillars installed. Even the new ones are a pain and even succeeded in breaking two of the top tabs off
-- able to add some small trimming around the new 3rd brake light2/24/14 UPDATE
--------------
Started to do some of the fun stuff:--Started putting the trunk back together - speakers, some of the trim, etc. Did not put the side trim on yet as I have not reinstalled the shocks and need to get to the top to finish them.
--Placed the trunk trim panel and lights.
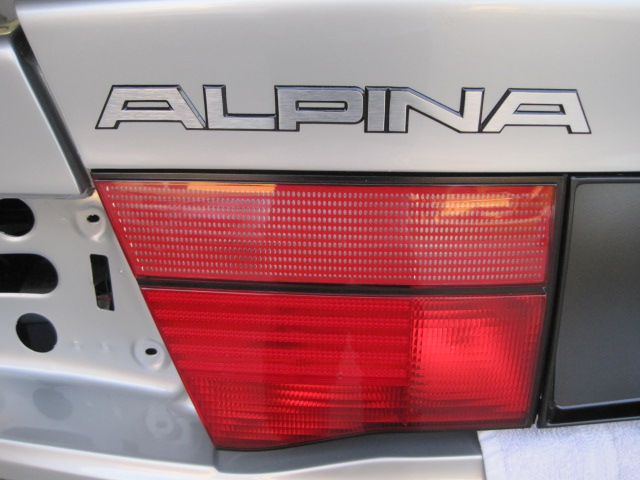
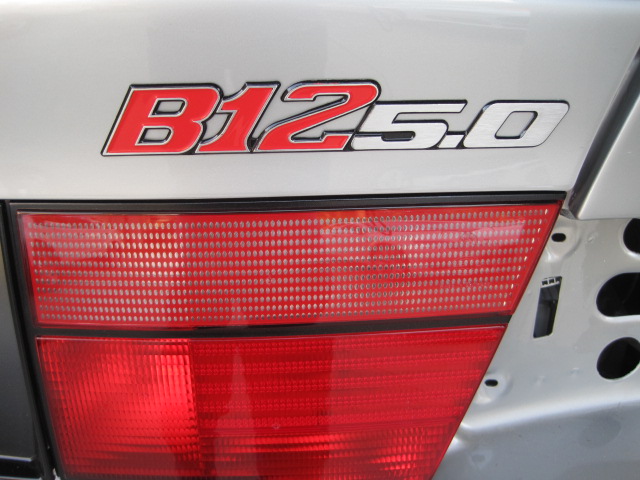
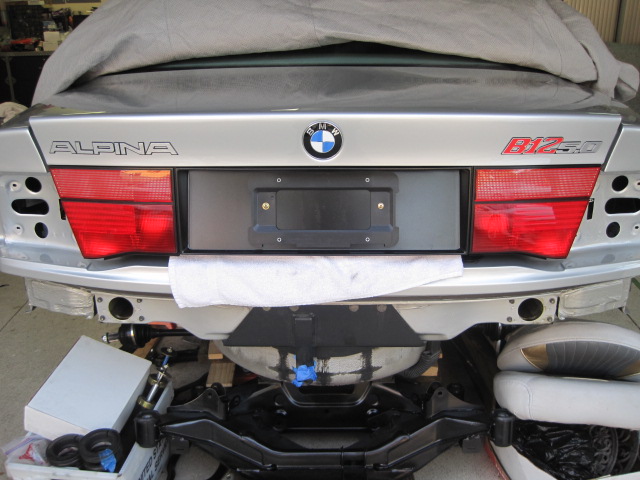
--Placed the new ALPINA and B12 5.0 Emblems on the trunk along with a new Roundel. I photographed everything with measurements before the emblems were taken off, so they went back on where they were originally.
--Placed the Door Handles.Small Stuff..but it seems that everything takes longer than expected, especially when cleaning and polishing the lights, cleaning and relubricating all the door handle parts, plus getting my big hands in there to hook up everything
3/10/2014 Update
-----------------
I was able to get to some more work in the interior yesterday. I redyed the Alpina stripes on therear seats and added some Hydefood leather treatment. Placed the recovered A pillars, rear seats, center console and side trim (they have been out almost 2 years!!!). Also took some pictures of the rear badges I placed last week. Next up will be taking the front seats in to have them touched up. I will redye the Alpina stripes back to their original color before putting them back into the car, and installing the Alpina Wood console.Here are some pictures.
Seats with Hydefood leather treatment done just before installing:
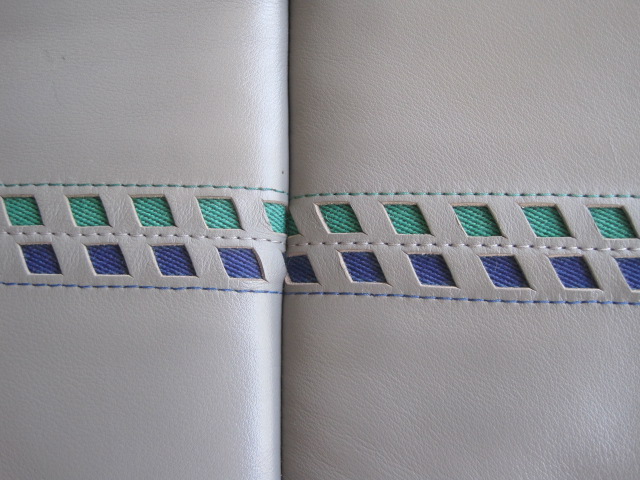
Redyed Alpina stripes in original Alpina Colors, I picked up the tip on how to do it here at 8er.org:
Rear seats back in place after nearly 2 years being out!
New emblems:
The rear license plate holder comes from the new 1 and 6 series:
4/7/2014 Update
----------------
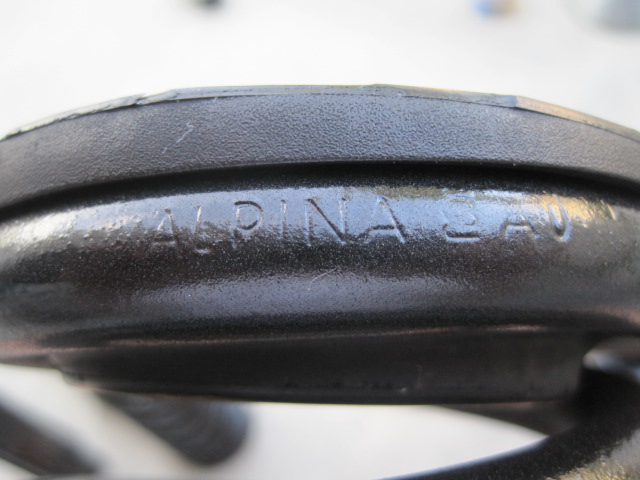
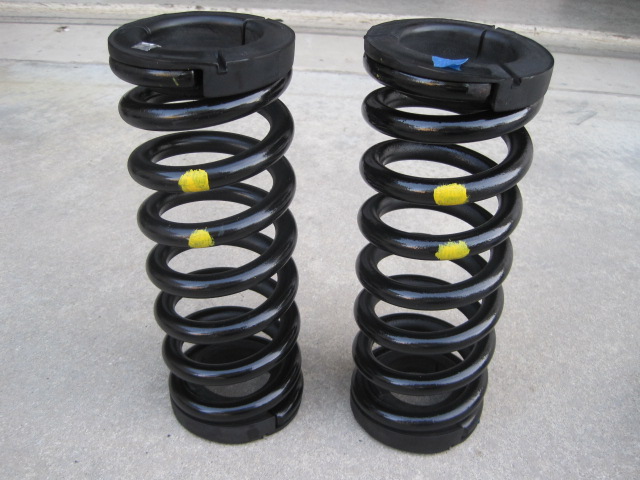
I was finally to do some more work yesterday. I have received the rear suspension pieces back with the new bearings. I got everything painted and detailed. On the rear springs I found ALPINA stamped into the springs. I also spent some time under the rear of the car cleaning getting everything ready to put back together and back on. On the rear springs, I noted the correct paint markings, and reduplicated them on the refinished springs. Here are some pictures: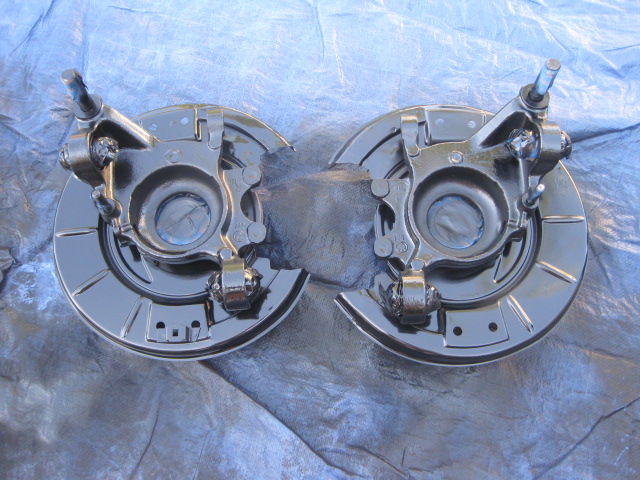

More to come!!!!!