Beiträge von rogbmw
-
-
The prices as Reinhard for the e31 B12 cars - as a trend - seem to continue to rise.
Regarding B12 5.0 cars, I purchased my B12 5.0 in 2009, and asking prices for nice cars have gone up quite a bit since I purchased mine.
From what I understand, B12 5.7 cars have also increased over the past few years. In 2012 I inquired about B12 5.7 #22 which was for sale. It is a very nice example in Brokarot, and eventually sold for just over $120,000 USD if I remember correctly.
-
I am always amazed at how many people work at keeping the outside looking good, but never wash out the wheel wells or under the side skirts. Glad you caught it when you did.
-
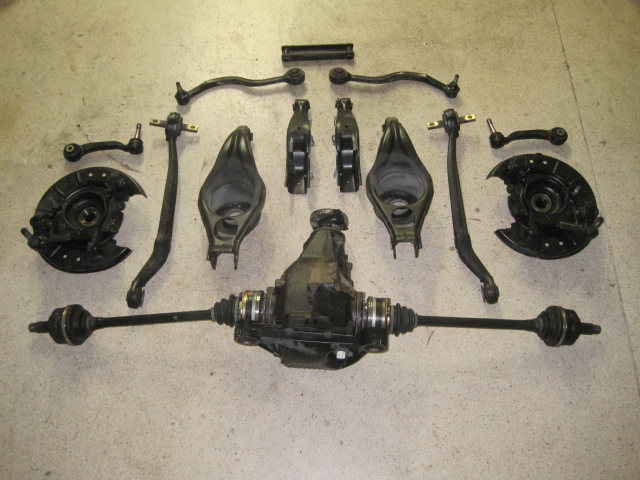
I have removed my rear subframe and completely removed all the parts. Everything is getting painted, and refreshed with new bushings or arms where needed. All the bolts have been re-cad plated. It is getting close to time to put it all back together. Anyone know all the proper torque settings for all the bolts and nuts, or know where I can find them?
Here is everything when I took it apart.
-
Wolf - I thought it was OK to use copper grease on the wheel bolts. I have been using it for over 20 years on all my lug bolts with a proper torque setting and never have had one get loose.
-
I have updated the original post with our new Website address: http://bmwccae31.com
-
Yes....Please!
Zitat von Antonin;116881I just copy your text into our WW FB page... Can I put your logo also ?
Cheers.
-
[INDENT]Official Announcement:
As of Yesterday, the BMW CCA E31 Chapter has received official recognition from BMW CCA, BMW NA and the International Council of BMW Clubs in Munich. This is a huge accomplishment for us. Our name and logo had to go through several revision, and now meets all International Council guidelines. A special thanks to our Press/Marketing/Branding board member, Jeff Ivarson, and Frank Patek, BMW CCA Executive Director. Thanks also to to Steve Johnson, BMW CCA Executive Vice President with assistance during the application and by-laws process. As many of you know, we announced the formation of the E31 Chapter at the 8-Fest event in California in September. Since that time we have had to revise our name and logo under the guidance of the BMW International Council. This is the first time BMW CCA has approved a Non-Geographic Chapter, meaning that our members are based not on an area, but on a model - the BMW E31. Anyone World wide can join!
We should soon be putting out our first Newsletter, and work is going on to finalize our web site. For those who have joined our Chapter - Thank you. For those wanting to become a part of BMW CCA E31 Chapter, please visit BMWCCA.org. This is an exciting time for us. Please join us in the First BMW CCA Non-Geographic Chapter, BMWCCAE31.
Here is our official website: http://bmwccae31.com
Here is our Official Logo:
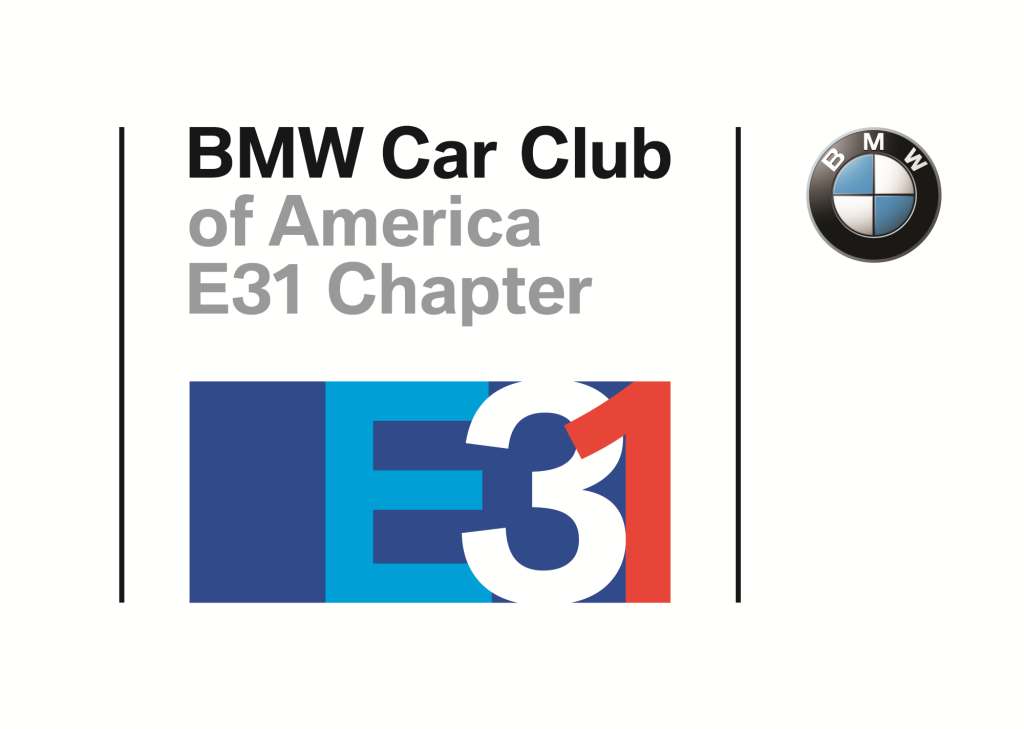
Please note that any reproduction of this logo requires chapter approval.
Our chapter officers and members holding significant positions include:
President
Roger Wray
FloridaVice President
Steve Cohen
CaliforniaSecretary
Tom Carter
CanadaTreasurer
Jon Nelson
MarylandPress/Marketing/Branding
Jeff Ivarson
CaliforniaEvent Manager
Rob Scott
CanadaWebmaster
Bob BennettNewsletter Editor
Fern MoraRegistry (associated, but not part of BMW CCA E31 Chapter)
Brian Eales
[/INDENT] -
Thanks guys. We tried to go directly under the International council, but were given different option. The Non-Geographic Chapter route was the best. 8-Coupe ran the numbers, and in the US and Canada we actually have almost 57% of the total world-wide registered E31 cars as of now, so we are excited to form an organization. Of course Fredi...those in Europe can join us too!

-
It is my pleasure to announce the formation of a new BMW E31 Group: BMW E31 America.
Announced Saturday evening at the 10th Anniversary 8-Fest, with almost 100 E31 car in attendance. BMW E31 America is a new Non-Geographic Chapter of BMW CCA for E31 Enthusiasts. This new Chapter is the first ever Non-Geographic Chapter of BMW CCA, and has been formed to organize E31 owners in the United States and Canada. It is open to worldwide members too! Final approval was received this week from BMW CCA. More information will follow shortly, but we wanted to formally announce this new E31 Group. The website for our new chapter is: BMWE31NA.org, with directions on joining this new E31 group.
Please join us in our excitement for this new E31 group...more to follow!
Roger Wray
President
BMW E31 America -
I have done it several times....and yes...you need to replace your motor mounts. If one is that bad, then do both. Undo the bottom of the engine mounts from underneath, then replace it back only finger tight. Place a 2 x 4 piece of wood that extends all the way across the oil pan and jack from there, or place the jack under the front crank with a piece of wood between the metal and jack.Undo the top of the engine mounts, and carefully jack up the motor until the bolt in the engine mounts clear. Go back and take the bolts back off from the bottom, and you can work the mounts out. I have at times just done one side at at time, and at other times done both. Just watch all the hoses and lines as to not overstress them. Good Luck.
-
If I remember correctly, Bavarian Autosport, or BMP has (or had) as set here in the US for the e31.
-
Beautiful!
-
Zitat von Fearghus;112286
My car is also ex Japan and is in Black Metallic - her name is Salome >...
She has a great looking brother in your car - was #44 ex Japan too ?Regards
Yes...44 is also from Japan.
-
Your car is my car's little brother! My car is #45, and a friend recently purchased #44.
Zitat von Fearghus;112262Awesome Project - I look forward to the pictures yet to come... What number on the register is your car ?
I have #46, yet to get in on the road in New Zealand but will do so in the next 6 months...
-
Zitat von 8Harry8;112187
 Congrats Roger
I'll take a beer and a break now too, but I doubt that I would ever drive this Alpina after restoration if I was you!
Harry - thanks. I will drive it some, but at least I will know it was clean again at one point!
-
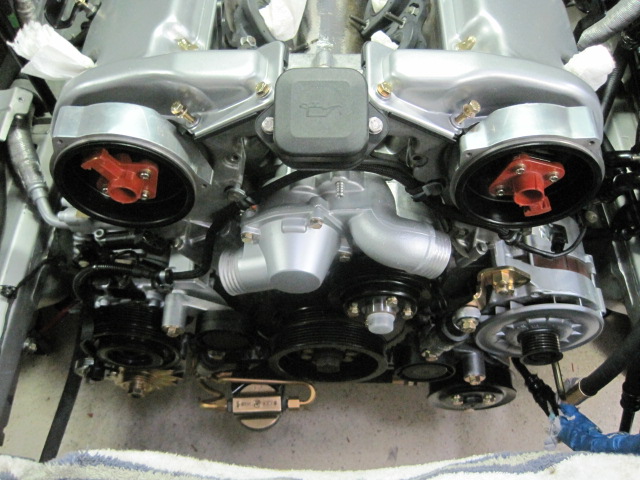
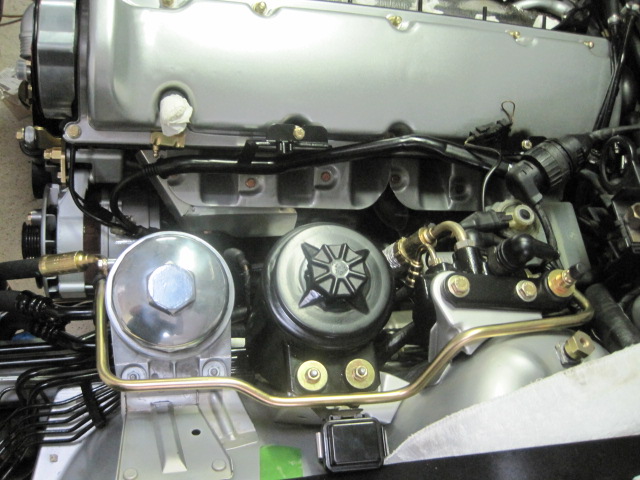
UPDATE 6/3/13
--------------------------
Well...I was finally able to get back to the car. It is nice to be putting things back on so here is the latest.
1. Replaced the Aux water pump and valves with new hoses
2. Ran the transmission cooler lines back up to the radiator area
3. Dropped the transmission pan, cleaned everything and replaced the filter and gasket, and replaced the pan
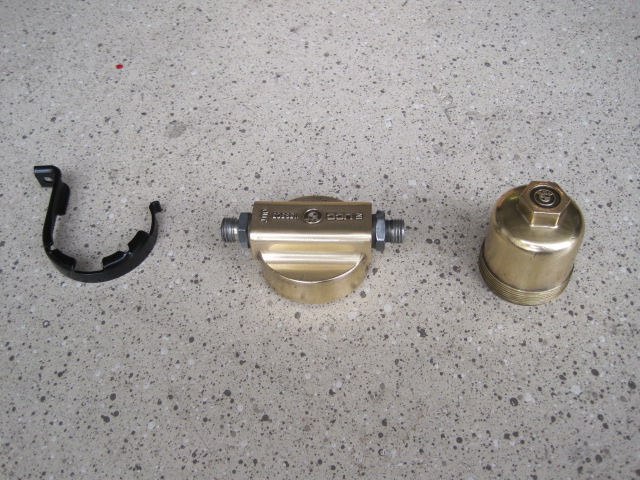
4. Ran the Pentosin lines, replaced the cleaned and polished ASC+T filter
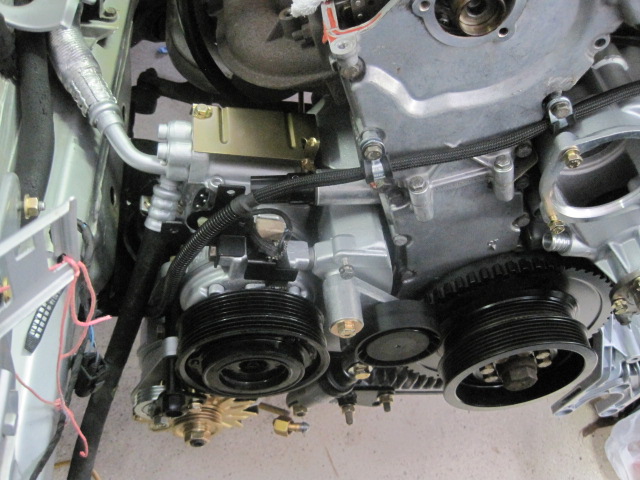
5. Placed the Power steering pump and pressure lines
6. Placed new belt tensioners and pulleys along with replated and painted brackets
7. Placed the Alternator and wires
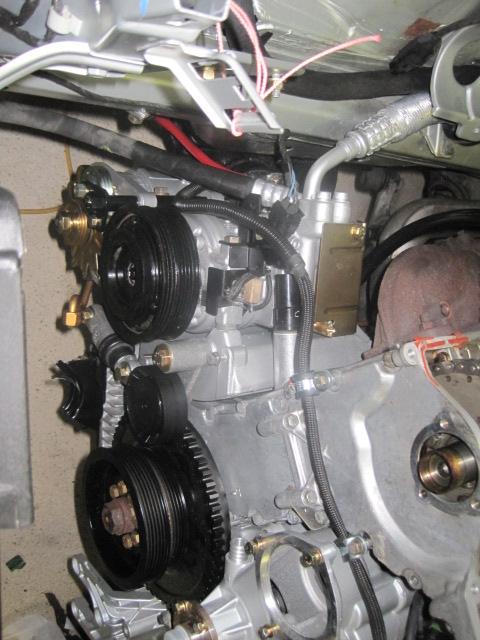
8. Placed the cleaned and powdercoated Pentosin canister and pressure lines, placed new filter
9. Placed the polished Oil Filter housing , and reconnected the lines with new "O" rings
10. Replaced the distributor housings, with new cam seals, gaskets, and rotors
11. Re-routed the second alternator cable (I think I had it wrong when I first placed it)
12. Placed the polished heat shields on both sides with new copper nuts
13. Placed the repainted housing and alternator cable
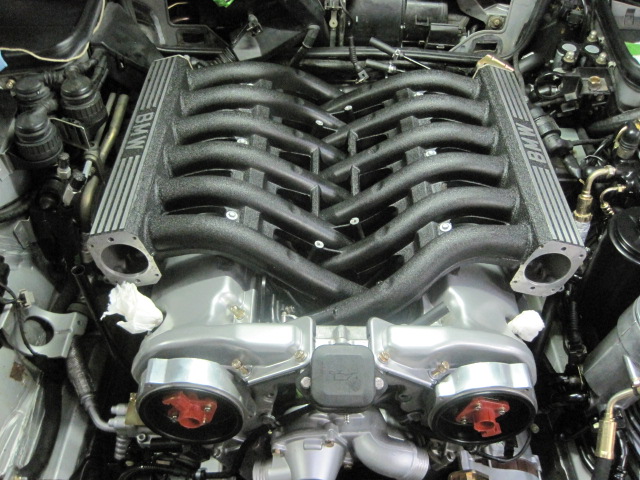
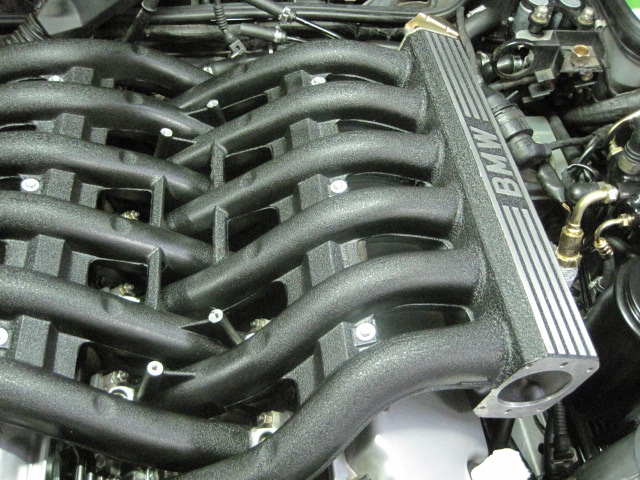
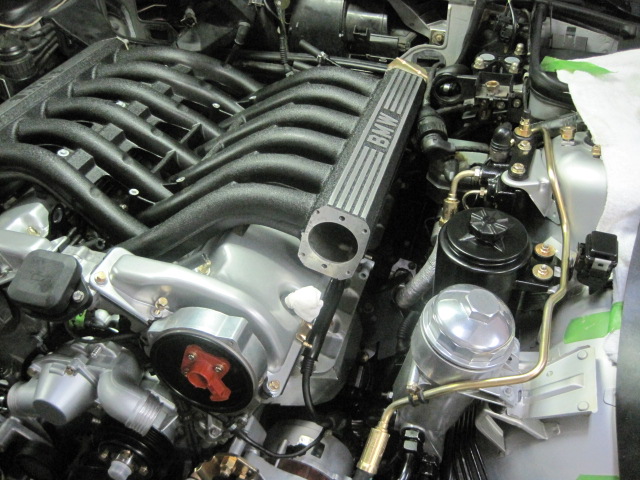
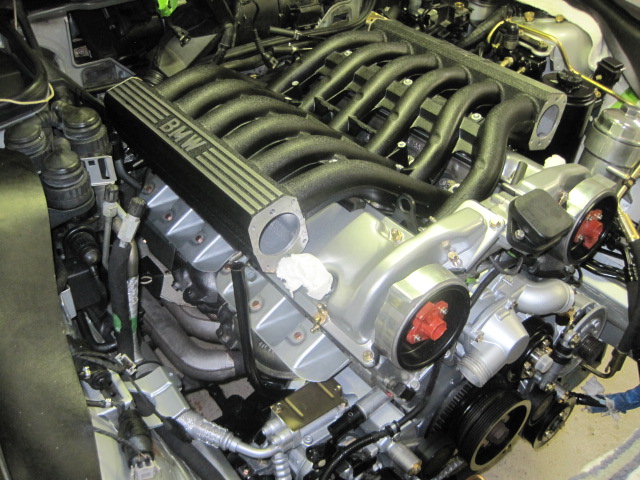
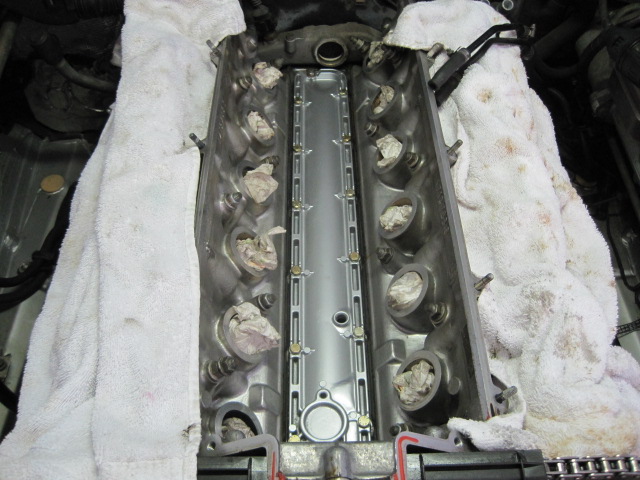
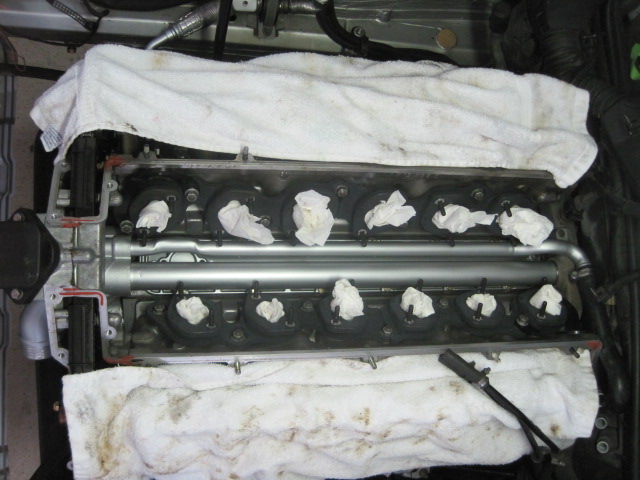
14. Placed the refinished intake manifolds (that bottom nut on #11 is a %$#@$^&*&%^!)Here are some updated pictures:
New hoses on the Aux water pump and valves

Polished ASC+T filter
ASC+T Filter in place and hoses

Alternater and new Pully adjuster and wheel with plated parts installed

Plated pressure hoses installed, Powder coated Pentosin canister installed, and Polished Oil filter housing installed
Getting ready to place the refinished Intake Manifolds
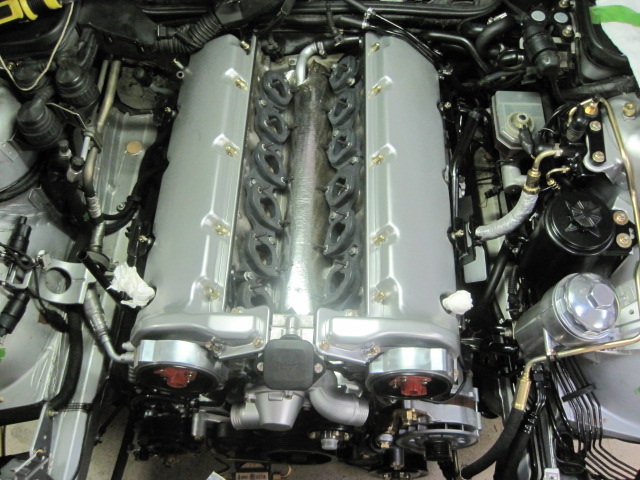
Refinished Intake Manifolds installed

I need a beer and a break....more to do!
-
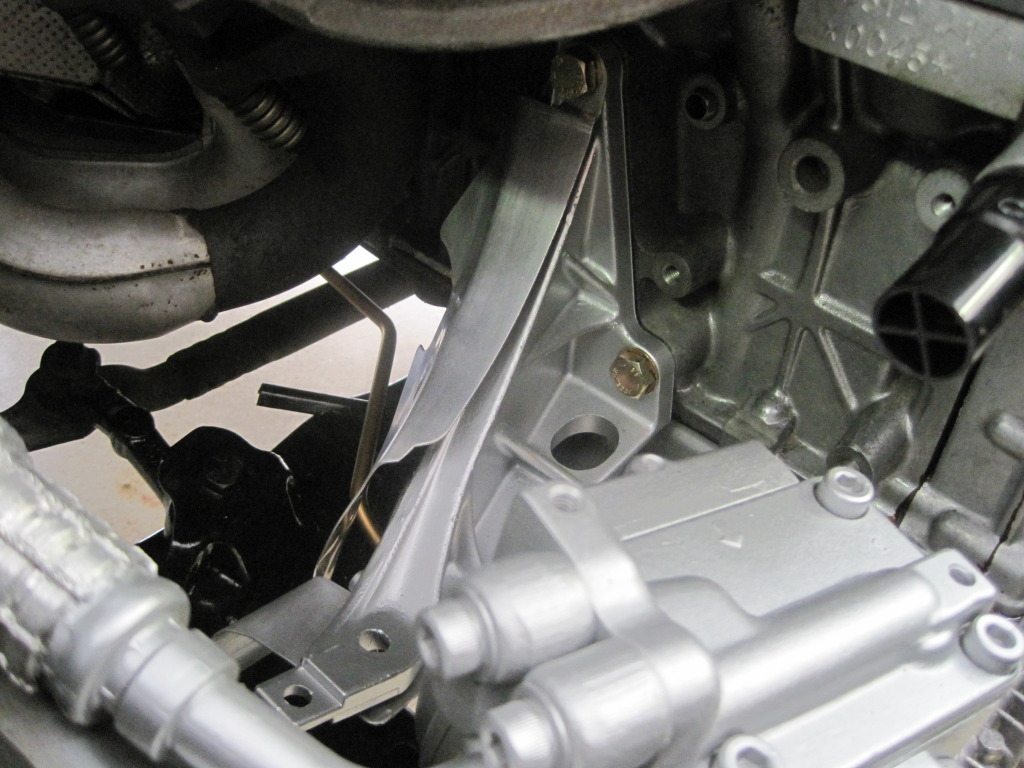
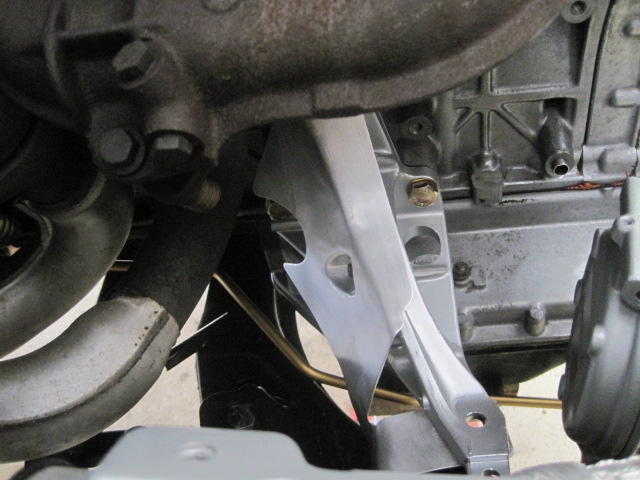
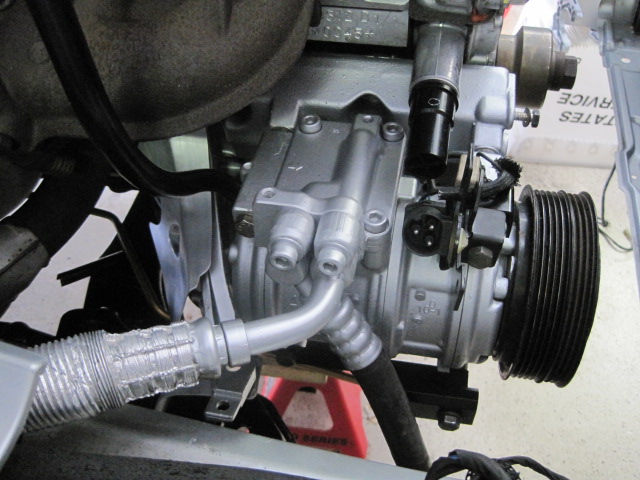
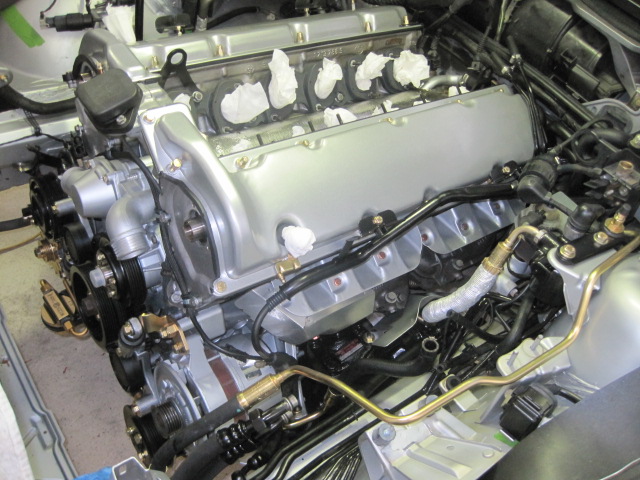
UPDATE 4-21-2013
-----------------------
Was finally able to get back to the project .
Here is a list of what was able to accomplish:
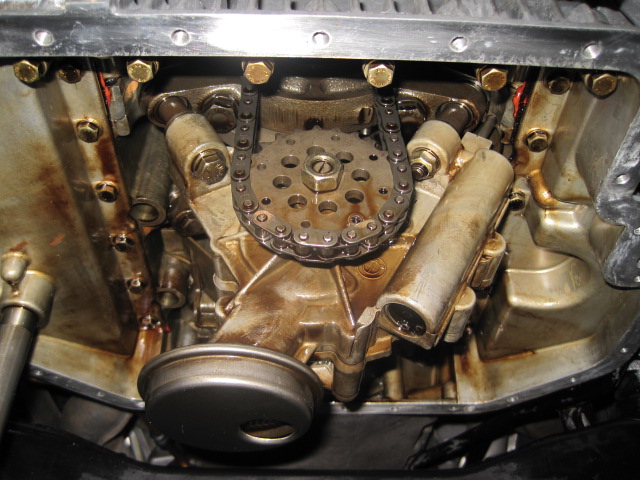
1. Got the engine back onto the engine mounts
2. New Banjo bolts and lock plates on the bolts.
3. Placed the valley pan with new gasket and new bolts
4. Mounted New Intake manifold gaskets
5. Mounted the water tubes complete with new O rings (including the one that nobody ever sees - the small on on the bottom of the large tube.
6. Mounted New Water Pump
7. Installed the new CPS sensors
8. Replaced the Alpina heat shield over the water tubes
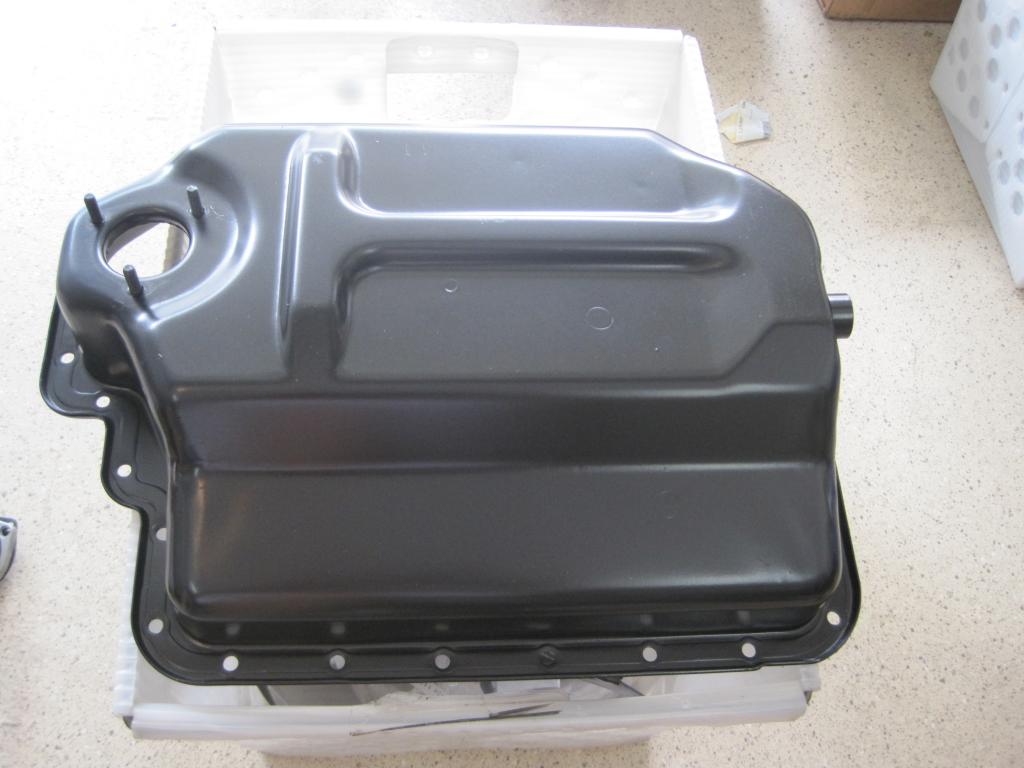
9. Removed the Oil Pan and tightened up all the bolts on the oil pump
10. Painted the Oil Pan, cleaned the sensor and remounted with a new O ring
11. Remounted the Oil Pan with new gasket
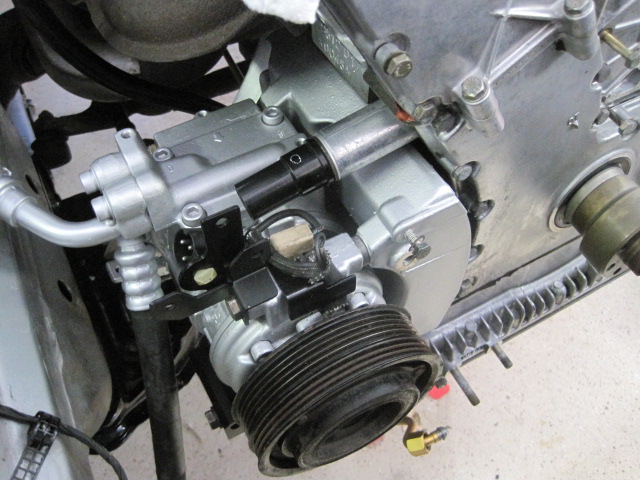
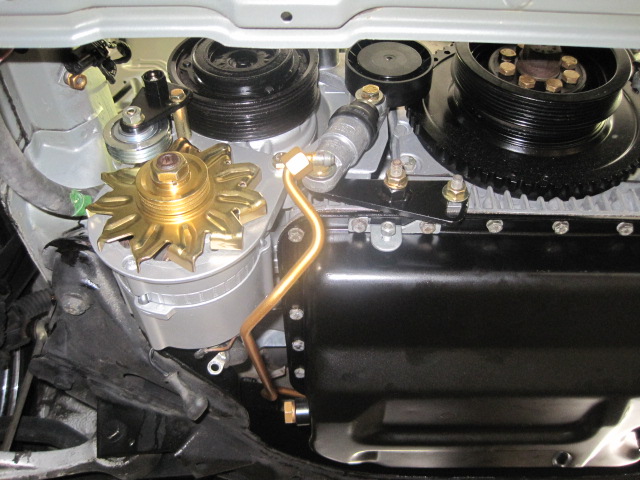
12. Mounted the Cad plated A/C compressor Heat Shield
13. Mounted the Secondary Alternator after refinishing
14. Mounted the front fly-wheel
15. Mounted the passenger side tensioner after replacing the wheel and shock
16. Remounted the ground strap to passenger side engine mountHere are some pictures....lots left to do.
Drivers side Motor Mount and Alternator/PS Pump bracket:

Valley Pan Replaced with new gasket and new bolts
Refinished Second Alternator with new Cad plated parts:

Replaced new Intake Manifold Gaskets:

The little O ring nobody sees on the large water pipe:

Replaced Water Pipes and new water pump:
Alpina water pipe heat shield in place:

Oil Pan removed to exposes the oil pump. Tightened all the bolts:
Refinished Oil Pan prior to remounting with a new gasket and O ring for the sending unit:
View from the top of the new water pump, flywheel, tensioner, and secondary alternator:

View from underneath - the subframe will be cleaned up before I am done
 :
:
Another couple of views from the top:
-
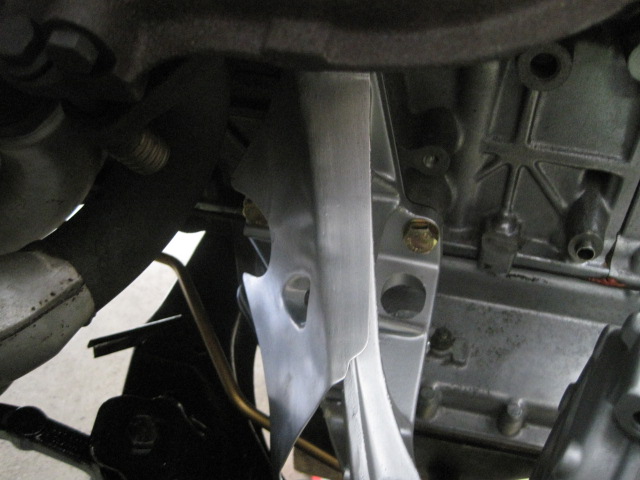
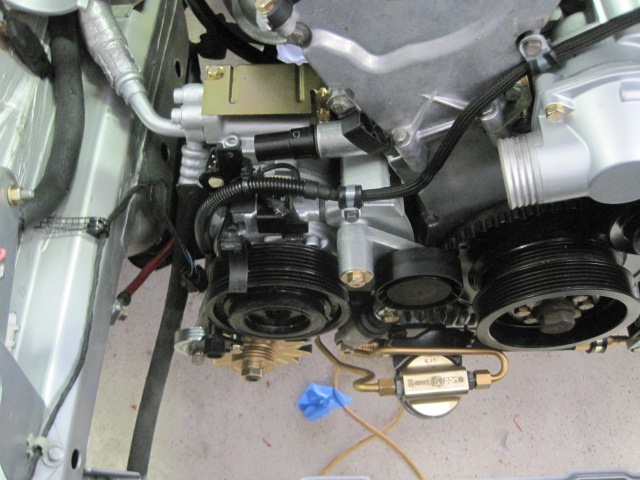
Update 2/12/2013
-----------------
Finally, after months of taking things off, cleaning, painting and replating items, this weekend I was able to begin to put items back onto the car. It was a small step, but very rewarding to put on the right motor mount and heat shield, Air Condition mounting bracket and compressor, and the high pressure line running down the right side of the engine. Small items I know, but again exciting to be finally putting something back on. More to follow....Well...the stars aligned and the heavens opened up and angels sang.......
- - - Updated - - -
Here are the pictures of the start of putting things back on....after months of taking things off, it was really enjoyable to start to put things back on...even it only a few.
This is the passenger side motor mount, Pentoisin line, and A/C mounting bracket and compressor.