Congrats Per on a beautiful car!
Beiträge von rogbmw
-
-
Zitat von Balbo01;107989
And because you have everything open, don't forget to save your Banjo Bolts for the future with
Yes - I will be redoing the Banjo Bolts. I sent Engl an email, but I think it may have been lost somewhere as I did not hear back.
-
1-22-2013 Update
Been busy so I have not been able to do much, but did pick up the items from the CAD plater.
I had one of those "OH SHI#" moments on Friday - was taking off the valley cover when one of the bolts snapped off!!!I was thinking that - OH No - I'm screwed! It looked pretty cruddy around the edges and because everything was taken off above it, there would be no better time to remove it, clean it up and place a new gasket. All the bolts seemed difficult to remove, as if they had thread lock on them. Anyway, the bolt half way back on the passenger side abruptly broke with only about 1/2 initial turn. I was lucky as I was able to get all the others out and remove the cover. About 1/4 inch was sticking out above the block, so I applied several squirts of WD40 over about 2 hours, then put a pair of vice grips locked onto the end sticking out, and with a little nudging, it unscrewed! Luck me!!! I should have taken a picture, but was too much in the panic mode to think of a picture at the time. So, new bolts, washers and a gasket have been ordered.
Here is a picture of a few of the items from the CAD plater. All in all there were around 230 items.8er.org/forum/index.php?attachment/21007/
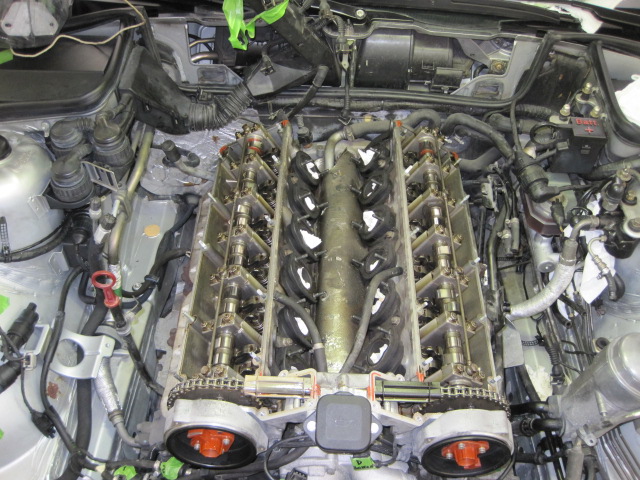
Here are some pictures of the engine without the valley cover. Notice the green sponge in the back so nothing goes down that way!!
8er.org/forum/index.php?attachment/21008/
8er.org/forum/index.php?attachment/21009/
-
1-4-2013 UPDATE
Dropped 227 items at the plater yester for CAD plating. They do all sorts of stuff. The co-owner took me through their facility. You name the plating, they do it. They had work there from Disney, the Military, several gun manufacturers. The place was super-clean and organized, they had their own metal laboratory, furnaces for heat treating items, and all sorts of other stuff.
Also repainted some of the pulleys and brackets. I will get pictures to show.
Presently am awaiting two boxes - one from Gault and one from AutohausAZ with more items.
Looks like in a week or two I may get to start putting things back together rather than keep taking things off! -
Update 12 - 19-2012
Have not posted for a while....so here is the latest:
I have received the powdercoated valve covers, brackets and Pentoisin canister back from the coater. While there I was talking with them and happened to ask if they knew of anyone who did Cad plating in the area. It just so happened that they not only knew of a shop, but that it was only 3 blocks from them and local. For any of you that have looked into re-cadmium plating parts, it is becoming very hard to find a place to do it as is very user-unfriendly, and the EPA is heavily involved. So I call up the place - and speak to one of the owners. Not only are they local and can do it, but I actually know the co-owner's wife through work. So now - I am going through all the bags of stuff taken off (I keep the bolts, nuts, and plates in bags with the particular item), and am beginning to take pictures of items so I know where they will go when I get back a big pile of plated parts. I hope to have a big bunch of stuff ready when they start back after January 1 to take and have cad plated.
A few other items - I have received modified headlight adjusters from Germany and they are very well done.
Although my Banjo bolts are still tight, since the valve covers are off I will be redoing them, and have received new drilled bolts from Gerry from Phoenix Motorsport from England.
Since I had the oil filter housing out, I took it into the lab and polished it up, along with the round distributor housings (the round aluminum housings in front of each head).
I hope to have all the remaining items off the front of the block this week for cleaning, polishing and repainting as needed.
I have removed all the aluminum heat shields from the exhaust and below the engine, have cleaned them up and polished them to look new again.
New motor mounts are in.
I have finally determined that "Mission Creep" does not justify everything...oh well...at least Marcia knows where to find me if I am not in the house.
More to come........
__________________________________________________________________________________________________UPDATE 12-27-2012
This past weekend I ended up sorting out a big bunch of bolts, nuts, washers, brackets, etc to get ready to be Cad plated. Kinda scary when you think about it. I have everything I have taken off the car in individual zip-lock bags and labeled. Then this weekend, I took everything out of the boxes and bags, made myself a sheet of paper with a metric ruler, and took 133 photographs of every nut, bolt and plate on the paper with each individual name and where it came from - then I tossed everything in one bucket
. Hopefully after I get everything back from the plater, I can use all the photographs to know where everything goes.
I picked up a blasting cabinet from Harbor Freight for $62 (it has a very small dent - hence the low price
), along with some glass bead medium, and will bead blast all the pieces after soaking and cleaning them. Then off to be Cad plated. While they are there, I plan on blasting some of the aluminum brackets and other pieces prior to some more painting.
Damn mission creep....
-
Huge undertaking for everyone - Thankd for all the hard work!!!
-
As many of you know, I am restoring my Alpina B12, and it has the second alternator. When I received the car, there was no belt connected to the second alternator, so it was not working (contributing to the charge). I have it out of the car, as I am removing all the items from the front of the engine and cleaning everything up. How important is the second alternator - I am wondering if I should put it back on? Thanks.
-
Zitat von reinhard;105425Alles anzeigen

This sounds as if you´re expecting the worst.
I hope nobody at the BMW HQ is reading this - they might just get another bright idea
The recycling cardboard comes with the fabric and it will be assembled, almost ready to use. A few holes need to be cut for the mirror & panic handle. Those headliners are universal for RHD and LHD. Ask me how I found out
Cheers
Reinhard
Reinhard - I actually have a new light gray headliner from BMW, but the problem is the following pieces:
the Headliner and sliding headliner cover
The rear deck - we are doing a custom install for the 3rd brake light so it has the thin LED brake light which has to be custom made, then covered. I am going to do something similar to ALF's B12 5.7 rear 3rd brake light, thus I will need to find fabric. -
Zitat von Racer MXM;104821
Awesome job...I was wondering what you are doing with the wheels that came on the car? If you had mentioned it already, please accept my apologies for rushing through the posts on the thread.
The original 5 Alpina wheels have been refinished, and will go on the car at the end with new Michelins. -
Update 11/5/2012
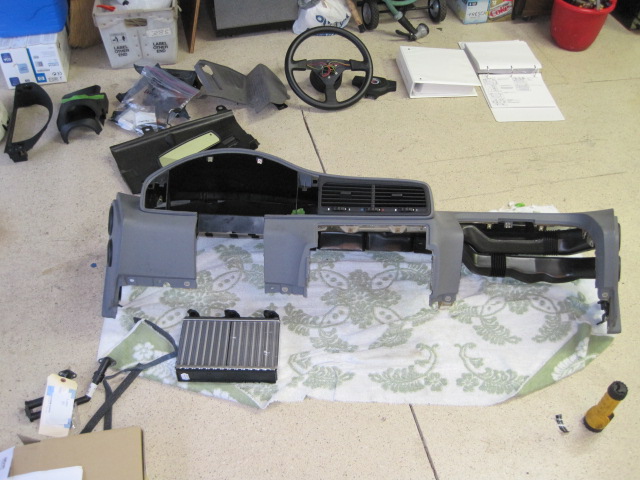
Was able to do a "little" more work on the car this weekend. I noticed before everything was taken apart for the painting that there was a very slight antifreeze smell when the heater was on, so it was time to replace the heater core. So...yesterday I tore into the dash while things for the engine bay were being powder coated. Called a couple of people, and was able to get in touch with Wuffer, and he walked me through a couple of steps. When it was time to lift the dash out I went over and got my neighbor (Marcia was not home), and he helped me lift the dash out - and his eyes got real big and he said "Holy S*#@" when he saw everything. I had the new heater core in last night at 7, so this week I will take the opportunity to clean everything up, attach the new DOT VIN plate, and put it back together. I have attached several photos:
Photos with the cover off showing the old core:

View through the sunroof:
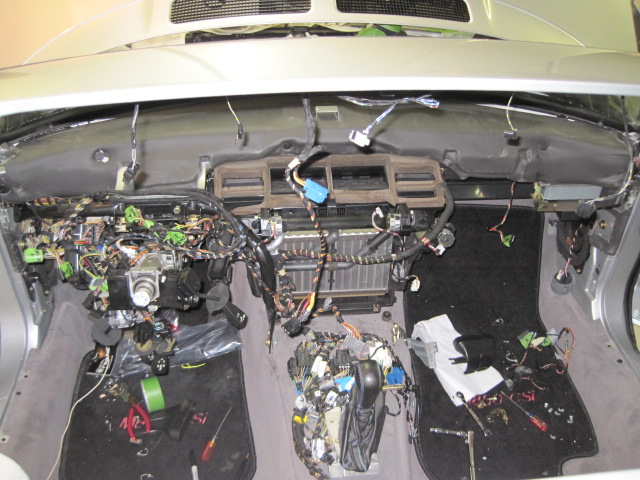
Old Heater Core - NOTE the yellow plastic just like the old yellow overflow bottles:

New Heater Core in and case closed up:
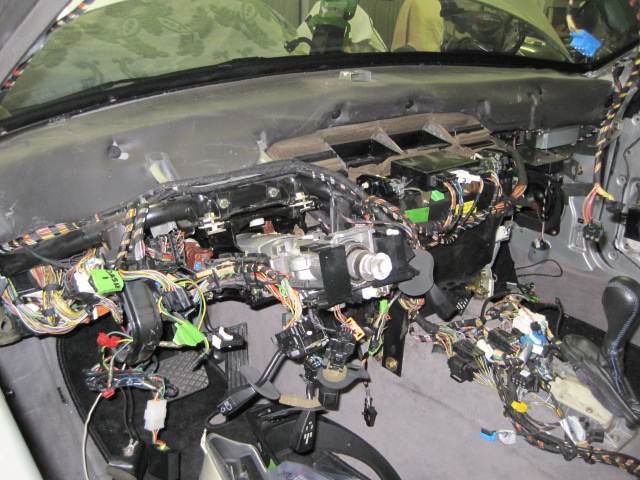
e31 Dash - some assembly required! This photo shows the new heater core with black plastic:
-
Does anyone have a source for light gray headliner material. I can find the darker gray, but not the lighter gray.
-
Zitat von Wildatheart;105020
That's right - they have ordered the glass from BMW.
Make sure they order the correct BMW glass - there are basically two types - one which has the black outline for the 3rd brake light in the middle, and one without. -
First off - nice set of automobiles.
I just recently purchased a new rear window gasket when replacing the rear window on the alpina B12 I am restoring. You can also get new rear glass from BMW.
Cheers,
Roger -
UPDATE 10/7/12
I ordered and received 12 new Bosch injectors from Bill Fox - he has them for a GREAT price - $30 each! (He also owns the company that federalized the car for me.)
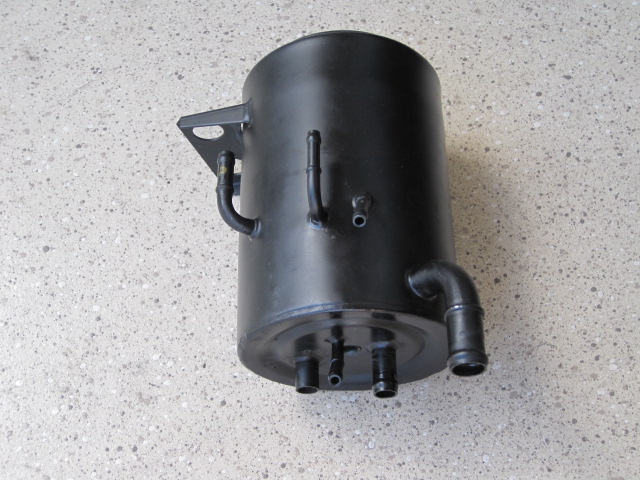
I was able to get a little more done this weekend. First of all, took off the Pentosin canister to be cleaned and powdercoated....felt like I was fighting an octopus. Sorry - it only had 6 lines going to it instead of 8. Here it is after finally getting it out....
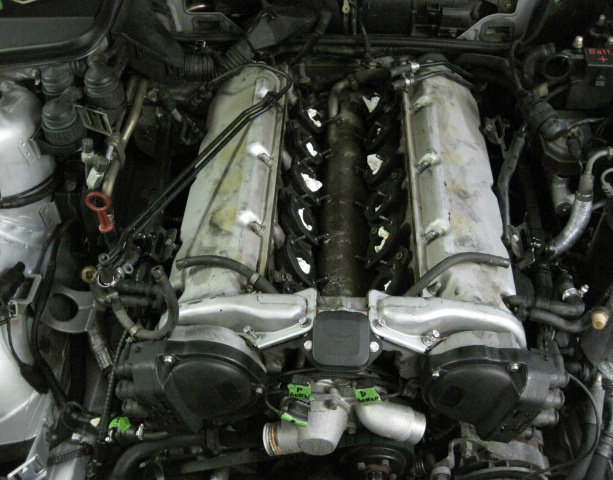
Next I took off the valve covers to have them powdercoated silver, and to check the Banjo bolts. All bolts are tight, and the inside of the heads are clean as you would expect on a 38,000km car...
You can also see in the above picture a little better the heat shield above the water pipes. Not sure if this is standard, or something Alpina added when they redid the manifolds and other things they did on the motor.
Now I have all sorts of bits to powder coat, paint and clean up..... -
Pretty Car
-
My Lucus injectors seem to be working fine (the car only has 38,000Km). Since I have everything apart, would it be recommended to change them, or keep the original Lucus injectors?
-
UPDATE 9/16/12
Spent all day yesterday stripping the top of the engine down. Read through all the go-bys on removing the intake manifolds, and found out some things that were not mentioned elsewhere:
1. When removing the wire harness on top, at least on my Alpina (92 build year) the wire harness taps into the coils on each side, and also has a wire that goes down to the alternator that has to be removed from a very tight spot. These all have to be detached to lift up the harness up and away from the front of the motor - I did not find this mentioned anywhere. I also have the second alternator, but I do not think this had anything to do with the alternator wire.

2. Running down where the intake attaches to the head on the right (passenger) side of the motor, and on top of the intake, is a hard set of fuel lines that makes it necessary to remove the intake attached to the drivers (left) side first. If you do not, you can not get the other side out first as this set of fuel lines has to be removed before you can remove the intake manifold. Steffen told me that the drivers bank manifold had to be removed first - thanks for the tip Steffen.
3. Since the top side of the motor had been reworked at Alpina I do not know if this is on all 8s, but there is what looks like an asbestos shield above the water lines in the valley. Does other 8s have this as standard, or did Alpina put it on when they did their work?
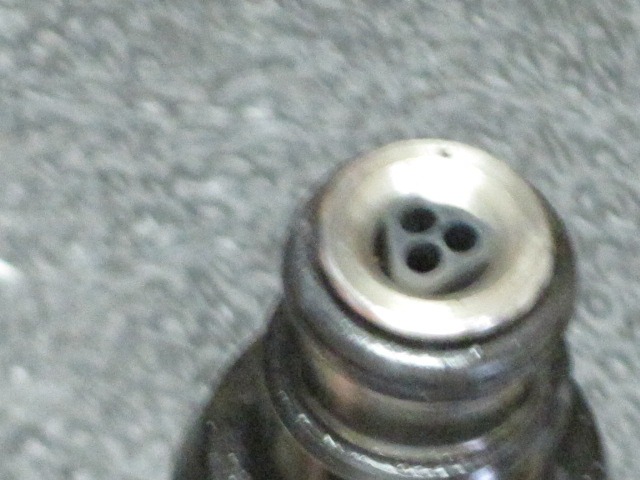
4. My fuel injectors do not have the little cap over the ports on the end. There are 3 of them (will try to take a picture this weekend as the fuel rails are out. Is this normal, or did Alpina put in different injectors?

-
Well....finally able to get some more done today after a lay-off due to no spare time. The car is back home, and now I am turning my attention to the engine bay:
Air filter boxes removed.
Fan and fan clutch removed
Radiator shroud and old yellow overflow bottle removed
All front radiator hoseshttp://forums.bimmerforums.com…howthread.php?p=25044501# removed
Aux water pump and valve removed at firewall
Acoustic cover removed
Windshield washer bottle removed
Charcoal canister removed
Cabin Filter housing removed
Water lines into heater core blown out (in preparation to replace heater core)I will be removing the intake manifolds to have them repainted, and placing new intake manifold gaskets. I will check the Banjo bolts at the same time when everything is removed from the top side just to make sure they are torques to spec. Belts and hoses look good, but I will go ahead and replace them along with new tensioner pulleys. The car has the Aux alternator, so it will be cleaned up and a new belt placed.
I knocked one of the side skirts off the storage shelf and scratched it
More to come....I just need more time in the week
-
Welcome to 8 land! Pretty car!
-
Update 6.22
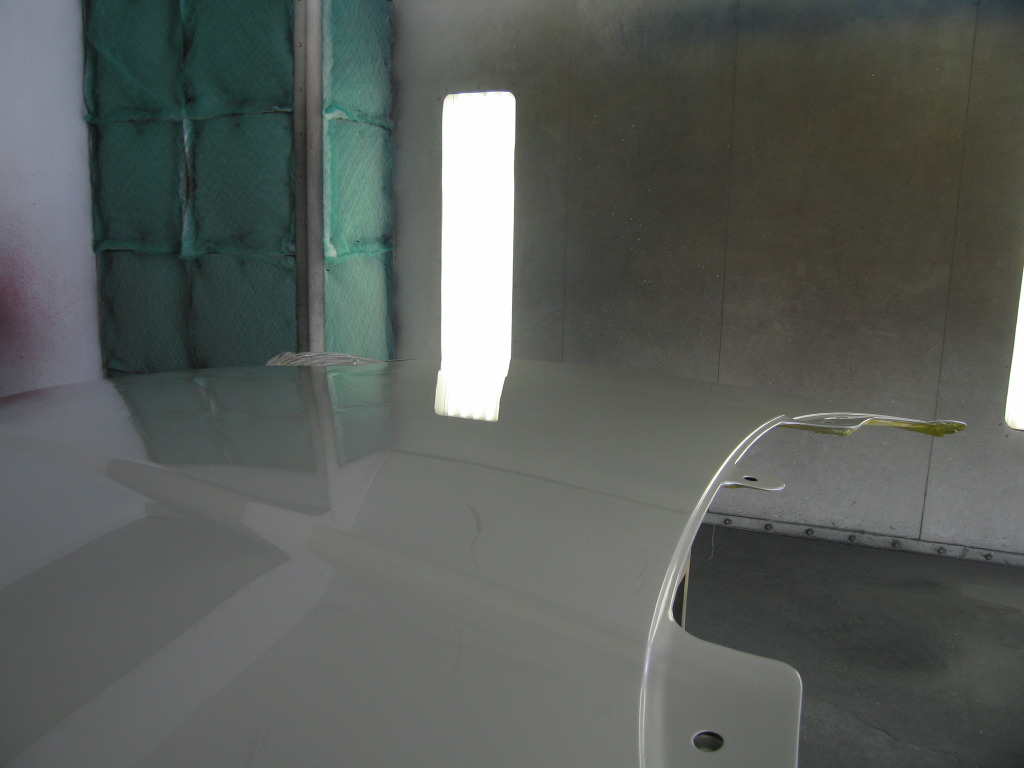
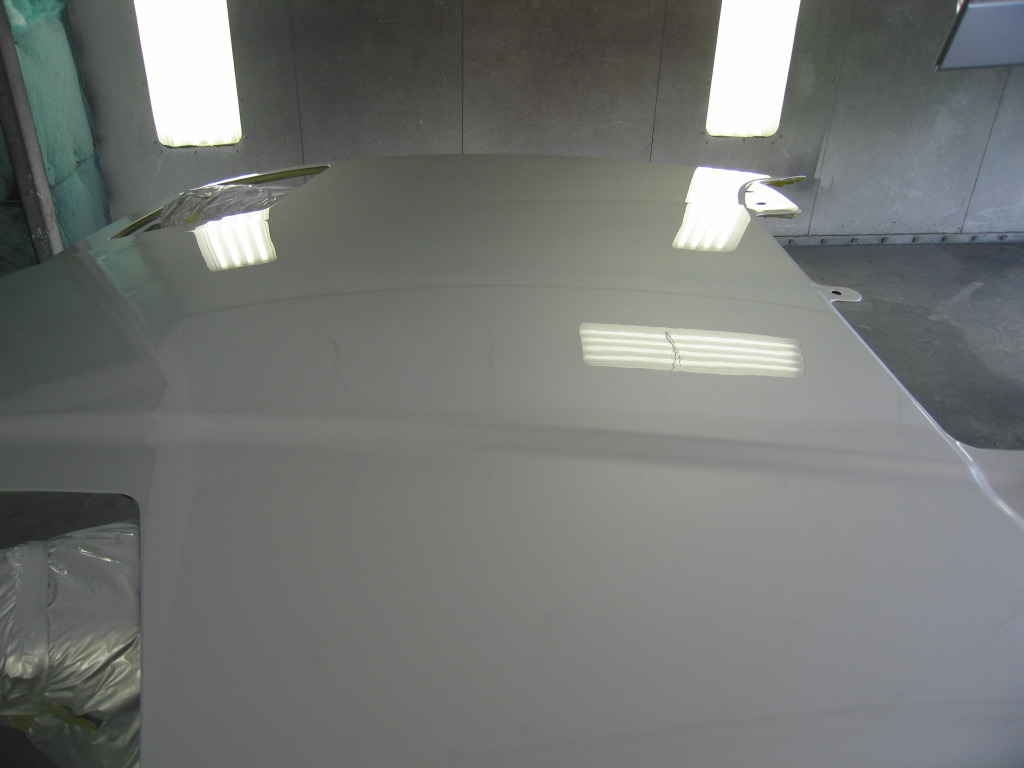
Here are some more pictures. The hood has been finished - look at the reflections of the filters on the walls and the lights overhead, including the wires!
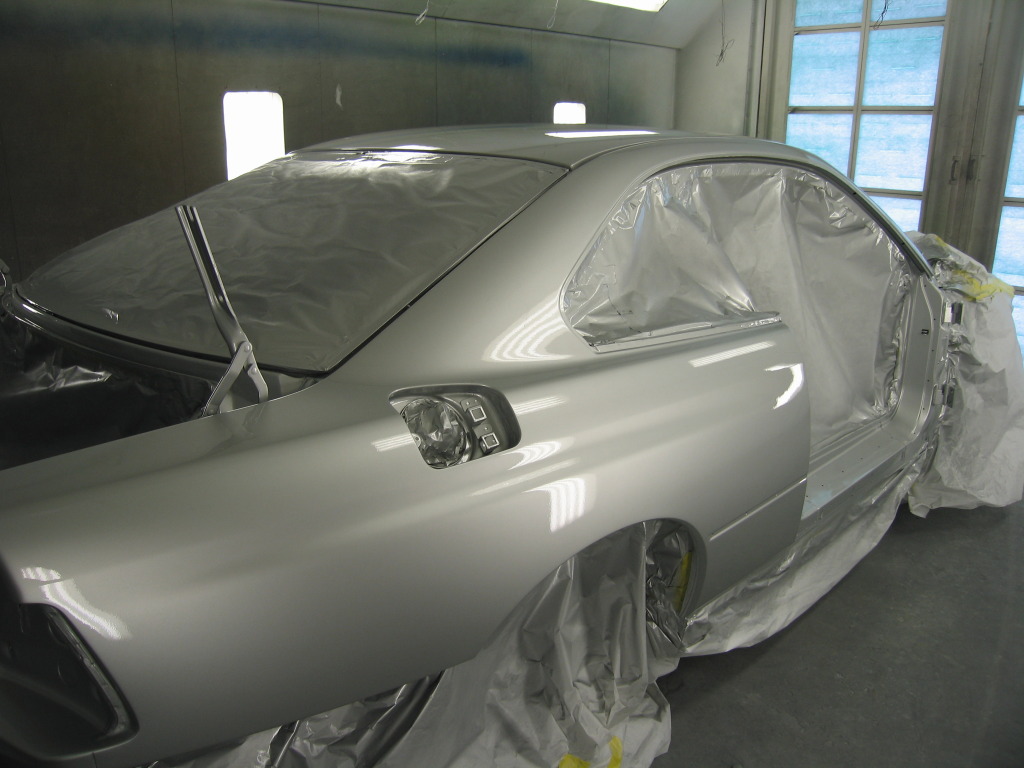
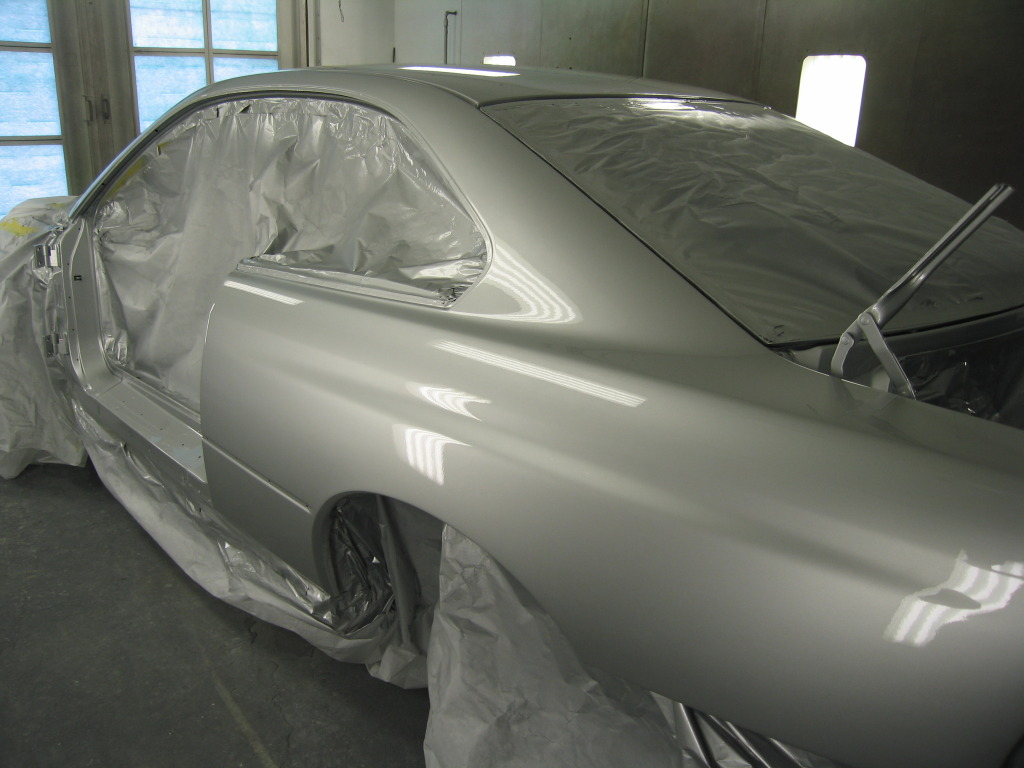
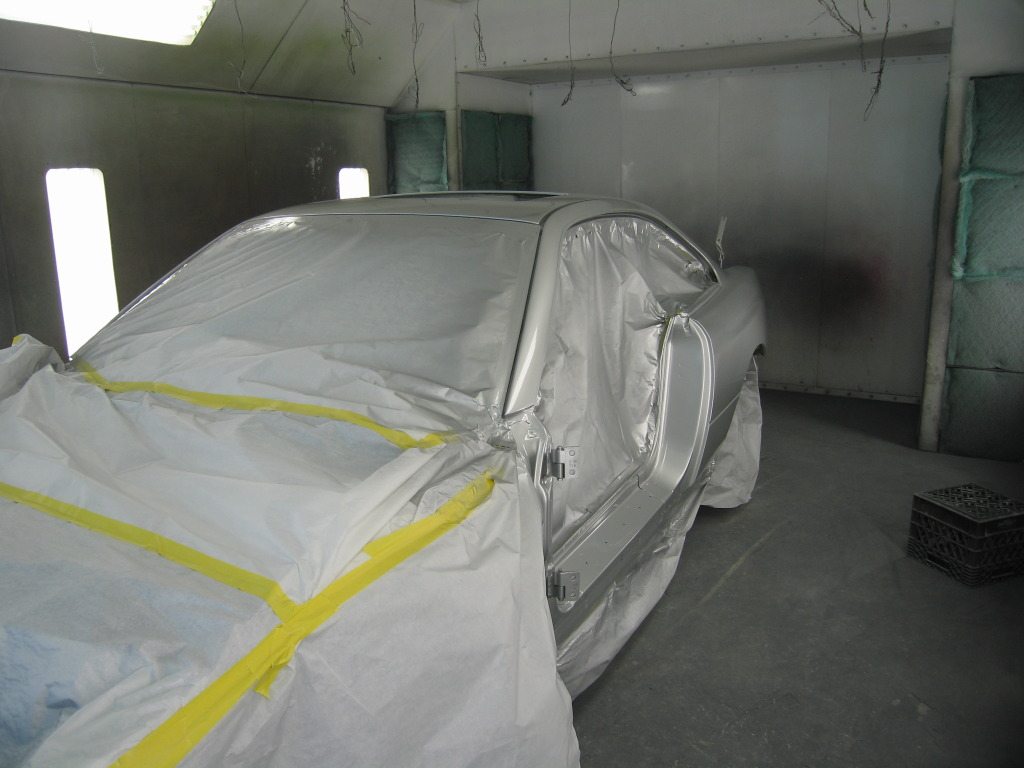
I just received some pictures of the painted shell last night from Gary. First two are after 3 coats of Silver, the second 2 are after several coats of Clear. The car will be block sanded down to 3000 just like the hood and other parts.
The windows are not in the car, and all the metal underneath has been prepped and painted underneath. They have just been laid in placed to help close the openings during painting.
The Hood (which has been polished and finished):
The body shell without the clear:
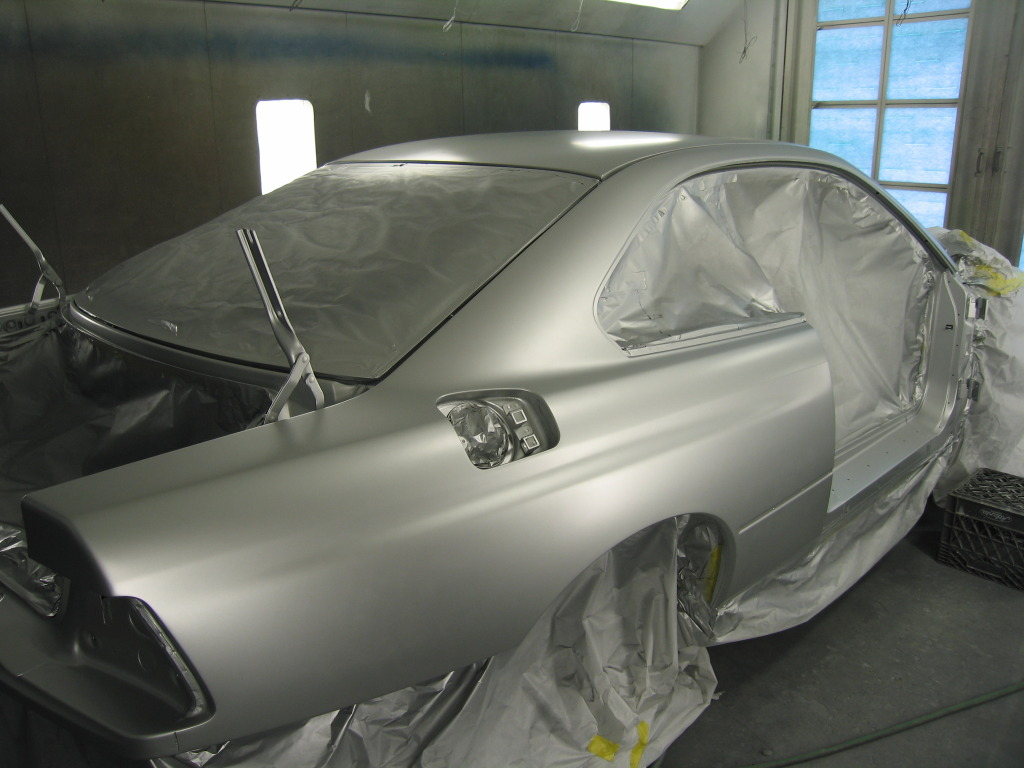
With several coats of Clear. This is before any wet sanding or polishing: