Beiträge von revtor

    Zitat von arnie

    Revtor,


    I just read your full article and it was indeed a labour of love to make all those modifications. But, did it occur to you (when you found the positive/negative menu) that perhaps a short cut would have been to change over the processor chip from the two units?


    Yes, I did. But since it wasn't until after all work I noticed the new menu entry, I didn't investigate it any further. Before I started the mod I really thought it was the head unit itself that produced all information to be shown on the display and that the display unit did no more than putting these bytes in a visible form. Apparantly the display unit does a lot more than that.


    But even if you could swap the correct chip or reflash its settings, the display swap like I did would still be the better option. Why?


    - The backlight of the Indianapolis is a lot dimmer than that of the Traffic Pro. See the difference in LED size in the pictures I posted in the thread about my mod (II). The Traffic Pro can go really bright. And that's a plus for a negative display. A negative display always requires a brighter backlight than a positive to be equally well readable.


    - The display of the Indianapolis is positive one (due to the polarization filter). The Traffic Pro has a negative. Even if you could have the Indianapolis' software invert the display, it would still be "LCD grey" when the unit is off instead of black like the Traffic Pro and all other displays in the car.


    - Also, due to the fact that the Indianapolis uses a positive display, you would see the pixel grid in negative mode. The black background would have a fine grid in orange. The opposite can be seen with the Traffic Pro's negative display in positive mode (there's a picture of that in my thread). You see the grid - this time in black because the display is negative. A simple monochrome LCD display always gives the best image when used in its native polarization mode.


    If you could get your hands on the same or very similar polarization filter foil Becker used on the Traffic Pro, you could change the Indianapolis to negative quite easy as shown in my first mod. The brightness of the backlight would probably not be an issue if the filter provides enough contrast. After all I had to turn the Traffic Pro's brightness to the lowest but one setting. I couldn't find the correct filter, though...


    I just don't get why BMW/Becker didn't use the Traffic Pro displays in the Indianapolis. That would have saved me a lot of work :)

    Haha :D


    It's not because I try to preserve the stock appearance of my car, I don't like what you guys do. I'm quite sure your unit beats the hell out of my Becker when it comes to features. I love the carPC projects by sama and TallTony, the HID conversions, supercharger projects,... It's just no option for my own car :).

    Zitat von arnie

    I'm curious, did you invert the display by hacking the software or did you add electronic components... or change the polarising filter....or is there some hidden internal switch?


    I tried changing the polarization filter. At first I was quite happy with the results, but the imperfections annoyed me more and more every day. Here's my detailed post on the polarization filter swap:


    >>> Becker/BMW Radio Navigation Indianapolis display mod


    This mod is easy if you are careful, but it's very hard to get perfect color and contrast matching this way. Unless you can get a large amount of different polarization filters to try with, I wouldn't recommend this route.


    Basically, the blueish shine caused by my new polarization filter and the somewhat lower contrast compared to other negative displays got me working on a second mod of the unit. This time I took a complete other approach. Instead of trying to invert the display, I opted to replace the display. However, this wasn't an easy job. You can read about it in following extensive post:


    >>> Becker/BMW Radio Navigation Indianapolis display mod II


    The results of this last mod are very satisfying as you can see in the pictures I posted above.

    Zitat von arnie

    By the way, where would you order the BMW version? Is the one you showed the model used on the Z8?


    The BMW Radio Navigation (BMW # 65 90 0 393 718) is used in many BMW cars. Here's a list of BMW cars that had the Indianapolis as option: BMW Radio Navigation Indianapolis @ bmwfans.info


    The unit is still available from BMW, but mind that it's a lot more expensive than its Becker brethren. I guess you pay for the "BMW" text on the faccia. I got my Indianapolis and Traffic Pro units from eBay instead. If you have patience, you can do excellent deals on eBay. The units I got were new (still in original packing) or barely used without usage traces... and I paid less than half of what BMW would charge.

    While I find the Becker Indianapolis a natural match for the E31's interior, the display may turn out to be a problem for people who try to match the stock appearance as much as possible. Why? The Becker Indianapolis comes in either yellow, red, green or blue background illumination. Neither color matches BMW orange very well. Besides, the displays are positive (black text on illuminated background) whereas all displays in the E31 are negative (illuminated text on a black background):


    Yellow Becker Indianapolis Pro 7950


    Then there's the Becker Indianapolis 7969 - also known as BMW Radio Navigation Indianapolis - which is a BMW badged Indianapolis with BMW orange illumination. This would appear the perfect match for BMW vehicles, however even though the color may be right, the unit still has a positive display:


    BMW Radio Navigation Indianapolis (BMW # 65 90 0 393 718) - Becker Indianapolis 7969


    The backlight is a bit dim too in the Indianapolis series. In bright light you can barely see the display is illuminated. That's not a problem for readability, but it may be a problem if you want to match the stock appearance.


    Older Beckers like the Traffic Pro (also available in a BMW edition) could switch the display between positive and negative. I don't understand why they left this out in the newer versions. The Traffic Pro doesn't play mp3 and I also dislike its design, but otherwise it's very similar to the Indianapolis. So it may be an option for you.


    I really like the OEM appearance of the Indianapolis. It may lack features found on other top end head units, but it features the well known Becker build and audio quality. The only thing that bothered me was the display. So I decided to modify the unit. You can read more about this in Becker/BMW Radio Navigation Indianapolis display mod II. The difference between the original 7969 unit and my mod can be seen in the picture below:


    Top: stock Becker Indianapolis 7969 - Bottom: my modified unit


    Below you can see what it looks like mounted in my car. The display is now a near perfect match with the OBC/MID (in both color and brightness). The Becker is set at almost minimum brightness (1). Needless to say I'm very happy with the result. I don't know if other people will attempt my mod, but if you do you will have one of the rarest units on this planet and - in my opinion - the most modern companion for the 8-series without compromising the stock appearance.


    A perfect match... Note that the OBC/MID isn't properly inserted because I had to remove it again


    For non-European readers: There are no navigation maps other than Europe available for the Indianapolis! Another weird Becker decision since the older Traffic Pro also covered Northern America.


    Of course, the Becker is not an option for everyone (and my mod even less). If you want map view, touch screen,... look elsewhere. But you'll have a hard time finding a more modern unit that matches the stock appearance so well as the Indianapolis. If only the display...

    There's a difference though, DickB. While I'm just fixing some minor issues BMW should have taken care of in the first place, people like "TallTony" and "sama" are really updating the car's interior with modern features like a carPC, cool white lighting, carbon fiber parts,... I try to keep as close as possible to the stock appearance, so these things are no option for me. But I like the car as it is - I'm not trying to hide it's a 15 years old design. I'm just taking care of some minor annoyances :)


    Actually I like the idea of a carPC and I have been thinking along these lines too. But these things only work out well with a large screen and that would involve cutting the wood trim. Considering the prices BMW charges for a center console, that's completely out of question. My car is in great shape and I don't want to devalue it by irreversibly modifying stuff. Every change I make is well thought of and can easily be undone without leaving visible traces. A flip-out screen would be an option, but that doesn't look stock at all. So I burried the carPC idea and went with the Becker/BMW Indianapolis instead.

    Zitat von TallTony

    I borrowed this image from Sama, since I thought you replaced every LED in the HVAC....


    No, I only replaced the top row (the button state indicators - 10 LEDs in total). The bottom row (9 LEDs) contains the button illumination - but these were already correct BMW orange. Their light ouput may not be that high, but it's more than enough in the dark. It's an almost perfect match with the MID/OBC and my modified Becker unit. So I left these untouched.


    Some may find the original LEDs too dim, but I don't mind. The buttons are very well readable in the dark. Brighter may become annoying for nightdriving on unlit roads.


    Anyway, the bottom row LEDs aren't any harder to replace than the top row, but you must use LEDs with a very large viewing angle and an even light distribution. Otherwise the icons on the buttons will be well lit in the center, but dimmer or dark on the edges.


    Thanks for the picture of the button internals! That gives me a good impression of what to expect.


    Zitat

    I saw over on the other Forum you thought my interior light package was dimmer that Stock. Hopefully this image, not shot through the slightly tinted glass, but the door open, will convince you otherwise :D


    It's very difficult to judge the brightness on a picture. It all depends on the exposure time by the camera. The picture below is shot at night with the camera on a tripod and a slightly longer exposure time than normal. This is stock lighting:


    When I saw your pictures I immediatly compared them in my mind with my own pictures - like the one above. Now it's easy to understand why I thought yours was a lot dimmer than stock :D

    Zitat von TallTony

    I emailed Wuffer several times asking for details on the HVAC conversion, but never got any reply so I just had to do what I thought was right, I used prewired LEDs with resistors, so I can use the dimmer switch on the dash. It was just a bit of fun for me really, and nowhere near as professional as your version.


    Thanks for your kind words! As far as I understood, Wuffer took an other approach (I haven't seen his pictures either, but if you ask him at the board he'll send you the pictures). He cut off the bulb holder from the original lightbar and then attached 3 high brightness LEDs - one per bar. He also used white LEDs but with a small dab of orange model paint to colorize the light a bit.


    I didn't like the idea of cutting the original lightbar. After all, I always want to be able to get back to stock without too much effort - and of course without permanent damage. So just like many people I chose to have the LEDs shine directly into the roller wheels.


    I prefer not to use LEDs with prewired resistors. I put a few LEDs in series with a single calculated resistor. More efficient and you have better control over the actual brightness. Add a simple brightness control and you can even adjust them between 0 and maximum brightness without effort.


    The brigtness control gets its power from the original bulb socket. So the HVAC illumination still works fine with the dashboard dimmer switch.


    Zitat

    I cannot believe you had the patience to replace ALL the button LEDs :shock::lol: The results are fantastic, but I'm a busy man who needs quick rewards :lol:


    All the LEDs... It's not like there are many LEDs in the HVAC. I mean, the original button illumination LEDs are fine. They are correct BMW orange. Not too bright, but they match the OBC/MID and my radio mod. So these were left untouched. The only thing that bothered me about the buttons were the green and yellow status indicators (10 in total). Now these are BMW orange too and the result looks quite nice. Actually, it looks more stock than the original :D


    Next on my list is the center vent illumination, but I have yet to figure out how to take that part out of the dash (I haven't really looked into it yet).


    Other things that bother me are the difference in illumination brightness and color between the various buttons on the dashboard (lights, rear window heating,...). Also the buttons around the shifthandle are not all equally bright. This might be a bit more tricky to modify. The small PCB inside the buttons is not clicked or screwed in place, but with melted plastic dots. I need to find a good way to reattach it before I break this. Stupid cheap construction...

    I also posted this at wuffer's board, but since other people are also contributing their HVAC illumination mods to this thread, I thought I'd share mine too. I haven't had the time yet to write and extensive article around it, but here are some teaser pictures with a word of explanation:


    LED brightness adjustment - small and simple but very effective. I didn't want to mess with soldering different resistors or putting some filter over the LEDs to get matching brightness, so I opted to make it adjustable.


    My lightbar replacement. Just like most I chose to get rid of the original lightbar. I didn't want to damage it - I always want to be able to get back to stock without too much effort - so I replaced it completely with LEDs shining directly in the roller wheels.


    Close up of the LEDs. As you can see I opted for very small SMD LEDs. The SMD LEDs are quite dim (only 8mcd each), so I had to use 2 for each wheel. The combined 16mcd output may not seem very much to the overwhelming power of today's high efficiency LEDs which offer several thousands mcd. But the LEDs will be located inside the roller wheels shining towards the frontside, so the light distribution is very efficient. In other words, the LEDs don't have to be very bright. In fact, even this 16mcd had to be turned down a bit because it was too bright. The LEDs have a 170° viewing angle so the light distribution is very even.


    The LEDs inside a roller wheel.


    The LED lightbar and brightness control mounted inside the HVAC control unit. I used a hot glue gun to mount it the lightbar. I like thermoplast glues because they begin to fixate within minutes - no need to hold or clamp it for a long time. Also, the glue can be removed very easy once it has cooled down without leaving traces on the plastic.

    The brightness control is mounted with a small screw in a previously unused mounting hole near the location of the original lightbulb.


    The brightness control is easily accessible through the lamp bulb hole in the back of the unit.


    And this is what it looks like at night. The color matches perfectly with the illumination of the buttons. There's no visible difference in color or brightness between the original buttons and the "updated" roller wheels. I think the mod worked out very well.

    If you want to match the BMW orange, you must use LEDs with a wavelength of 605-610nm. Anything shorter or longer will be too yellow or too red. The LEDs I used are 610nm. I didn't want to use white LEDs (like most people do). The white light tends to be too pale compared to the rest of the illumination. You can of course apply a color filter (orange paint for example), but why not using correct color matched LEDs from the beginning? As you may have seen in my Becker/BMW Radio Navigation Indianapolis display mod II perfection is the only thing I'll settle for and I go quite far in that :).

    The only drawback of these orange LEDs is the monochromatic light they produce. Monochromatic light doesn't color well when a color filter is applied. You can see that clearly in the picture above. The red marks left from 24°C are almost the same color as the rest and the blue marks right from 20°C are nearly invisible. This works better with white LEDs, but I actually like the fact that it's all orange now. The red and blue just didn't match the illumination.

    I also took the time to replace the yellow and green LEDs in the buttons with BMW orange LEDs (not seen on the picture above). Now the HVAC illumination is completely BMW orange - I like it :D

    Re: Unplugging head unit


    Zitat von Seb

    The black plastic cage can be moved up slightly, as denoted by a small diagram on it, but beyond that I'm not sure what I'm meant to do.


    Don't try to pull the connector from the radio unit by force - it just won't work. Just pull the cage/latch all the way up with a large screwdriver (as shown on the diagram). Once the latch is past a certain point it will push the connector from the radio unit. The latch should raise about 2cm (0.8") before you can take the connector off.

    Part II: Traffic Pro meets Indianapolis

    Some time ago I replaced the Becker/BMW Professional RDS radio unit in my 8 series with a Becker/BMW Radio Navigation Indianapolis. You can read about my motivation in an earlier thread: Becker/BMW Radio Navigation Indianapolis mod. In short, I was looking for a modern high quality radio/cd player with mp3 support which integrates nicely in the E31's interior. I'm not a fan of catchy head units with animated multi color displays, thus the choice for the Indianapolis was a logical one because of its OEM-like appearance.

    The problem with the Becker/BMW Radio Navigation Indianapolis is the positive display (black text on an illuminated background) whereas the car uses negative displays (illuminated text on a black background) all around. Although I'm updating some items on my 8 to today's standards, I also try to keep the car's stock appearance as much as possible. As you can see in my other thread and the Cd Box modification, I go quite far in this.

    After inverting the Becker/BMW Radio Navigation Indianapolis' display from positive to negative, a blueish shine left (the display background was not black but rather dark blue). This effect is caused by the polarization filter I used. In the dark the blueish shine is invisible, but in bright daylight it is visible. The brighter the light, the more blue the background. Although I was very happy with the display mod at first, the blueish shine began to annoy me more and more.


    First I intended to experiment with other polarization filters, but sadly these filters are not really available in my different types to end users like you and me...

    The Indianapolis' predecessor, the Becker Traffic Pro, does have a negative display (which can be switched to positive by software control). The Traffic Pro was also made in a BMW edition with correct BMW orange illumination: the Becker/BMW Radio Navigation Traffic Pro. On pictures I found of it, the display looked always lovely black with at most a slight brownish shine. Just like the other displays in the E31. Too bad the Traffic Pro lacks mp3 support which was one of the key features for taking the Indianapolis. Also, (personally) I believe the Traffic Pro is one of Beckker's lesser designs.

    The more I looked at the Traffic Pro, the more it appeared to me the differences with the Indianapolis are rather small. Sure, the design is different but the display seemed to have the same dimensions and the displaystyle looked almost identical. Chances were good both units featured the same display - apart from the polarization filters making the Traffic Pro's display negative and the Indianapolis positive. For a while I thought about swapping the Indianapolis's display with one from a Traffic Pro. But I got stuck on a problem: The display of the Indianapolis is connected to the printed circuit board (PCB) by a flexible plastic foil on which a large number of very thin conductive traces are printed. After a few careful attempts I came to the conclusion that it's impossible to release the foil from the PCB without damaging it beyond all repairs. I'm a seasoned hobbyist, but this would be something I can't fix. Furthermore the trace densitity is so high it would be practically impossible to solder by hand. Bad luck.

    I couldn't let the Traffic Pro go, though. Apart from the similarities of the display it's striking the amount of buttons around the display is also the same. Just as the Indianapolis the Traffic Pro features a removable front with virtually the same dimension. The row contacts on the rear side of the removable front is at the same location and has the same number of contacts. All feature-wise differences (like mp3 support) are in the electronics inside the main unit itself and not on the removable front. So the idea grew that the hardware differences between both fronts is rather small. Automatically the idea came: Would the electronics in the Traffic Pro's removable front work on the Indianapolis? And in connection to that: Would it be possible to fit the Traffic Pro's electronics in the removable front of the Indianapolis?

    The only way to find out is by experiment. After a bit of searching I got myself a removable front of a Becker/BMW Radio Navigation Traffic Pro. Of course second hand to keep the price low (in case of failure), but the unit is like new.

    Front and rear side of the Becker/BMW Radio Navigation Indianapolis:


    The display on the first picture shows an extremely blue background. This is caused by the bright light I used and angle I shot the picture at. In real life the display looks dark blue to black-blue.

    Front and rear side of the Becker/BMW Radio Navigation Traffic Pro:


    The black display is quite a difference to that of the Indianapolis. Despite the same bright light for the photograph, there's not a single trace of a blueish shine. Perfect. Too bad I couldn't find such polarization filter for the Indianapolis display.

    As you can see there are many resemblances between the Traffic Pro and Indianapolis. But is this also true for the insides?

    Rear side of the Becker/BMW Radio Navigation Indianapolis PCB:


    Rear side of the Becker/BMW Radio Navigation Traffic Pro PCB:


    If you look carefully you'll see several differences, but for the rest both PCBs are practically identical. The Indianapolis is definitely not a brand new design, but rather a follow-up based on the Traffic Pro. Of course this doesn't mean the Traffic Pro front will work with the Indianapolis.

    Front side of the Becker/BMW Radio Navigation Indianapolis PCB with display:


    Front side of the Becker/BMW Radio Navigation Traffic Pro PCB with display:


    Again, the Indianapolis display is extremely blueish due to the setup I used for the photograph

    The removable front of the Traffic Pro doesn't fit in the Indianapolis due to the somewhat different design. But with the PCB out of its case I could put it on the Indianapolis and push it by hand to make contact. So finally I could test whether or not the Traffic Pro front shows any signs of life on the Indianapolis. Because I short of hands while doing this I don't have pictures of this first test session.

    Keep the PCB in place, turn on the power supply en then turn on the radio unit... Noting for a moment, but immediatly after that a bright orange BMW logo appears followed by the question to enter the radio code! A small celebration was at its place here. The Traffic Pro display is - I must admit - a lot better than the result of my own polarization filter mod on the Indianapolis. The contrast ratio is much higher and the orange a lot brighter. De brightness and background color (black to dark brown) now matches those of the old Becker/BMW Professional RDS with as difference the software controllable brightness of the Indianapolis. This way I can match the display's brightness perfectly to the rest of the car. I don't think I'll find better than this. This is exactly what I was looking for. Operating the switches on the PCB (actually contact pads instead of real switches) with only a few fingers free isn't easy, so I couldn't test the unit very thouroughly. At first sight everything worked, thus reason enough to continue the mod.

    Becker/BMW Radio Navigation Indianapolis PCB with folded back display:


    Becker/BMW Radio Navigation Traffic Pro PCB with folded back display:


    Top left on the overview pictures you see the metal bracket that keeps the display firmly pushed against the PCB. Top right is the backlight diffuser. The Traffic Pro has an orange diffuser, but I don't really see the point of that because the orange color comes from the orange LEDs and not the diffuser. LEDs are monochromatic light sources. Working with color filters doesn't have much effect.

    In the center and on the detail photographs you see the front side of the PCB with the display folded back so you can have a look at the backlight. The Traffic Pro uses much larger LEDs in the backlight. That explains why it's so bright. Because the display is folded back you look at the rear side of the LCD display. On the Traffic Pro the rear side is just as black as the front side (ignore my fingerprints), but on the Indianapolis it's white instead of blue. The reason for this is an semi transparent reflective layer on the rear of the Indianpolis display. This layer reflects incoming sunlight making the display readable even without a backlight. It's this layer that gives the typical grey color many LCD displays without or with dimmed backlight have. A negative display is more difficult to read without backlight than a positive, thus Becker opted to leave the reflective layer away to benefit from the maximum light output from the backlight. If the backlight is off the display is hard to read. But that's not an issue. The backlight is meant to be on.

    Now we know the Traffic Pro hardware works on the Indianapolis, it's time to fit it in the Indianapolis' front. But... There are quite a few differences. The five buttons on top of the display are in different locations. The Indianapolis has LED illuminination for each key while the Traffic Pro has four powerful LEDs (one in each corner). The light is distributed to the buttons by transparent plastic bars. The holes in the PCB are in different locations and the shape of the PCB differs a bit so it doesn't fit in the Indianpolis removable front .


    The picture above shows the main differences. The yellow and blue squares are the button contact pads from the Traffic Pro and Indianapolis respectively. The small blue rectangles are the LEDs of the Indianapolis' button illumination. The last image shows the Traffic Pro's key layout over the Indianapolis. Now you can clearly see the differences. There is some work on it... The shape of the PCB has to be altered slightly, several contact pads have to be relocated and the key illumination must be redone from scratch (we can use LEDs from the Indianapolis for this). The different locations of the holes is another problem, though. I don't dare to drill new ones. The PCB is made of at least 4 layers traces: There's no way to see whether or not there are traces below the surface. If it turns out you drilled through several traces in lower layers there's no way to fix it. We'll have to tackle this issue by changing the case, not the PCB.

    Where the polarization filter swap from the Becker/BMW Radio Navigation Indianapolis mod was already risky in terms of damaging the unit, it should be very clear that this mod is even a step further. Any warranty - if still on one of the units - will be void. The chance that you will ruin both the Traffic Pro and Indianapolis display unit should not be neglected and it's not even sure the final result will be satisfying! Because of my urge for perfection this won't stop me, of course.

    The mod

    Making the Traffic Pro PCB fit in the rear half of the Indianapolis' case is not that hard. Just file the top left and top right sides a little bit. The front half of the case is for later.

    For the key illumination I'm going to use LEDs from the Indianapolis. Of course this will render the Indianapolis front useless. If you don't want to take this risk, you'll have to find LEDs elsewhere. But finding such small LEDs in the right color may prove to be difficult. If the mod fails you can always put the used LEDs back onto the Indianapolis PCB - assuming you didn't fry 'em of course.


    If you are going to work with such tiny components it should be obvious you need very fine soldering equipment. Otherwise you are melting LEDs instead of soldering. On the picture above you see below the soldering iron from right to left a 3.2mm (0.13") "chisel" soldering tip (the standard choice for most soldering) and a 0.8mm (0.03") "point" soldering tip for finer work. On the soldering iron is a 0.2mm (0.008") "needle" soldering tip for very fine soldering jobs like this one. The LEDs are also fixated to the PCB with a small drop of glue, thus you'll have to use some force to get them of the PCB while desoldering.

    As said earlier on the Traffic Pro uses only four LEDs for the key illumination - The Indianapolis uses 19! Thus it's not just relocating 4 LEDs. It's important all LEDs have the right brightness so it should be made well-considered. But why experiment if we already have the perfect example: The Indianapolis display unit. I used reverse engineering to find out the wiring schematic of the LEDs. The result is below:


    This network is powered by contact 11 (ground) and 12 (positive voltage) from the row of contacts on the rear side of the PCB. The voltage for the LEDs comes straight from the main radio unit itself. That is good news. This means the Traffic Pro PCB gets exactly the same voltage for the LEDs. I can rebuild the schematic from the Indianapolis 1:1 for the Traffic Pro.

    The combinations of resistors and LEDs may appear a bit illogic at first, but there's a simple explanation. Assume a 12V power supply. The current through a single LED of the left group is:

    Iled = (Ubatt - Uled1,3 - Uled2,4) / (R1 || R2 || R3 || R4) / 2

    Ubatt: battery voltage
    Uled1,3: voltage over LED 1 and 3
    Uled2,4: voltage over LED 2 and 4
    ||: parallel resistance

    Iled = (12V - 2V - 2V) / (3900ohm || 3900ohm || 3900ohm || 3900ohm) / 2 = 4mA

    For the right group the current is:

    Iled = (Ubatt - Uled5,8 - Uled6,9 - Uled7,10) / (R5 || R6 || R7 || R8) / 2
    Iled = (12V - 2V - 2V - 2V) / (3000ohm || 3000ohm || 3000ohm || 3000ohm) / 2 = 4mA

    Exactly the same. Makes sense, not?

    Now the middle group:

    Iled = (Ubatt - Uled11 - Uled12 - Uled13) / (R9 || R10)
    Iled = (12V - 2V - 2V - 2V) / (680ohm || 680ohm) = 18mA

    Woops... Did we make a mistake? No! When we take a closer look at the mechanical design of the key illumination we notice the top row keys each have 2 LEDs directly beneath the key. The bottom row on the other hand only has LEDs beneath the edges of the keys. Thus they must shine a lot brighter to get the same level of key illumination. Hence the higher current.


    The upper half of the ruler is in inches - the lower half in centimeters. The tiny white blocks are the LEDs. For comparison, I put a 5mm (0.2") and 3mm (0.12") LED next to it. Did I already mention the LEDs are small? When you place the LEDs don't forget LEDs have an orientation for current. Placed in the wrong direction they will not work. For the LEDs from the Indianapolis display unit the small dark spot in the LED indicates the negative pole.

    There's very little room in the display unit case for the wiring and realisation of my modifications. At most places less than 1 millimeter (0.04") in each direction! Maybe I'll have to modify the inside of case. Relatively large components like standard "through the hole" resistors won't fit at all. The easiest way is using the SMD resistors from the Indianapolis. If you thought the LEDs were small, wait until you see the resistors. These are less than half the size of the LEDs! On the picture above the small black blocks are the resistors. A standard 1/4W resistor is put next to it. I'm taking all parts from the Indianapolis display unit because I have no need for it anymore, but if you work carefully it can all be undone to make the Indianapolis front work again.

    My idea is to glue the new wiring onto the Traffic Pro's PCB. It need isolation first, though. I opted for 0.15mm (0.006") thick plastic foil glued onto the PCB over the places where new wiring will come. There are cut-outs for the current contact pads (the bottom row buttons re-use the Traffic Pro contact pads and the top row contact pads must remain accessible to connect the relocated contact pads to).


    Here I just started laying the traces. I cut the traces from a 0.05mm (0.002") thick copper plate. When you connect two traces you have to take care not to melt the isloation foil. This may cause an unwanted short circuit with traces on the PCB. When you're wiring the unit you have to pay very good attention to the inside of the case. On many places the case touches the PCB. You can't put your traces there unless you modify the case carefully.


    The front side is ready. The LEDs are placed and the contact pads relocated. I had to redo the bottom row LEDs a few times. At first these looked like an easy job, but it turned out to be quite delicate to position correctly. If placed even slightly out of position the illumination of the buttons becomes inconsistent which is quite ugly. The top row buttons had to be modified. When you press the buttons they normally touch the PCB. But that's where I put traces. Thus I filed the rear sides of the buttons to match my modifications on the PCB. Especially the second button (TP) turned out to be a problem. There are a few components on the Traffic Pro PCB right where the button should be. In other words, the contact pad and LEDs are a tad higher on this location than for the other buttons. The button had close to no room left to be pressed. Carefully I sunk the rear of the button to make it operate normally like the other buttons.


    The rear side. Not my best soldering job, but it was far from a comfortable job. For the bottom row LEDs I didn't follow the schematic completely to lessen the amount of traces.

    Now the PCB is done the case had to be modified. On some places the PCB became about 0.5mm (0.02") thicker due to my modifications. I tried to locate thicker parts in places with enough free space, but that wasn't always possible. All small changes, not worth making pictures of.

    Testing

    And then comes the moment... The moment of re-assembly and testing. In my testsetup a press on the "ON" button leads to a bright orange BMW logo on the display. Victory? Barely a second later the display goes dark. Panic...


    A closer look at the display reveals that there is text displayed. Difficult to read, the unit asks to enter the radio code. Did the backlight die? A short circuit or overload due to my modifications? It all seemed unlikely, especially because I could reproduce the problem by turning off the power for a while and retrying. The hardware is fine.


    After entering the radio code, the Indianapolis appeared working normally - apart from the backlight. The key illumination remains dark too. Looking at the brightness setting in the options it struck me the unit displayed 31 (see picture above). The original Indianapolis goes from 0 to 8. So we turned down the brightness...


    ... and yes, there is the backlight. As soon as the brightness is within normal regions the backlight lights up as it should and the same goes for the key illumination. I'm not entirely sure what causes this. Maybe the Traffic Pro was adjustable between 0 and 31? It's of no importance, the unit works.


    Somewhat unexpected my eye fell on a new option in the menu: "LCD". This option was not available on the Indianapolis. This option switches the display between positive and negative mode. A feature that was present on the Traffic Pro, but not on the Indianapolis. And it works! It's a bit strange the names are swapped. What the Becker calls positive is negative and vice versa. If Becker would have kept this option in the Indianapolis software I wouldn't have to go through all this.

    And what does the reult look like?

    This is what the old mod looked like at maximum brightness (8):


    And this is what the new mod looks like at almost minimum brightness (2):


    The contrast ratio is clearly a lot better with the new mod. Thus the background is darker where it should be black. And the backlight can go a lot brighter which enhances readability in bright daylight.

    The biggest difference with the old mod is the blueish shine in daylight which is now completely gone. Even in very bright daylight the display looks black or a bit brownish at most. Getting rid of the blueish shine was the reason I began this mod and I succeeded very well by transplanting a Traffic Pro display unit into the Indianapolis. Only now the Indianapolis is truly worthy to be placed in the E31.


    (Please note that the MID/OBC is not properly inserted in the shot above)

    A lot of time and effort was put into this mod. It's not given to everyone to perform a mod like this. Not because of the required technical knowledgle (which is very limited), but the fact that you may very well turn an expensive and perfect working unit into garbage. But there's also hope for the less adventurous people who want to keep the stock appearance enhanced with modern features like mp3 support. A Blaupunkt/BMW Business CD (CD43) can easily be modernised with an iPod and DICE (which is even able to display ID3 information on the CD43 display with the R17 harness) or with a Phatbox. Even bluetooth is possible...


    To finish this article, a few shots of the original Indianapolis sitting on top of my modified unit:


    [COLOR="DarkRed"]Update: The article below is still useful, but I wrote a complete new article that is much more comprehensive. Here's the link to the new article: Illuminated CD box at E31Wiki.org.[/COLOR]


    In my 8 I have exchanged the original BMW Professional RDS headunit with a Becker/BMW Radio Navigation Indianapolis. This makes the outdated cassette box behind the phone and emergency brake completely useless. BMW once offered a cd box, but apparantly these are no longer available. Luckily "8eights" at roudfly found out the box (made by Fischer) is also used in other cars (including Mercedes and VW) and is still available on eBay and several autoparts stores.


    Thus I got myself such a Fischer cd box. The cd box has the same face dimensions as the cassette box and the design is also very similar. In other words a perfect upgrade matching the interior of our beloved cars.


    Although the Fischer cd box fits in the E31 out-of-the-box, I made a small modification to the case. On each side I made a rectangular cutout (not yet visible on the picture above, see 2 pictures below) for the bracket in which the cassette box is mounted. This bracket has two positioning tabs grabbing in these cutouts. Otherwise the sides get somewhat pushed inside.


    The original cassette box does have illumination. The small windows with the indicators showing whether or not there's a tape in the tray are illuminated. The cd box doesn't have this. Now, few people won't sleep from this fact, but I'm trying to keep the stock appearance as much as possible (see also Becker/BMW Radio Navigation Indianapolis mod), so I wanted the cd box illuminated too...


    In the cassette box, the illumination comes from a single bulb on the rear side. The light is distributed to the indicators through transparent plastic bars. On closer inspection it turned out the cd box is also made for a similar illumination system, but the necessary parts are missing. I couldn't find any references to an illuminated Fischer cd box, so I don't know if it was ever made or no longer available.


    I decided to take a different approach by changing the single bulb with 6 LEDs mounted directly behind the indicators. A problem with this setup is that the cd trays can move, so fixed cabling can't be used. The trays and case must get some sort of connector making contact when the tray is closed.


    On the picture above you see the bottom side of a single tray (with the bottom plate removed). Behind the red/white indicator you can see the LED: the tiny white block fixated with a royal drop of glue. It's an SMD LED, so it's very small. Nevertheless the light output is very good. The LED lights up in BMW orange.


    In the bottom right corner of the picture you can see the female contact of the connector. It's made out of 0.3 millimeter (0.012") thick copper. In the picture the LED's wires are yet to be connected to the connector. By glueing a small black flexible plastic strip on the hinge point it's impossible to see the grey wiring from outside once the unit is assembled again. The male contact is in the case. I couldn't make a good picture of this, but the connector is nothing but two straight pins.


    The LEDs have an operating voltage of around 2V. On board of the car the voltage is 12V (in reality sometimes even up to almost 15V). Way too much for the LEDs, so the voltage must be dropped using resistors. Since there's no current running when a tray is open (the connector is then open) the LEDs can't be put in series (otherwise all illumination of the box will turn out when a single tray opens). Thus each LED gets its own resistor. The downside of this setup is that each resistor takes about 10 to 13V for its account and with an average current of 25mA quite some power is uselessly dissipated in the resistors. Hence the somewhat larger sized resistors. Luckily the LEDs produce so much light I want to turn them down quite a bit. So I can take higher resistor values, effectively lowering the drawn current and thus also lowering the wasted power. I'm hoping to get the total power of the cd box somewhere betwee 0.5 and 1W.


    And this is what it looks like in the dark. A nice orange illumination, perfectly blending in with the rest of the interior's illumination. You have to know the 8 series quite well to know this ain't stock.


    Of course this is just a small mod to the E31. Between the people changing diffs, adding superchargers,... it may appear almost idiotic, but I thought I'd share it with the rest of the 8 community.

    Zitat von 2rgeir

    How much for doing that conversion for me then? :lol:


    Unless you are really clumsy you can easily perform the mod yourself. Just take your time, don't over haste. The costs are very low (unless you screw up of course ;)). I paid less than $ 25 (without shipping) for a sheet of polarization filter that is large enough to invert a dozen displays.


    Zitat von schnitz850

    Looks really good...
    I have the BMW Older Traffic Pro.
    http://www.clube31.net/forum/files/knob1.jpg
    Wondering whether to upgrade?


    It depends on what you are looking for in a radio unit. If you can live without mp3 support there's little reason to upgrade, but I must add that I never really compared both units. There are of course other ways to add mp3 support (through an iPod for example), but I wanted to keep everything in one unit. The navigation that came with the Indianapolis is a nice addon, but I don't think I will use it very often.

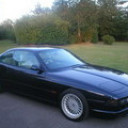
    In my 8 series I have a BMW Professional RDS radio unit - back then the top model made by Becker. I'm very satisfied with the quality, operation and looks of the unit. Nevertheless I have been thinking about replacing it with a more recent unit which features mp3 playback. There's plenty on the market, but I don't want an alien-like looking unit with an annoying useless animated multi-color display. Sadly, most units fall into this category. Luckily there are still manufacturers making radios with an OEM appearance - one of them Becker (supplier of many of BMW's top model radio units).


    I was interested in the Becker Grand Prix 7990 or Becker Indianapolis Pro 7950 (the latter also features navigation). Both nice OEM looking units with respectable features and the well known Becker quality. Becker builds these units with yellow, red, blue and green display/key illumination. There's the first issue: In an 8 series where all dashboard and center console illumination is in BMW orange, yellow or red illumination won't match. A second issue is that these Beckers have a positive display (black letters on an illuminated background) whereas all displays in the BMW are of the negative type (illuminated text on a black background). Maybe I'm a bit too sensitive at these points, but (in my opinion) a replacement unit should look like it was an option on the car.


    Now it appears Becker also manufactures the Indianapolis for BMW using BMW orange illumination: BMW Radio Navigation Indianapolis (BMW part # 65 90 0 393 718 - RealOEM link & BMWfans link). The Indianapolis is the older brother of the Indianapolis Pro, but the differences are of no importance to me. The bad news is that BMW wants 750 - 800 euro for the unit and that's without GPS antenna and navigation software. A complete package goes for about 1.000 euro. The Becker unit sells for a lot less.


    The only picture from BMW I could find of the BMW Radio Navigation Indianapolis looked quite good. But... After investigation with owners of the BMW/Becker unit it turned out the picture above is fake. It's a never-produced prototype or a photoshop. Whatever it is, the 65 90 0 393 718 doesn't have a negative display, just as the Becker units. The color of the illumination is in correct BMW orange, though. Disappointment... Well there's always the older Becker/BMW Traffic Pro which has a correct negative display, but I don't really like the design of it.


    So up came the question; why not invert the display of the BMW Radio Navigation Indianapolis?


    I got myself a second hand BMW Radio Navigation Indianapolis in perfect condition. After disassembly of the display unit an electronic solution seemed impossible. I had no specifications of the display and there's no room left for any addition electronics. Thus the only way to invert the display was to swap the polarization filter. Easier said than done, because the current filter is glued tight to the display so removing it will ruin the filter. Not much of a problem. Such filters can be bought in sheets. It should be very clear that performing this modification will void the warranty, potentially damages the display and the quality of the final result is unknown until done. In other words, no reason not to begin with it :).


    That's what the internals of the removable front look like. The display fills the printed citcuit board (PCB) almost completely. The display is kept on the PCB by a metal frame. The frame can be removed by bending it's feet which hook behind the PCB into the straight position. Once the display is freed the polarization filter must be removed. Take your time for this because the foil sticks quite hard to the display. The display itself is a glass plate only about one millimeter thick which will break when you put too much force on it. If the new polarization filter is not satisfying you have a problem because the old filter is ruined by removing it.


    The filter is off! On the picture above you can also see the polarization filter sheet from which we will cut the new filter out. Not visible on the pictures, but at this point I put the removable front back together and turned the radio unit on. I didn't know the polarization direction of the polarization filter sheet, so I had to test it. I cut out a small piece of filter and rotated it in front of the active display until I got the best contrast ratio. At a certain rotation the display will be positive and 90° or 270° from that it will be negative. The why, what and how can you find in the theory behind LCD displays, but that would take us too far.


    Once the right direction is found the full size filter can be cut out of the sheet. The filter I bought has an addhesive layer on one side and an anti-glare anti-scratch layer on the other. Perfect for displays. Now it's time to clean the display to remove all left-overs from the glue, dust and smear. Such left-overs will be very visible with the new filter attached because small air bubles form around the contaminations. Ugly.


    The filter is put on the display. The label that's still on it is no issue. There's a thin protection foil over the filter which still has to be removed. You can see from the parts not covered by the label, the filter has turned the light grey display into deep blueish black. The white thing on the picture is the diffuser for the backlight.


    Time to re-assmble the whole thing and test it. Will the result be satisfying?


    I was a bit worried the backlight wouldn't be bright enough to make the letters stand out well (in original positive mode the brightness is a bit disappointing). No needs to worry, though. The display is very easy to read even in bright light. A small downside is the blueish shine of the display's black in daylight (caused by the polarization filter) whereas all other displays in the car have a brownish shine. One could live with it but still I'm on the lookout for polarization filter foil with a brownish shine.


    At night the result is very good, although the display is less bright than the BMW Professional RDS.


    Conclusion? The modification of the BMW Radio Navigation Indianapolis is a succes! The only thing left is mounting the unit in the car, but that's for later. This way my 8 gets a modern head unit with navigation (not that I need it) and mp3 playback without giving price in identity and stock appearance of the car's interior.

    update 2010: New information from Reinhard suggests the ETK may be wrong in this case (it contains plenty of errors). Taking in account the considerable difference in price between the early and the later ('92-'99) sun visors, it is pretty safe to assume the later ones are actually in leather. Furthermore, according to Reinhard Silbergrau sun visors were never used in the later cars so Silbergrau" in the ETK most likely means "Silbergrau Hell"...

    There are several approaches to this. Removing the radio is one of them.


    Once the radio is out, you can reach in, release the catch on the bottom of the OBC/MID and slide the unit out. A 5 minutes job if you have the right tools to remove the radio.


    You don't have to disconnect the radio (cables should be long enough), but if you do don't forget you will have to enter the security code again (in the case of an original BMW head unit). So make sure you have the security code card.

    I'm am confused about the sun visors in the BMW Parts Catalog (ETK)... I do have the '92-'99 sun visors in Silbergrau Hell (Light Silver Grey) leather. The ETK shows sun visors in black (Schwarz - 51 16 8 152 677 / 51 16 8 152 678), silver grey (Silbergrau - 51 16 8 156 461 / 51 16 8 156 462) and parchment (Pergament - 51 16 8 156 463 / 51 16 8 156 464). Am I correct the silver grey sun visor is not the same as the light silver grey I have? Are the ones listed even in leather?