Beiträge von sierramike67

    Bonjour !


    Une information pour vous : certaines personnes m'ont rapporté avoir grillé un fusible en installant les LED sous tension (pour savoir si elles sont dans le bon sens).


    Un conseil : éteignez l'interrupteur de l'éclairage pour installer la LED, puis allumez pour tester le sens d'insertion ! Ca vous évitera de griller le fusible ...

    To be precise, the original bulb has 2 brightness : 5W and 21W, with two pins at the bottom, one for each brightness.

    On our cars, only the 5W is wired, but on "nordic" versions, the two are wired and the 21W is used for daytime runing lights.

    There is a mod presented on this forum to add this function, with a 4 position switch used to select (None, DRL (21W), Normal (5W), Main lights). I don't know if it acts as actual standard : when you use turn signal, the DRL becomes dimmer while the turn light flashes, then it becomes bright again.

    In fact, I use a LED bulb that has the 2 brightness : 5W equivalent and 21W equivalent. On the picture you see the 5W "dim light" so it matches the original tugsten bulb you see on the other side ! So my LED bulb is compatible with DRL !!!

    Salut Antonin,

    Aucun problème !

    J'ai soudé 3 paires ce soir, s'il n'y en a pas assez ce weekend je ferai les autres et les enverrai comme convenu par la poste.

    J'aurai les kits avec moi pendant le meeting pour les remettre aux acheteurs, dont toi !

    Oui on est bien sur du 6000-6500K ! Rendu excellent dans la voiture, j'ai équipé la mienne hier soir pour être sûr du résultat ...

    Je pourrai même montrer en photos et vidéos pendant le meeting en avant-première le rendu avec des LED dans les clignottants et veilleuses avant ... ;)

    A samedi !

    Now the good news !


    I went and picked up the parcel yesterday morning, and did the testing of the bulbs yesterday evening. So I juste have now to repack the bulbs for each of you and send them out ... Which will be done ASAP !


    Just tell me if you'd like me to do the soldiering I showed in this tutorial, I don't mind doing it for you, just leave me a few days next week to do it and it will be dispatched to you !

    Hello everyone !

    This is my first tutorial about the LED installation : the one for registration plate !

    First of all, view of the resistor chosen for this appliance :


    We start with cutting the mounting holes, this is made of aluminium, a good cutting clamp to squeeze the metal, then just fold it and it will just break :


    Here is the result, without the mounting holes, put on the radiator of the bulb, exact sizing !


    Then we use bare electric wire to go around one end of the bulb and go into one terminal of the resistor :


    The we twist arround the terminal :


    And we repeat on the other end and just soldier it (be careful to well spread the welding point, not make a "ball", otherwise the welding will break with the car's vibrations, tip : soldier one end before installing the wire at the other end, it will save you time and nervousness !) :


    Here is the side view of the result :


    We soldier the resistor's terminals, and cut off what exceeds, and here we are : finished !


    Just put it in the car's diffusor :


    For information, the resistors have a 100 Ohms value, mounted in parallel with the internal resistor of the bulb that has a 72 Ohms value. This gives us a total 45 Ohms resistor for each bulb, which gives us a 3,4W power consumption for each bulb instead of 5W for classical tungsten bulb. This is not a huge gain, but it avoids showing defective bulb information on the OnBoard Computer ... And a wonderfull light !

    Bonjour à tous !

    Premier tutoriel sur le montage de LED : la version pour plaque d'immatriculation !

    Tout d'abord une vue de la résistance choisie pour cette application :


    On commence par couper les pattes qui dépassent, c'est de l'aluminium, une bonne pince coupante pour entamer le métal et lorsqu'il est bien creusé, on le plie et ça casse net :


    Le résultat, sans les pattes, et posé sur le radiateur de l'ampoule, dimension idéale !


    On utilise un morceau de fil électrique dénudé pour entourer une extrémité de l'ampoule et passer dans la borne de la résistance :


    On torsade autour de la borne en question :


    On répête l'opération de l'autre côté et un point de soudure (bien étalé, ne pas former de "boule" sinon ça se détachera avec les vibrations, astuce : souder un côté avant d'installer le fil électrique de l'autre côté, ça évitera de s'énerver !) :


    Voilà ce que ça donne vu de côté :


    On soude sur les bornes de la résistance et on coupe ce qui dépasse, et voilà c'est terminé !


    Il n'y a plus qu'à installer dans le diffuseur de la voiture :


    Pour info, les résistances ont une valeur de 100 Ohms, montées en parallèle de la résistance interne de l'ampoule qui vaut 72 Ohms, ça donne une résistance globale de 42 Ohms et une consommation de courant de 3,4W par ampoule contre 5W sur une ampoule tungstène. On ne gagne pas beaucoup mais ça empêche l'apparition du défaut ODB...

    Je me permets un petit tutorial pour le règlement par Paypal afin que je reçoive bien la somme désirée :

    Choisissez "Envoi d'argent" :

    Sélectionnez "Envoi d'argent entre proches" et "Autres"

    Dans l'écran suivant, si le solde de votre compte Paypal ne suffit pas, des frais seront appliqués pour un paiement à partir de votre CB, veillez bien à cocher la case suivante :


    Merci !

    I don't want to leave my real plate on a forum, otherwise I would put a picture of it with 2 LED bulbs, this really takes the car to a "young" appearance ! Like brand new actual BMWs ...


    The resistors can be soldiered directly on the extremity of the bulbs, or on the mounting plastic blocks, or even on the original cables using shrink sleeve ...


    When I will have everything I'll do a pictured tutorial to show how I'll mount them on my car ...

    Hello everybody!


    With Fabrice’s support, I come to propose you to participate in a bulk order of LED bulbs to fully equip our wonderful coupé, this include engine hood, passenger cockpit, trunk hood and rear registration plate.


    Little particularity: bayonet bulbs used in the reading spotlights at the front are not standard but reverse polarity. That means that the base body of the bulb should be of positive polarity where the standard is negative polarity. So I had to find a supplier that could sell me this kind of bulbs.


    Light color is « Pure white », this means that color range is real white targeted at 6500K, without blue reflects. Bulbs are selected with a number of LED and bright quality to have a good light in the car (avoid darkness like with old LED types) without being “too much” and not being “dazzling”.

    Here are the pictures to make your own opinion:

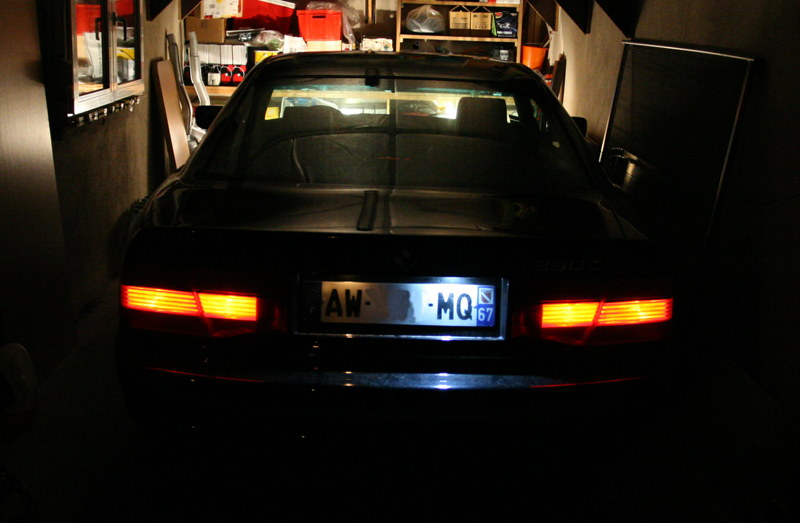
    This is the result before/after on rear registration plate:


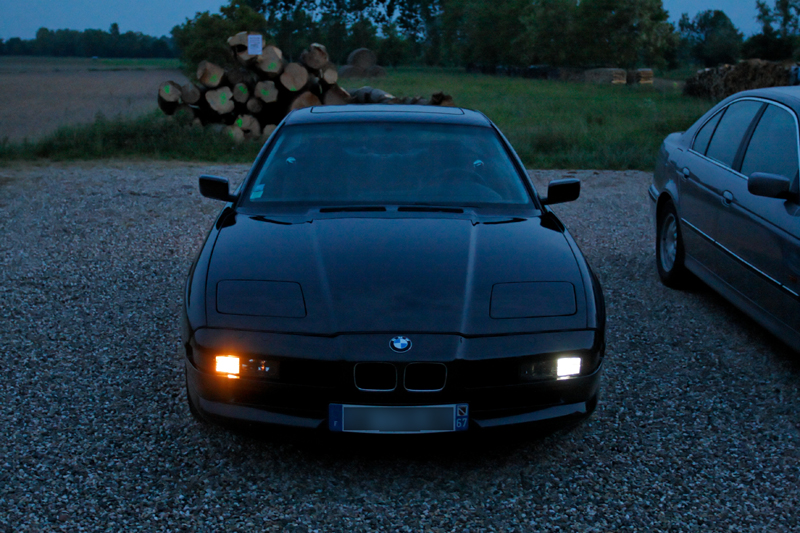
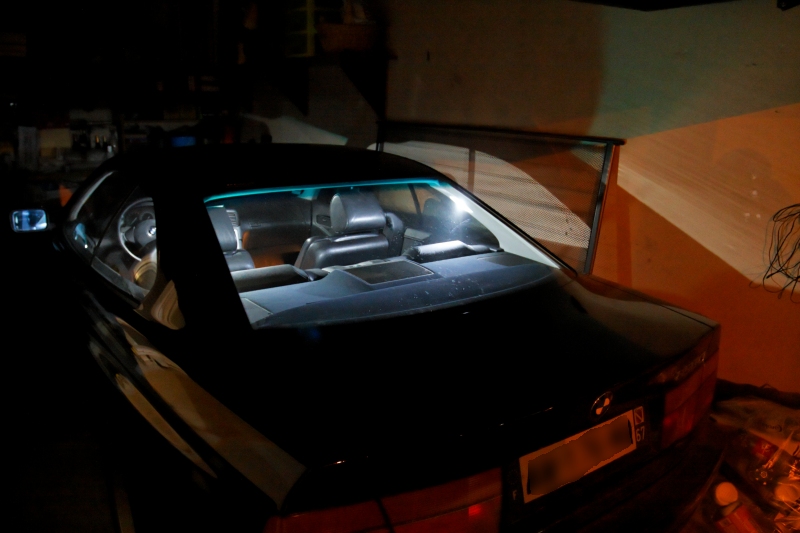
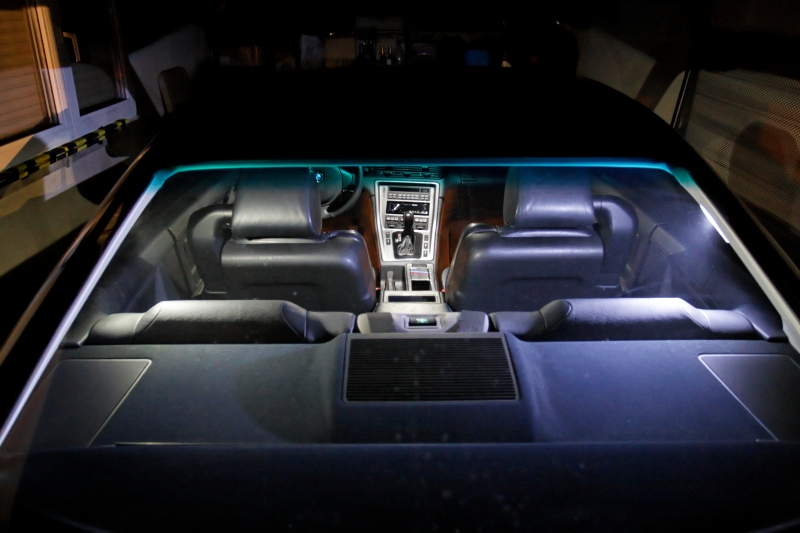
    And here is the inside result !!!


    And now the kit content :
    Kit INSIDE :
    - 15 C5W bulbs (14 to equip the car, one for spare)
    (usage: ceiling light (3), door sill (2), vanity mirrors (4), glove box (1), engine hood (1), trunk hood (3))
    - 2 Bayonet BA9S of reverse polarity
    (usage: reading spotlights at the front)
    Price : 37 € including postage (outside France)
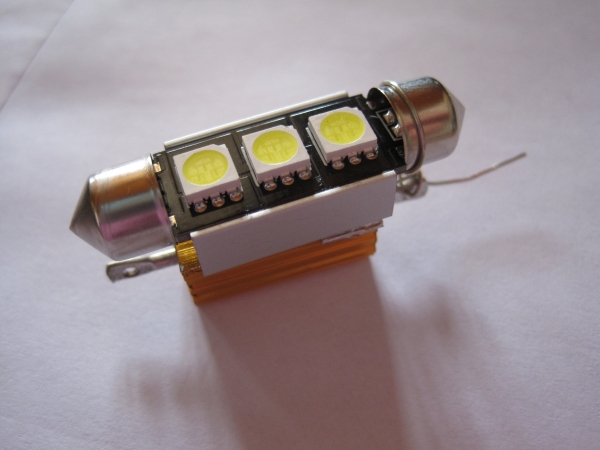
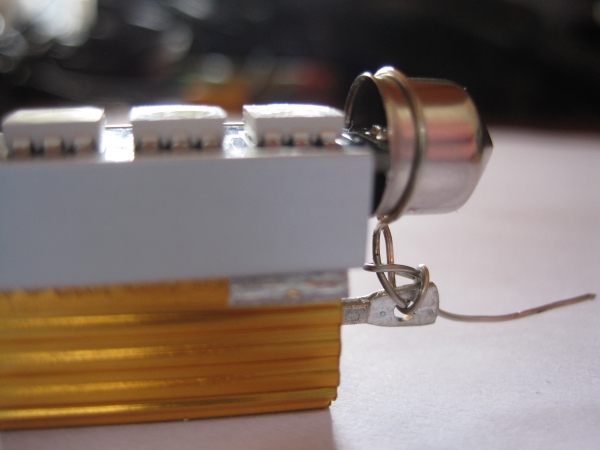
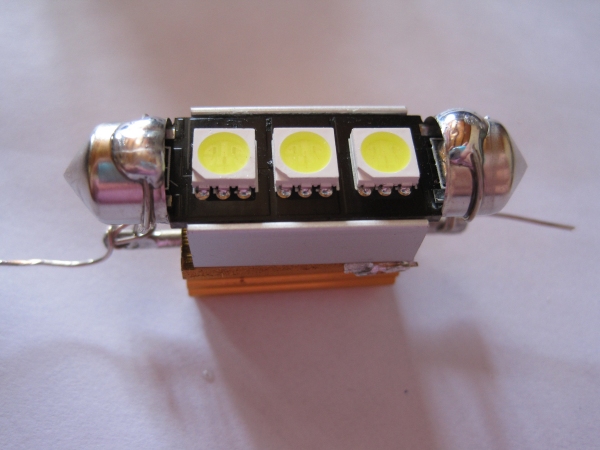
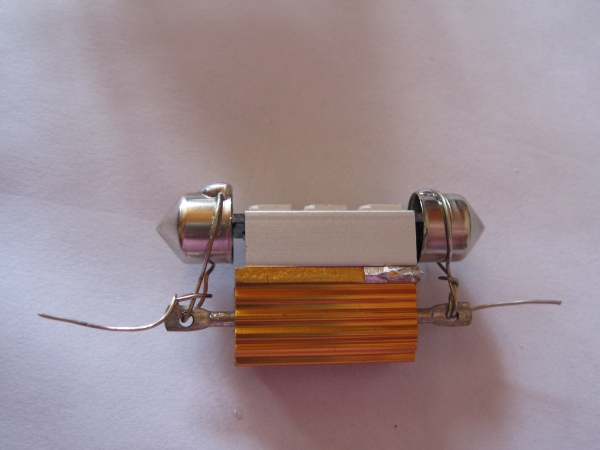
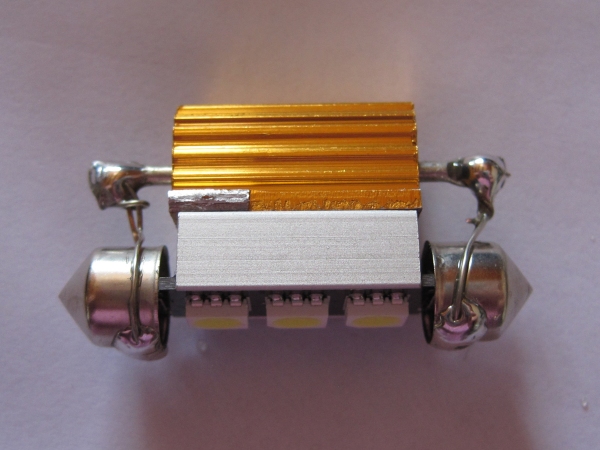
    Kit OUTSIDE :
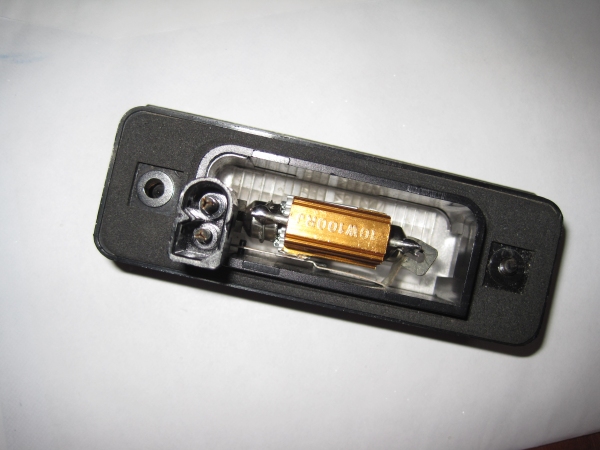
    - 2 C5W bulbs including resistors and heat sink
    (usage: rear registration plate)
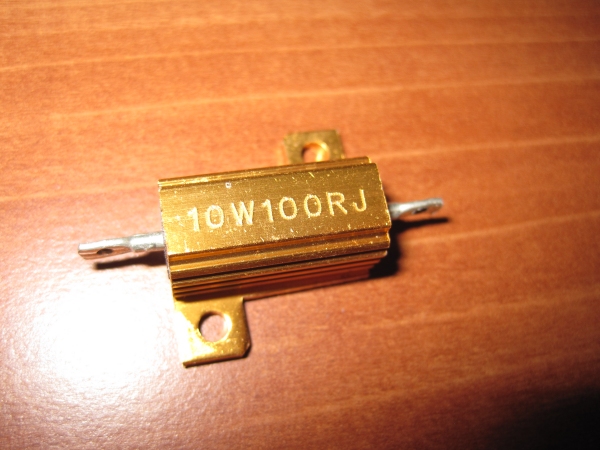
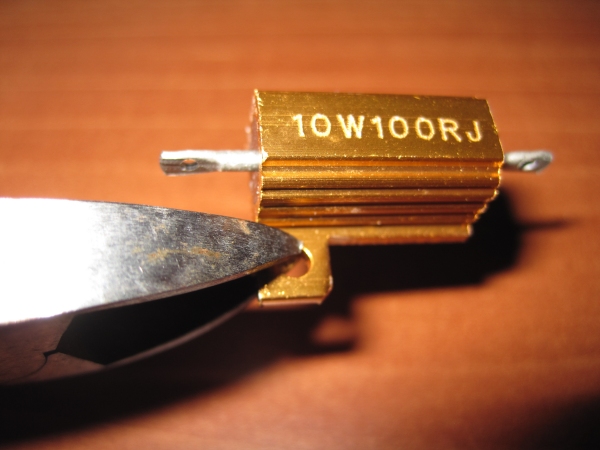
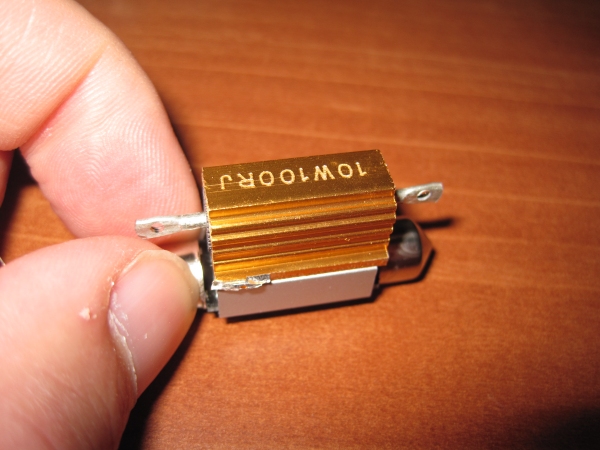
    - 2 x 100 Ohms resistors with heat sink
    (usage: avoid defective bulb detection by OnBoard Computer, this resistor value is chosen to produce only a little heat)
    Price : 19 € including postage (outside France)

    Kit FULL :
    The two precedent kits
    Price : 52 € including postage (outside France)

    I did 2 separate kits for the following reason :
    In order to use LED for the rear registration plate, it is necessary to add an external resistor even if the selected bulbs already have an integrated one. The 8 series OnBoard Computer uses higher detection thresholds than standard actual ones. Integrated resistor isn’t enough, but the combination selected produces only a little heat. (LED bulbs without integrated resistors will need other external resistors of 30 Ohms approx. and will become really hot, I did the test …). Maybe some of you prefer keep their old tungsten bulbs because of this additional resistor modification needed.


    Also, some of you may prefer other light colors for their LED than this « Pure white » and will find them by themselves. So they can still have the “OUTSITE Kit” alone.

    The FULL Kit is 4 EUR less than the 2 prices just because there would be only one packaging and one stamp!!!

    I take orders on now. First bulk order will provide 20 kits, 12 are already sold. Just decide as quickly as possible! I take payment using PAYPAL, just contact me in private to have my PAYPAL account and tell me your full name and address so I can ship this to you!


    Shipping in 2 to 3 weeks.


    P.S.: Only « Pure white » is available. This bulk order is ONLY for hoods, cockpit and rear registration plate bulbs. For other bulbs (stop, warning lights, rear fog light etc.), I’ll do other experimentations in the near future to propose another bulk order. But this will be another completely separate kit !


    My car equipped was shown on last week’s Alsatian meeting and modifications were already made to the kit so everybody will be satisfied by the « Pure white » color and the bright intensity. Experimentations were made and took me many hours to produce a kit that will fit perfectly the 8 series, so I hope you’ll be satisfied about it!

    Just for information, here you can see difference between “Pure White” bulbs (on the left) and my old selection that had blue xenon reflects (on the right). Blue reflects may change your interior’s appearance.


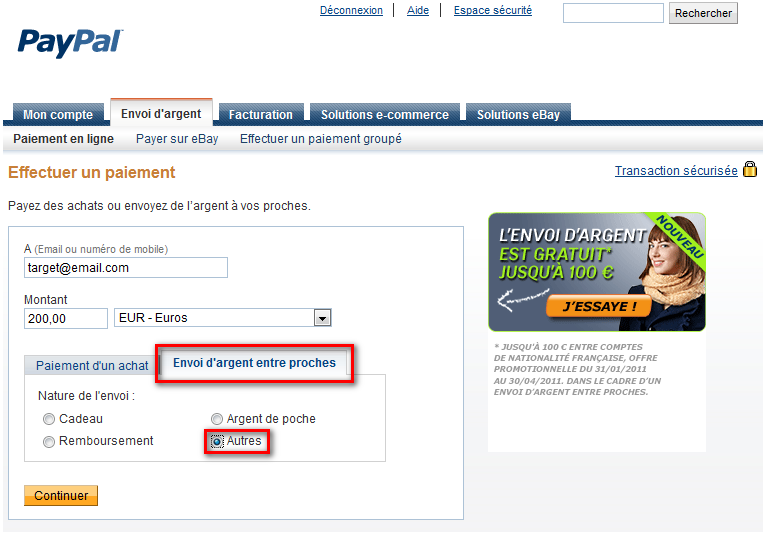
    Note for PayPal payments :

    I just add a small tutorial to avoid mistakes when payment is made with PayPal, so I get the correct amount :

    Choose "Send Money" :

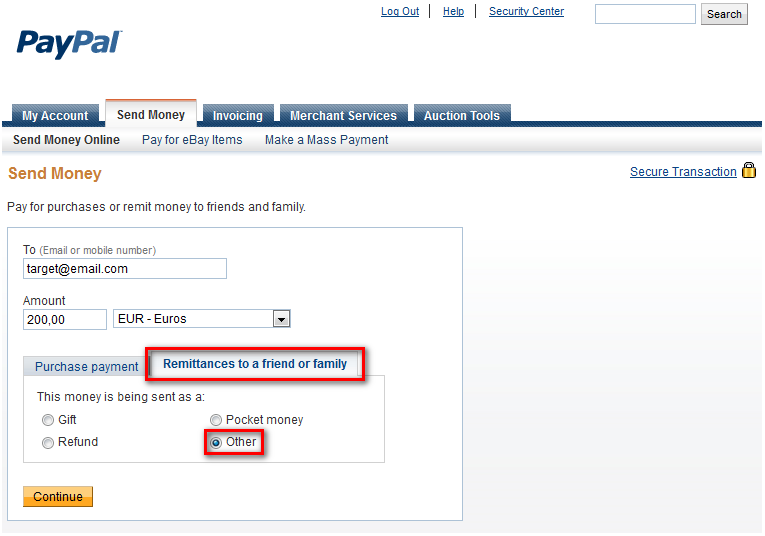
    Select "Remittances to a friend or family" and "Other"

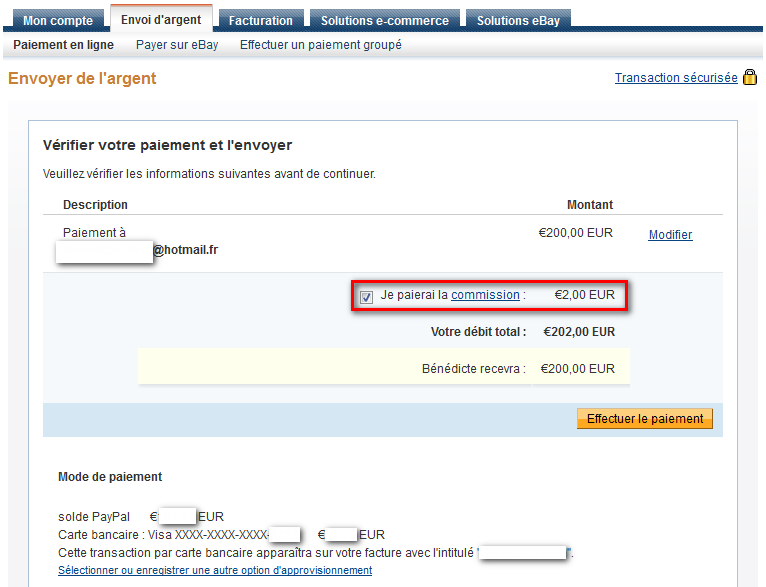
    In the next screen, if your PayPal Balance is not enough, some fees will be applied by PayPal for credit card payment, be sure to check the following checkbox :


    Thanks a lot !