Beiträge von Timm

    E31 IGNITION KEY REPAIRS
    E31 keys are pretty clever things. They consist of three separate security devices.......the cut part of the key itself, a radio frequency immobiliser and a transponder that is coded to the car.


    My main key was getting temperamental, sometimes it would work, sometimes not. Although the battery was new, sometimes the LED would not flash. Time to take it apart. No need for explanations to start with:


    In the previous picture the transponder can be seen, here is a close-up of it:


    It is a completely self-contained wireless transponder (Phillips PCF7930SA), it is not wired to anything, is completely encapsulated and can be oiked out.


    This bit appears to be the problem. This mylar film has conductive tracks that rely on the graphite to complete the circuit:


    A close look at the graphite next to the number '29' in the centre of the film shows that there are two worn areas where the graphite has been lost. The key body has two small pillars that push the film against the PCB. Here is the key body and then the PCB where contact is made:


    There's an easy fix for this one.....stick a little block of foam under the mylar film:


    The foam puts a little pressure on the film so that a new area of graphite makes contact with the PCB.


    Stuffed it all back together and all OK.


    My other key was obviously a lot more worn and the 'Lock' button had collapsed although it would still work if given a hefty squash. So I took that one apart as well. The rubbery bit had distorted so it missed the right spot:


    The rubbery bit is glued into the plastic to form a watertight seal and cannot be replaced (easily). Buying a key from Ebay (£29) would involve trying to melt the key shank off and installing the old one, possible and might be worth a go in the future.


    However, for now I'll reshape the rubber by poking a pen barrel around the rubbery prong, straightening it up and then give it a good frazzling from the outside with a small heat-gun:


    A bit industrial and quite a bit of smoke but it did work when it cooled down in the right position! Recently, I have seen the rubber parts for the E38 keys on Ebay, this might be a more sensible option rather than frying them.


    While it was apart I noticed it had the transponder missing! Although it works the immobiliser and you can turn the ignition ON, it will not turn the engine over......good thing I never relied on that then!
    All done, time for a cup of tea......

    Very true Reinhard, those gaskets can be awkward that's for sure. I replaced them and the Dowty-seals on my first E32 but it nearly killed my back and severely shortened my temper when it had a slight leak next to the timing-chain cover!

    I've never seen an M60 or M62 that doesn't have a slight weep from the rocker-cover-bolt Dowty-seals, I guess that the positive pressure in the crankcase doesn't help, especially when giving the engine some welly. Of all of them, the 8-Series looks the closest to being dry, so that's one job I won't need to do.....thank goodness for that, I'm getting too old!

    Yes, it looks like the grilles on my 840ci are glued on with some sort of silicone compound! It certainly would be easier to replace the bleached parts (the camera makes them look a lot worse than they were), but where would you stop?

    Many other parts suffer the same fate, door handles, the number-plate surround, the black parts of the rear clusters, side-repeater surrounds, the plastic at the bottom of the windscreen, etc. By the time these have been replaced you will have paid out a couple of hundred quid. Teak oil makes them look like new and stops them being porous. I'm not sure why it works, but it does!

    I just tried this plan out once when I was treating the garden furniture, I was fed up of continually 'back-to-black'ing the rubber and plastic trim on my wife's Volvo and gave it a go. It works especially well on the awful plastic used on the old Vauxhall Corsa's. I did all the plastic on a '96 Corsa today where the trim had badly faded. It looked like new afterwards and I was really chuffed........

    BMW E31 CD CHANGER REPAIR
    Here's a fix that I first did on my E32, on my first E38 and now on my E31! This is for the standard 6-CD changer that is fitted to the 8-Series E31, the 7 series E32's and E38's....the cartridges look like this:


    The fault message is that you have 'NO DISK' even when the cartridge is full of CD's. If you watch the cartridge as you stick it in the changer sometimes one of the trays will not be selected....OR.....they all get selected but when you go to play the CD there is a long wait and you get 'DISK ERROR' or 'NO DISK'.


    This can happen at random intervals, sometimes one CD works, next time more or none at all.


    The problem is down to the ball-bearings that are fitted to the cartridge, these are used so that only one tray can be selected at a time. There should be FIVE ball-bearings, if you have the full complement you are usually OK, if you have NO ball-bearings you are usually OK. The problem is when you are one ball short of a full set. When this happens the remaining ball-bearings trundle around and block the trays movement, sometimes during play, sometimes when the cartridge is first inserted.


    When I did this on my E32 I carefully measured the remaining ball-bearings and got replacements by smashing ball races until I got ones the same size! However, if you just take the ball-bearings out it seems to work just as well so today we are going to oik then out.


    OK, hoik the cartridge out of the changer and remove the three screws:


    Remove the top panel and this is where the spring-clip lives that holds the bearings in place and exerts a controlled pressure on them:


    Lift the copper strip, the ball-bearings live in here:


    Even from this picture I can tell that I'm a couple of ball-bearings short, the last bearing should be visible. At this point it is possible to pour the bearings out, unfortunately mine were well stuck with old grease.
    So, lift the first platter up and out and then remove the hinge pin:


    Rotate and then slide each of the platters out (I should have removed the CD's really :(


    If the plastic fulcrum pops out this is how it goes back together:


    The side-view of the remains of the cartridge shows the remaining three ball-bearings in-between the platters:


    Oik the remaining bearings out and refit the platters. Fit the hinge-pin back in place. I refitted the copper strip just in case I needed to find new bearings but there really is no need for it and then refit the lid:


    ...And that's it, after putting the cartridge back in I got the full C.S.N&Y, Free, Vangelis, Floyd, Chase and Tori Amos.....as much as I like The Division Bell there are only a number of times you can listen to it!


    P.S. I have no idea where the ball-bearings go! My E31, E32 and E38 have all had bearings missing....but no gap where they could have escaped....it is one of life's mysteries............

    BMW E31 V8 Noisy Tappet Cure


    There has been many comments about noisy tappets on the V8 engines, only recently have I come across the official reason for this problem and how to fix it where possible.

    The M60 and M62 engines use Hydraulic lifters which take up all the back-lash between the cam and the lifter. To do this the lifter cavities must be completely full of oil, if there is any gap then the cam clouts the lifter instead of smoothly following each other. There are a number of reasons that the Hydraulic Valve Actuator (HVA) gets air trapped:

    The oil is too viscous (especially when cold)
    Frequent short journeys
    Sharp cornering with low oil level

    Frequent short journeys where the engine oil does not reach temperature means that the oil can absorb air when it contracts in the supply gallery. The air is normally expelled when the oil reaches high temperatures but where the oil never reaches high temperatures the air can be a problem, especially where it has to replenish the oil in the HVA elements. Small amounts of air are not really noticeable but where it builds up over a few short journeys the HVA elements will begin to be noisy.

    The sharp cornering problem when the oil level is low is more obvious, the oil-pickup slurps air instead of oil and this is passed to the HVA elements where it can be trapped.

    Where the oil is too viscous it cannot replenish the HVA cavities especially when the engine is cold. The oil in the HVA cavity contracts as the engine cools after a journey and in this way air finds its way into the system, if the oil is too viscous it will not immediately replenish the cavity.

    How to fix the problem

    Firstly, get the correct viscosity oil, you will not cure the problem if the oil is too viscous.

    The procedure is pretty simple and is designed to bleed the HVA elements:

    Check the oil level, replenish if necessary. Run the engine at idle and listen for noisy tappets, if the tappets are noisy run the engine at 3000RPM (with the car stationary) for 3 minutes. Return the car to idle for 30 seconds (to achieve minimum oil pressure) and listen for noisy tappets. If a tappet is still noisy increase engine speed to 3000RPM again for 3 minutes.

    It is possible that you may have to repeat this procedure 5 times to bleed the tappets correctly. If the problem persists there may be another problem but in most cases this will provide the cure.

    BMW E31 RESTORING THE FRONT GRILLES


    The front grilles on my E31 were pretty badly faded, in the past I've tried all sorts of off-the-shelf plastic restorers but they always smear everywhere and only last for a couple of washes. Fortunately, a while ago I tried using a new plan which gave excellent results and has not deteriorated (6-months so far).


    Here are the front grilles on the E31, they are pretty bleached and porous:


    So, after successful refurbishment of the wife's S40T out comes the Teak oil again:


    A couple of coats later and all is lovely and waterproof again. The good thing about Teak oil is that it dries to a waterproof matt finish that never bleaches!


    A couple of days later I did the air-intake grilles. As my Cuprinol had gone a bit gloopy I bought some Ronseal hardwood furniture oil instead. It worked just as well and was dry in a couple of hours. This picture shows the difference between a treated and a non-treated grille:


    All done, time for a cup of tea......

    BMW E31 M70 M73 V12 ENGINE - DISTRIBUTOR LEAD ORDER


    Ever popped a couple of leads of the distributor and then worried that you got them on in the wrong order? Rather that fire it up and have the air-box launch itself over the fence have a read of this first!


    The V12 has two distributors with the engine effectively run as two straight-6 engines. Although the distributors are mounted 180 degrees rotated in respect to each other (they both have the leads pointing towards the outside of the car) the rotor arm is also rotated 180 degrees with respect to each other. Both rotor arms rotate clockwise when viewed from the front (as does both cams and the crankshaft).


    Firing order RHS bank = 1 5 3 6 2 4
    Firing order LHS bank = 7 11 9 12 8 10


    The RHS bank = 1-6
    The LHS bank = 7-12


    It now gets a bit more complicated. The distributor caps do not fire from top to bottom, they go like this instead:


    The pulse generator goes on plug 6, so this is the lead order for the RHS bank:


    As the rotor arms are fitted 180 degrees differently LH bank to RH bank this is the lead order for the LHS bank:


    BMW E31 840i and 840ci SPARKPLUG REMOVAL - MISFIRE REPAIRS (M60-M62)
    This procedure shows how to remove the sparkplugs on the V8’s and clear the oil from around the sparkplugs and HT stub leads. Most of the V8’s suffer from this at some time or other and the symptoms are very similar to Nikasil wear in that the car rocks at tick-over. There often is a pronounced lack of power that can be intermittent, getting worse in damp conditions. It differs from Nikasil wear in that the power loss is evident at all revs whereas Nikasil has a pronounced lack of power at low revs and is less significant at higher revs. This fault and a split PCV valve (aka bellows) are quite simple faults to fix on the V8 and you can often pick up a rocking V8 for next to nothing because it is perceived as Nikasil wear.


    Oil down the sparkplug holes on V8's is quite common, just a small leak from the rocker cover bolts or gaskets and the oil has no-where to go except for around the plugs. Although oil is an insulator, it damages the stub HT leads eventually causing the rubber to disintegrate and allowing the spark to travel through the rubber and straight to the head. Before the complete failure of the rubber it becomes loose on the sparkplug and sparks can travel down the side of the insulator. With the high compression ratio (10:1) on the V8 the spark likes to go anywhere except across the electrodes of the plug!


    The oil tends to accumulate on the rear pair of cylinders initially due to the backwards cant of the engine but after a while they will all get filled up and certain gasket failures will fill up odd plugs rather than travel all the way to the rear cylinders.


    Repair can be as simple as clearing the oil from the apertures and fitting 'O' rings to the stub HT leads that have been damaged. Where the stub HT leads are disintegrating they can be replaced as separate items from BMW for around £5 per coil, there is no need to replace the whole assembly.


    These instructions include sparkplug removal.


    First of all, you need these tools; all except the 10mm socket and wrench are available in the normal E31 toolkit........


    Start by removing the top and side covers. The 10mm nuts are covered by little plastic covers, which can be levered out. After a while, these get quite brittle and the clasps may snap off so lever them carefully. Replacements can be bought from BMW if you break them.


    Remove the soundproofing from the top of the manifold....


    Start with the drivers side bank........This is what is under the side covers.......four HT coils each held in place by two 10mm nuts with captive washers.....


    A clip holds on the connector on each coil. Get your fingers behind the clip and pull it towards you as shown. As long as the clip is fully forward, the connector should lift away from the coil. Leave the connector sitting on top of the coil.....


    Undo the two nuts on the coil and put them somewhere safe, you do not want them falling down the sparkplug holes later on!
    Pull the coil upwards.... they should come off with a 'pop', if they don't the rubber is probably failing.....


    Here is a picture of the head after the coil is removed showing evidence of oil. There is not much here; most of it had ended up on the back plug whereas the other three are dry…..


    Remove all the coils (work on one bank at a time to reduce the possibility of something disappearing down the bores). Make sure that you indelibly mark the coils with the cylinder number; they should go back to the cylinder they came from. Here's a picture of the coil stub HT lead that is furthest back....Yep....covered in oil!.......


    Before the plugs can be removed, you need to clear the oil from the plug(s). To do this remove the insert from the plug spanner.....


    Wrap a single layer of cloth around the spanner and stuff the spanner over the plug. Keep lifting the spanner and moving the cloth to a new dry bit and stuff it back in again until most of the oil is removed.....


    Stick the spanner back over the plug without the cloth and ensure the spanner does not look like this!.....


    You will not get all the oil out but most of it ends up on the sparkplug threads when you remove the plug (at least it won't seize up!) .......


    On my car the AC pipe work gets in the way on cylinder 1 and I can only get the plug spanner on when the insert is not fitted to the spanner. So I always start with cyl 1 and then refit the insert for the rest of the plugs......


    With all the plugs out you get to work removing all the oil from the cavities. Use the other end of the sparkplug spanner and cloth to get to the bottom of the sparkplug wells. Use your fingers and a cloth for the rest of it......


    Clean all the oil you can from the stub HT leads. Give them a good stretch.... if they survive the rubber is probably OK. However, the lead must fit tightly over the plug and the plug should come out with a 'pop'. If the rubber is slightly loose but does not disintegrate then a repair can be made by fitting a couple of 'O' rings on the lead as shown. Ensure it is a tight fit again. If the rubber is beyond repair then they can be obtained separately from BMW.....


    Fit four new plugs not forgetting that cylinder 1 needs the insert removed from the plug spanner (at least it does on my car)......When you refit the coils guide the stub HT lead over the plug and place the connector over the socket, as you push the coil down push the connector on at the same time, this reduces the strain put on the wiring......


    Make sure each clip is fully home on the connector. Do not over tighten the nuts on the coils; the studs are in an aluminium casting. If a stud does pull out, coat the stud with Loctite 270 and screw it further in than usual, allowing just enough thread to fully fit the nut. Loctite 270 cures better with heat and will lock fast when the engine warms up. Note where the earthing strap connects to coil number 2, it must go back in the same place it came off.....


    Once all coils and nuts are refitted stuff the plastic cover back on to stop anything falling on the cylinder head. It's a bu$$er to get a nut back out when the coils are re-fitted!......


    The passenger bank is the same process except that the spanner fits all the plugs with the insert in place.....but you still need to take it out to get oil out from around the plugs.


    When both sides have been done refit the soundproofing over the inlet manifold and carefully align the four studs into the centre cover. DO NOT OVERTIGHTEN the nuts on the centre cover as you will find that the studs will rotate and tear the rubber mounts that bond the two halves of the raised stud assemblies. Refit the plastic covers over the nuts.......


    All done, time for a cup of tea (and a Osteopath as bending over the engine will kill your back)........

    Thanks Reinhard,
    By accident I checked this as the engine was not running when I was 'working the oil in' by pressing the brake pedal. I was impressed by how many times the brakes worked compared with an E32 which fizzles out after the 10th press!

    The brakes feel a lot better now, if I had to do it again I would use LM grease instead of oil, I reckon I could just get the grease on with a bit of fiddling......

    Thanks!


    Thank you for the welcome. I have only just bought my 840ci, and like most people, have been wanting one for years. I've always been put off by the the price of them compared to the E32 and E38....but, you only live once so off I went and bought one.

    Once in the car I was immediately reminded of my V8 E32 7-series, there are so many similarities and I felt 'at home' straight away. However, the 8-series gets around the corners a darn sight better even in comparison to an E32 V8 sport model. The 840ci is very impressive.

    My E31 website has only been running two weeks, whereas the E32 and E38 sites have been going for 18 months or so. Fortunately a lot of E32 and E38 repairs are relevant for the E31 (especially the V8's) so I had a lot of material 'stored up' and ready.

    This website looks great, a lot of friendly people....just as a Forum should be!

    The V8 M60 engine fitted to the E31 840i's (not ci), E32 730i's and 740i's and in the 1995-1996 E38 730i's and 740i's can suffer from flooding under certain conditions. The usual cause is starting a cold car and moving it a few feet and then stopping it again. This often causes no problems, but where the battery voltage is low and the air temperature is hot the engine floods and will fail to start again. Repeated attempts to start the engine just results in a flat battery, even jump-starting the engine fails.


    The reason for this is that the DME 3.3 system injects petrol in all cylinders when the ignition is switched ON, this fuel is used to aid starting. Unfortunately, if the engine is only run for a short period the over-rich fuel mixture washes away the film of oil that lubricates the cylinder walls. The next time the engine is started a number of factors will not allow the engine to fire. These are:


    The charge compression is low due to the loss of seal between piston-rings and bore
    The battery voltage is reduced because the alternator failed to replenish the charge from the last start
    The low battery voltage means that the crank speed is low and compression is further lost
    Every time the engine is cranked an additional quantity of fuel is injected making the mixture far too rich


    By the time a few starting attempts have been made the inlet manifold will be swimming in fuel, the engine has low compression and the battery will be flat. There is no chance of getting the engine going in this condition. Unplugging the Fuel-Pump-Relay does not help as there is a lot of fuel still under pressure in the fuel-rail. There are quite a few ideas around of how to get the engine going again, some of these are very complicated but the one I have found to work is detailed below. It does involve a bit of work but I guarantee that the engine will start (eventually):


    1) Start charging the battery, a 10A charger will take 11 hours to fully charge the 110Ah battery
    2) Remove the spark-plugs from ONE BANK only
    3) Squirt a few drops of engine-oil down the bores of the bank that you removed the plugs from
    4) Clean the spark-plugs that were removed
    5) Replace the spark plugs and coils


    You must wait for the battery to be fully charged before an attempt is made at starting the engine, do not 'have a go' before as you will end up back in the same position again. Jump-leads will NOT supply a sustained current for long enough. Once the battery is fully charged, connect jump leads to the B+ terminal in the engine bay and the ground point nut. Start the donor vehicle and have a helper keep the engine speed around 2000RPM, wait 10 minutes before doing anything else, the BMW battery must be absolutely fully charged.


    Right, time to start the engine! Put your foot on the throttle and push it to the floor, do not let it go! It is absolutely imperative that the car is turned-over continuously, do not try for a few seconds and give up. So, ignition ON and start cranking the engine, DO NOT LET GO OF THAT KEY! DO NOT LIFT THE THROTTLE!


    What will happen is the car will fail to fire immediately, but after a while a cylinder or two will start to fire and the cranking-speed will increase, a few seconds later a couple more chime in. At some point the engine will exceed the speed of the starter-motor, but make absolutely sure the engine is going fast enough before releasing the starter. DO NOT LIFT THE THROTTLE, at this point the car will be emitting huge clouds of black smoke, this is quite normal. Keep your foot on the throttle until the revs reach 5000RPM and then just feather it to keep the revs at that speed.
    What you will find is that you will need to lift your foot slowly to keep the revs at 5000RPM. Keep the revs up for around a minute and make sure the exhaust is clear before slowly lifting the throttle, making sure all the time that the engine keeps running.


    It may take quite a while for the engine to keep running and may well fail to fire on all eight cylinders for 10 minutes or so, sometimes even longer. It is important that you do not stop the engine again until all 8 cylinders are firing. Allow the engine to reach full operating temperature, disconnect the jump leads and then drive for 10 minutes or so. That's it, fully running again!


    Note: The same symptoms can be due to a failed crankshaft sensor. The easy way to differentiate between the two faults is to remove a sparkplug. If the plug is wet and smells of petrol the engine is flooded. If the plug is dry then the crankshaft sensor is suspect. When a crankshaft sensor fails the fuel pump does not run and the injectors do not fire.

    The windscreen wipers on my E31 were pretty slow and failed to park (after wiping they should return to the bottom of the windscreen). They also only wiped a reduced arc of the screen. The combination of these faults indicates general wear in the linkages. It is possible (but expensive) to replace the wiper mechanism, but I decided to lubricate the system first to see if it improved matters. I am using engine oil, don't try WD40 as it tends to wash away any lubricant remaining, and then it evaporates. You need something to squirt the oil a couple of inches.
    It is quite awkward to lubricate all the linkages, fortunately it is the exposed parts that suffer from seizure. You need to operate the wipers to lubricate successfully, to reduce the strain on the wiper mechanism trap a microfibre cloth under each wiper to reduce friction. Start by removing the microfilter covers 3 bolts using the 10mm box-spanner and screwdriver shaft from the toolbox:


    Here are the lubricating points:
    This is the rotating output from the motor; lubricate the shaft and the fulcrum as it rotates (takes a few practises)


    Lubricate the upper and lower bearings of the passenger wiper:


    Finally lubricate the upper bearing on the drivers wiper. This needs quite a bit of oil to form a pool around the wiper bearing. After a few more wipes it will be noticed that the wipers run faster and wipe a greater arc. Turn off the wipers and allow them to park. Push the wipers down to the bottom of the screen. Run the wipers again and then park and push down. Repeat this until the wipers park correctly.
    All done, time for a cup of tea.
    P.S. A lot of the oil ends up on the exhaust....don't panic if things smell a bit hot!

    I've re-gassed loads of cars now using the method shown here:
    7-Series A/C re-gas
    However, on the E31 the compressor-clutch is not cutting-in, this one is going to take more than just gas! There is a possibility that there is a massive leak somewhere, but I'm not put off. I'm going to fill the system with all sorts of stuff this time just in case.
    I start off with some leak-stopper, give it a damn good shake. turn the tap fully anti-clockwise, fit the can to the fitting and fit the other end of the pipe to the low-pressure connector on the A/C system:


    Fire the engine up, switch the A/C ON at low speed. Now screw the tap fully into the can and then slowly unscrew again, this will let the leak-stopper into the system. Keep an eye on the pressure gauge to make sure the safe pressure is never exceeded. Heat up the can in a bucket of hot water to make sure all the stuff is expelled from the can. Screw the tap fully in again and remove the fitting from the A/C connector.


    Open the tap to expel any charge left in the can (be careful, red-stuff might come out). Remove the can from the fitting and then do exactly the same with the Pag-oil. Always make sure the safe pressure is not exceeded. I was glad to see that the compressor-clutch has now kicked-in and the A/C system is sounding OK. The auxiliary-fan has also started, this is great news as it means that there is not a massive leak and the system was just a little short of gas.
    Now it is time to re-gas, I've got three cans of the stuff just in case. When re-gassing make sure you open the tap slowly. Don't be fooled by the gauge quickly reaching the green area, this is just the back-pressure of the gas passing the pressure-fitting that is fitted to the A/C system. The plan is to keep the pressure out of the yellow area while the gas is going in. Here is the first can going in:


    The can needs warming up as it will quickly reach freezing point and your hand will get stuck to it. Keep closing the tap and seeing if the pressure stays up, normally it will decrease and more gas is needed. Here is the second can going in, the tap is closed and the pressure has stabilised....we're done!


    I still had some gas left in the second can, so I opened the tap with the other end disconnected until it stopped hissing. Even with the other end disconnected you will notice that when the tap is opened the pressure gauge will move just short of the yellow area. This is why you have to take it easy when re-gassing to ensure the correct pressure is reached.
    Result? Ice-cold air, the E31 can really bung out some air!

    The brake feel on the RHD 8-Series is awful, a light poke gives the feeling that the brakes have given up or that the brake pads are made of granite. A harder poke and you are being thrown against the seat-belt. There is no doubt that the brakes work OK, it is just that they don't feel like they are working to start with. The problem is more noticeable at slow-speeds, for instance, when driving the car around a car park.
    There is a good reason for this.....the brake pedal is on the right-hand side of the car and the master-cylinder is on the left! The shape of the chassis and the size of the V8 (and V12) means there is no room for the master-cylinder in front of the driver. Instead, just like on my old E28, there is a system of linkages between the pedal and the master-cylinder that looks like this:


    The difference between E28 and E31 is that on the later car, the linkages are inside the car whereas on the E28 they are fitted to the engine-side of the firewall. The plan is to lubricate the linkage bearings, the problem is getting to them!
    Here we go then, let's start with the linkage to the master-cylinder on the passenger-side. This is going to hurt a bit as it involves a lot of kneeling and contortions. Start by removing the passenger kick-panel, this is held on by two plastic fasteners at the rear of the panel:


    The kick-panel has a lip which hooks over the plastic side-panel to the left. The kick-panel also has the 'Lady Of The Bongs' sounder which has two connectors plugged into it, remove both connectors:


    The kick-panel can now be put aside. In the top-right of the foot well you can now see a black cover that encloses the master-cylinder pivot and linkage. It has three clips, top, bottom and one on the right:


    Pull the cover out at the bottom, then the top and then pull it to the left, it's a bit fiddly but nothing like as tricky as it is to get it back in again! Here's the cover after removal, not where the clips are:


    Here is what the mechanism looks like:


    All the pivots need oiling, there are four areas of which only two are seen here. Refer to the first diagram, parts 7 and 15 need oiling at the top and bottom of the shafts and at both linkage points. Before doing this ,'borrow' a few tea-towels to cover the carpet, they need to be left in place for a while.
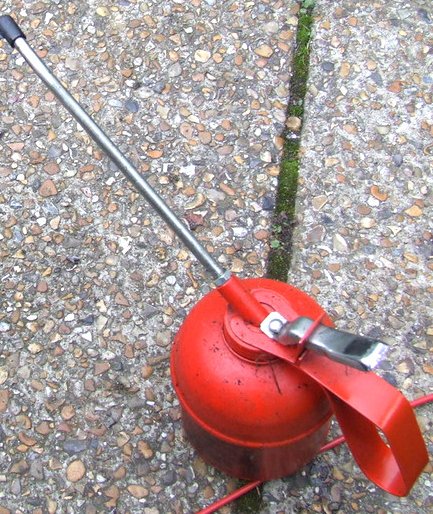
    It isn't easy getting the oil in the right place and there will be considerable dribbling so be prepared. I used a standard oil-pump and new engine oil. I wish I used something else because it does smell a bit! After oiling try and wipe off the excess oil otherwise it will drip for days:


    Right, that's one side done, leave the towels in place and move onto the drivers side.

    Remove the side-carpet, it is held on by a single screw (just like the E32):


    Remove the plastic fasteners at the top and bottom of the kick-panel, they need to be rotated 90 degrees:


    There is also a single self-tapper slightly right of the centre of the panel, remove this. The panel (like the passenger panel) is hooked over the plastic side panel, a bit of wiggling and it's out:


    The self-tapper was fastened to the foot air-vent as shown here:


    There are five places to oil this time (check the diagram on the previous post). The main pivot is difficult to get to but persevere. There will be oil running down the brake pedal so be prepared for a lot of mopping up:


    Once everything is oiled, pump the brake pedal loads of times to work the oil in. Do a final mopping-up and replace the covers. The passenger-side master-cylinder cover is a real pain to refit but keep going and it will clip into place in the end!
    The results were excellent, at last there is some feel to the pedal and the driving experience is so much better. It still isn't as good as the 740i but that has the master-cylinder in the right place! Of all the repairs I've done this is the one that really makes a difference.
    Time for a cup of tea and a hot bath, this repair is a real crippler.........

    This was the first repair on my E31. It was great fun on the way back from the dealers when I tried to clean the windscreen, a little dribble of water plopped on the screen and the wipers managed to smear it across a very small arc of the screen...great!

    The first place to start is the main wash pump which is fitted to the side of the larger washer reservoir (the small one is for the intensive wash). Pulling on the washer stalk made the main wash pump run so there was no problem there. The main problem was that there was no water in the main reservoir, and bizarrely, no method of filling it up! Here's a picture of the main reservoir (I'm fiddling with the intensive wash pump):


    There is only a small hole in the main tank, no lid or cap. I had to look in the owners manual to find that the filler is in the boot....so is another main reservoir! So, off we go, remove the boot carpet and spare wheel and you will find a circular reservoir (apparently only on models that have headlight washers). The system works by pumping fluid from the boot into the reservoir in the engine bay, it does this under control from the General Module when the upper tank level is low. When you operate the washers the upper pump runs until the level drops and then the lower pump keeps running (even when the washers stop) until the top tank is half-full again.
    First thing to do is remove the connector to the pump and try sticking 12V up it (polarity doesn't matter):


    I'm using a portable 12V battery but a pair of wires from the battery in the boot will do. Well, it clicked a bit but failed to go round so I tried 18V from an electric-drill battery, it did the same, clicked and that was it. It's time to oik out the pump. Find yourself a 5mm drill, you can use this to block up the hole that the pump leaves behind (I wish I had thought of that earlier).
    Fit the connector back on the pump, it makes it easier to get a grip on the pump. Disconnect the pipe that comes from the pump where it goes into the fitting at the base of the boot. Pull the pump upwards and rotate slightly ant-clockwise so that the pipe clears the tank....and out it will pop. Put it to one side and plug the hole with a 5mm drill, there is a lot of water in that tank!


    I didn't think to put a drill in the hole at the time, fortunately the boot has a drain-hole. Pump motors often seize up and there is a simple way to get them going again as long a they have not burnt-out. First pump some oil into the pump:


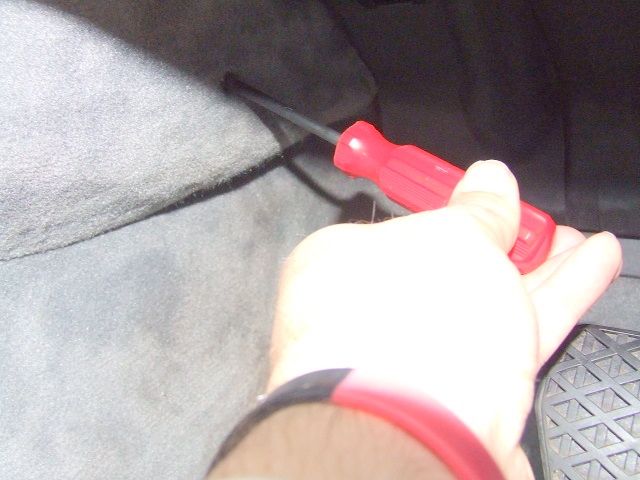
    Now give it a good clout with the fat end of a screwdriver. Then stick a few volts in it. If it doesn't run, hit it again:


    And off it goes! If yours doesn't run, you can rotate the pump-shaft with a pair of tweezers. Here, I'm giving the Intensive wash pump a good tweezering:


    Don't run the pump dry for too long, just give it a few seconds to get up to speed, fill it up with oil again, and then spin it for a few seconds. Now remove the drill from the hole and immediately fit the pump back in the reservoir. Reconnect the pipe to the fitting at the base of the boot. Refit the connector and give it a go:


    All done, time for a cup of tea......