LEDs in Front Sidelights

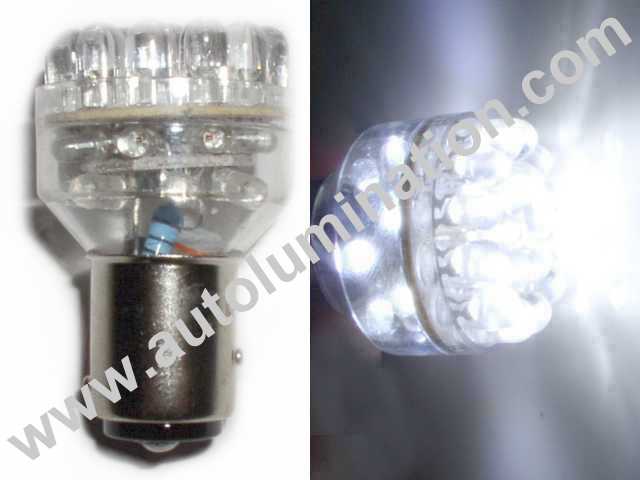
  • Ok, so you have sowed the seeds of inspiration regarding the LED light clusters and I decided to follow your lead. Got all the tackle needed to grind off the bottom row of LEDs (Dremmel/vice/magnifier) and thought I'd just follow your basic instructions in the HID thread.


    I know in principle what to do but seemed to have fallen at the first hurdle. After carefully grinding one LED off, so that only the metal hoop contacts are present, I tested the Bulb and as expected all but the modified row of LEDs worked. So I then soldered a 200 ohms 1/4W resisitor across the contacts replacing the removed LED and tested again. The other two still didnt work. I guess I've overlooked something blindingly obvious, but it's a long long time since I did electronics at school !!!


    Could you point me in the right direction please. Cheers, Tony

  • Hi Tony - You can check if the LEDs have been fried.
    Just bridge the ground off contacts with something metal - for the short test duration you won't fry the leds even with no resistor.
    For this just bridge all 4 or at least two diagonally opposite legs where one of the Leds has been ground off. I used the ultimate precision tool for this - a big spanner.
    The resistor is best soldered diagonally - that is connecting diagonally opposite legs.
    If you solder it at 90 degrees to the row of leds you won't be completing the circuit and might think it's bust.
    There are 4 legs per LED, but they're for mounting purposes only - if you look closely you'll see in the LED housing where the two legs are in fact one contact.


    Other led clusters may also work, but I was careful to choose one with most leds on the side - it's the side leds which make use of the reflector and give that OEM look. However - remember - I'm no expert.


    One note of interest - I am now getting a sidelight failure warning on the OBD. Am now working on the right resistors to wire across the contacts to prevent this (will be easy to fit - behind light unit - and I'll post info when done - will cost about 80p). Just too much to do and too little time.

  • The bulbs on Tony's link look superb - if they work it'll be a better solution than my original try.
    Might even get some myself - is ordering from US a problem?

  • thanks UKzero for the pointers. Whilst I have the others on order I still want to do the cluster mods for experience, and because I know when done right they look great (as in your posted pics). The reason I think I fried the first one was that after I tried the resistor, not diagonally as you mentioned, the row didn't work - whilst all the other rows and the top ones did. So, like you, I bridged the gap with a screwdriver and tested again...... but not for the 'short' time you said, more like for about 3 secs... in which time they flickered and then went off with the accompanying puff of circuit smoke :lol:


    Still got one more to play with and will follow your instructions a bit more carefully, plus I have to use these resistors that I bought from Maplin for something :D They were 13p each or 6 pounds for 420 of them in assorted ratings. You can guess which I bought ! Looks like I'll have the correct ones needed to sort the OBC out when I get the error message too.


    Regarding the US ones. I spent an hour or so searching Google for '1157 White LEDs' and a whole host of sites came up. I settled on the above linked ones because of their tapered shape and the side LEDs which hopefully will use the reflectors in the housing. Ordering was a doddle. Simply put 2 of them in your cart, then add International Shipping option for US$3.00 extra and pay with PayPal. Should have them in 5 days. Results to be posted here in due course.

  • Amongst others, I also bought one of these for testing purposes.


    http://www.4touring.com/led_bulbs.html


    It's the one at the bottom for £14.


    To be honest I'm anticipating the US ones more now as these UK ones only have 6 radially mounted LEDs for the reflectors to work of. It arrived today and I have tested it and it fits and works without mods, though the OBC doesnt like it !


    More results to follow as the bulbs arrive :D


    these (link below) look ok, and have slightly larger LEDs contained within, but still only 6 mounted radially....


    these ebayer jobbies


    load resistors costing considerably more than 80p!!


    Look forward to your solution UKzero re the OBC error msgs :D

  • the plot thickens.


    The LED I got in the post today from here


    http://www.4touring.com/led_bulbs.html


    is, like the other ones on order and the ultraleds already received, a Stop and Tail cluster. It has offset pins like the stock tungsten ones as well. However, the dual contacts are for each function ie Stop = Bright, Tail = Dim.


    The Sidelights on the 8 use the Dim contact, and one reason why the lights look so pitiful. Turn the the bulb 180 degrees around and insert and the light and the output is effectively doubled, but the pins will not lock. You can get round this with a bit of sellotape :shock: and wedge it back in and you will be amazed at the difference.


    This is going somewhere I promise.... Anyway, the same is for the LED clusters with the offset pins. They lock in on the dim setting, but with the sellotape you can get the Bright setting by inserting them the 'wrong' way round and fixing tape over them so that they keep the contact.


    Seeing as I only have one LED to play with at the moment, and this is a dim one compared to the ones on order, I am seriously looking forward to seeing how the USA ones fare up when they arrive. :D


    See pic for the present difference in light output. I like 8)

  • you can never have TOO much information :D


    so, to add to what has been done so far....


    Bulb 1 = UltraLED. Needs modification. 5 Forward facing LEDs & 10 Radial LEDs (after mods). Costs £10 each.


    Bulb 2 = 4touring.com. Fits straight in because of shallow taper from 15mm base. The 'lock' position is the DIM/Tail setting. Turn 180 degrees around and secure with clear sellotape :shock: and you get the BRIGHT/Stop setting with is 50% brighter. 18 Forward facing LEDs & 6 Radial LEDs. Costs £14.50 each :shock::shock:


    Bulb 3 = Ebay link in previous post. Does not fit straight in and will not lock because of the steep taper from 15mm base, however the contacts (in bulb housing) can be pulled/bent forward carefully with a srcewdriver and the bulb will shine. Again, needs securing with clear tape, and the inserted so that the Bright/Stop setting is activated. 18 Forward facing LEDs & 6 Radial LEDs, but larger and brighter LEDs overall than Bulb 2. Costs £10 per PAIR :shock::D


    Bulb 3 is in the new pic below, shining brightly despite it being 12pm in the day !


    I still have the ones from 'autoillumination' in USA to arrive, which have 14 radial LEDs and 18 up front, promising to brighter than a supernova, so will post comments in due course. For now though I am happier than I was yesterday.


    Hope this lot will save someone else time and money, wish I'd been privvy to the info before spending £50 or so on bulbs but it's all in a good cause !! Gotta wear my 8)


    PS. my bonnet does close properly, just need to adjust the rubber seal which has come adrift and hadnt done it before taking this pic.....


    Wayne, did you do the full resistor mods on your bulbs like UKzero ?

  • Tony,
    Yeah, had a trip to maplins for a bit of advice and to pick up some resistors and hey presto.


    These led's will do the trick apart from the error message on the OBD :x , if you have any better luck with the bulbs you are testing, let me know and I will order them. These bulbs you are testing does the error message come up :?:

    Wayne.

    On my 3rd 8 but my first V12 :cool:

  • I will try and get out this weekend and get the bits to work on the OBD error message. As I posted previously, it should be a quick and easy fix to install once I've cracked it and like I also said, I'm not an expert - just an amateur having a go like the rest of us.
    When I first installed the LEDs the car was in the garage on the trickle charger and so I never tried them with the ignition on - it was only then that the message popped up. Bear with me.
    This fix should also work for those rushing out to fit LED flasher units, tail lights, etc.


    Looks like you're setting up in the auto bulb business Tony - that's quite an impressive range you now have "in stock".


    Just started installing the HID units - hats off to those who have fitted these successfully. I'm finding it really fiddly to fit the ballasts and cabling beneath the light units in a way that is secure, misses the moving cranks and makes for a completely invisible installation.

  • Ok cheers ukzero.


    I have fitted both side lights, but one seems brighter than the other :shock: , I have double checked both lamps and all led's are working on both lamps, when fitting I cleaned the inside so its not dirt, I didnt remove the metal fins from inside the actual sidelight, is there any reason why one would be brighter than the other :?: or is it just because of these metal fins :?:
    Tony did you remove the fins :?:


    Thanks


    wayne

    Wayne.

    On my 3rd 8 but my first V12 :cool:

  • It could be that the fins on one side are in directly in front of the LEDs and not on the other side which will consequently look brighter.
    Try rotating the bulb holder in the mount and trying again - if it pops out - just push it in loosely and try it for alignment in that position - if that is the right position just push it in hard and use a couple of small self tappers to hold it in and water tight. Removing the fins is not an easy option.
    If all else fails you may need to consider some of the units Tony has been looking at.


    All I can say is that my lights look the same and work.


    Hope the above is useful.

  • I like a challenge, even if that only involves me simply chucking money at a problem rather than getting a soldering iron out :D


    Wayne, have you tried the bulb inserted 180 degrees the other way. Believe me the difference is staggering between Dim/Tail and Bright/Stop function. There is always the outside chance that the internal circuits of one bulb is configured incorrectly giving the Bright setting on one of them, even though it is in the 'locked' position (which should be Dim).


    This goes for anyone without LEDs. Simply turn your Tungsten bulb around and secure (with tape, or more professionally like ukzero with self-tappers) and hey presto - a super bright sidelight.


    The bulbs I've got dont come close to the shark fins like the UltraLed ones, so there was no need to remove or modify them at all. Even the ones in at the moment are so bright I barely need proper headlights up at night !!!! Bring on the US ones :lol::lol::lol:

  • I have now solved the OBD problem mentioned by Wayne and following Tony's info, also solved the brightness problem without the need for reversing the LED clusters.


    However, I cannot say this is a universal fix and it has only been tried with the LEDs I have used. Others may work the same internally and have the exact same resistance/current draw, but I cannot guarantee this.
    Consequently I won't publish instructions here in case someone rushes ahead, fries their electrics and then blames me.


    Please request further info by private message.


    Thanks

  • Now that the ultraleds are in, working, not upsetting the computer and are brighter than the tungsten filaments ever were.........let's just say I have lost the enthusiasm to start all over again.
    How long before other motorists start flashing you Tony 'cos you're blinding them with your sidelights :?: :wink:

Jetzt mitmachen!

Sie haben noch kein Benutzerkonto auf unserer Seite? Registrieren Sie sich kostenlos und nehmen Sie an unserer Community teil!