Alpina Restoration

  • Update 2/12/2013
    -----------------
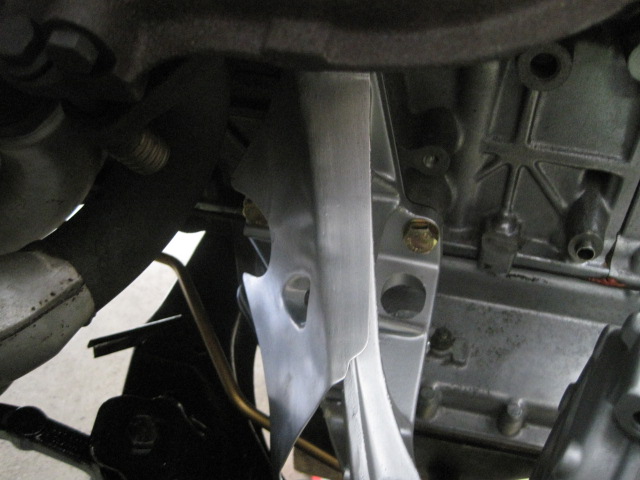
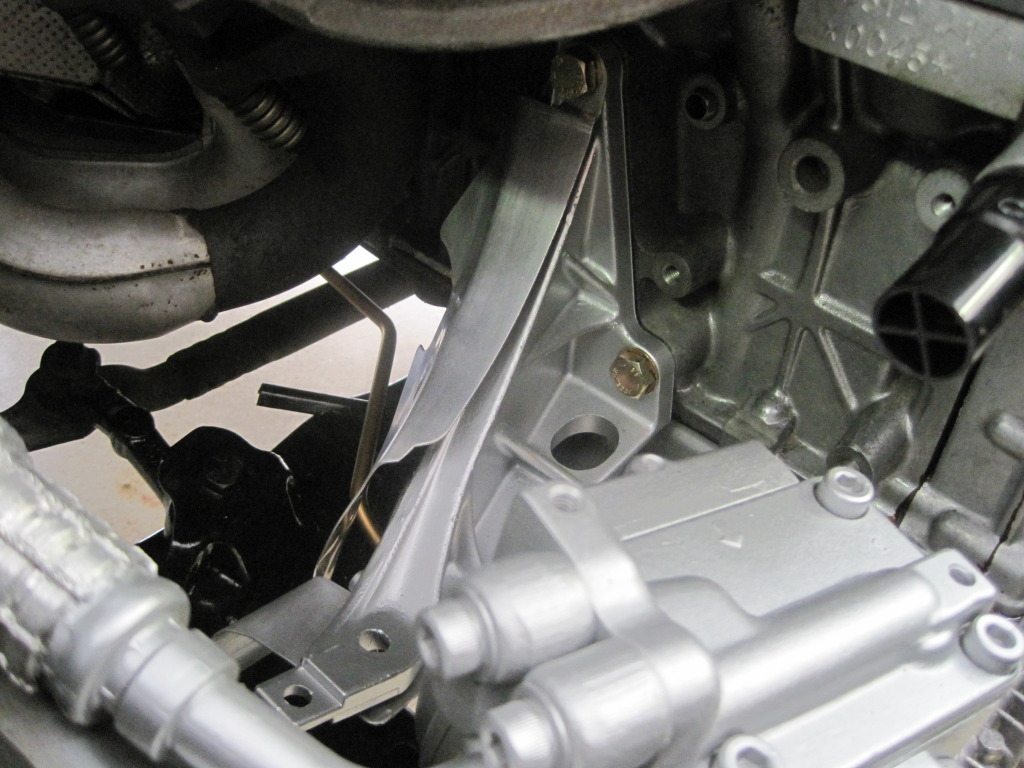
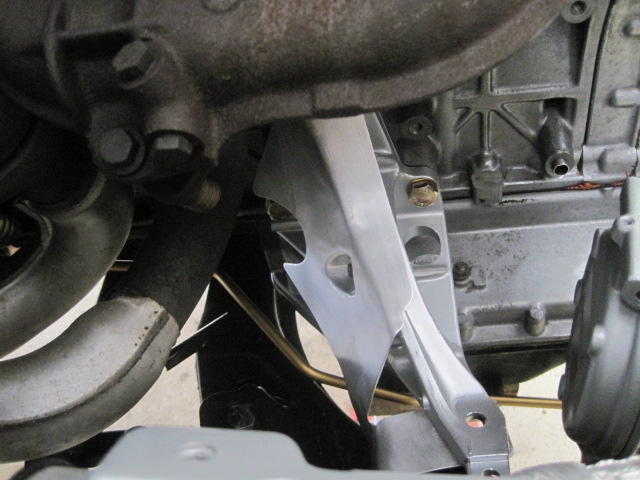
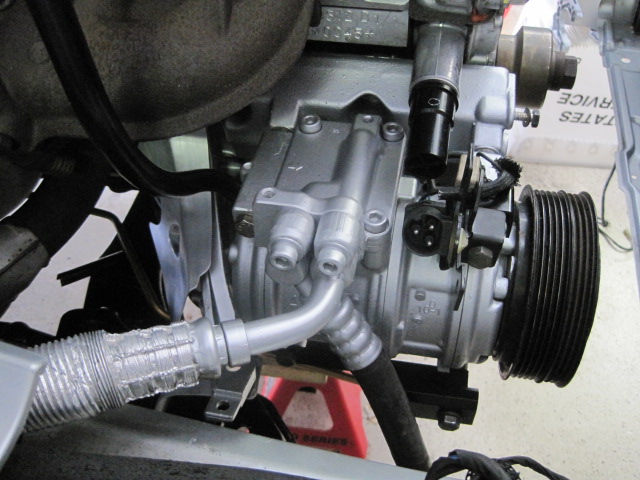
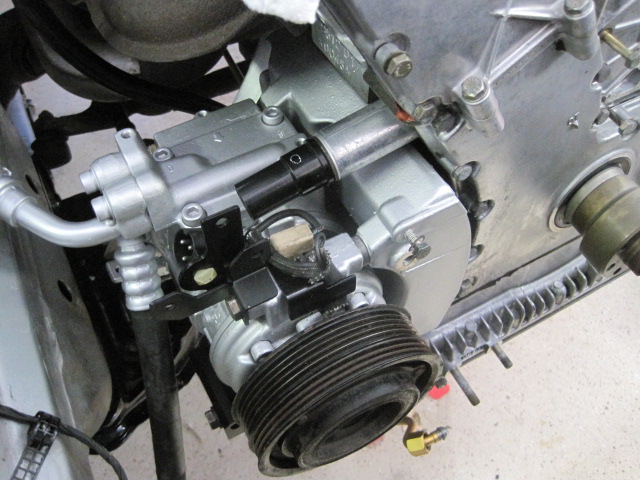
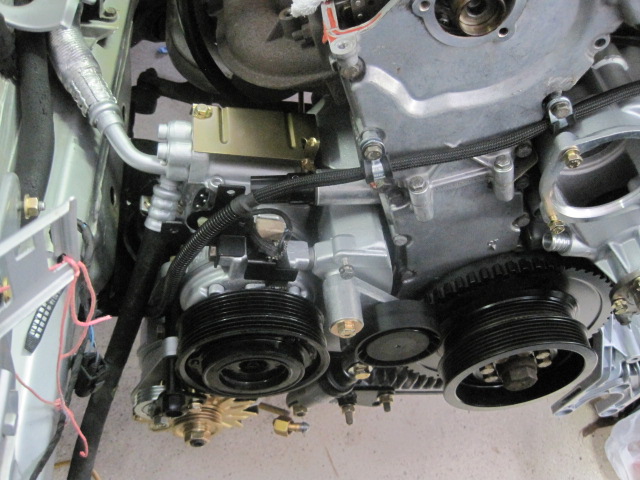
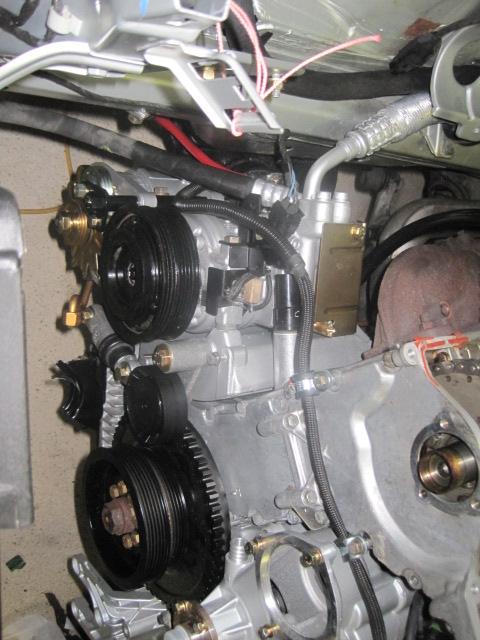
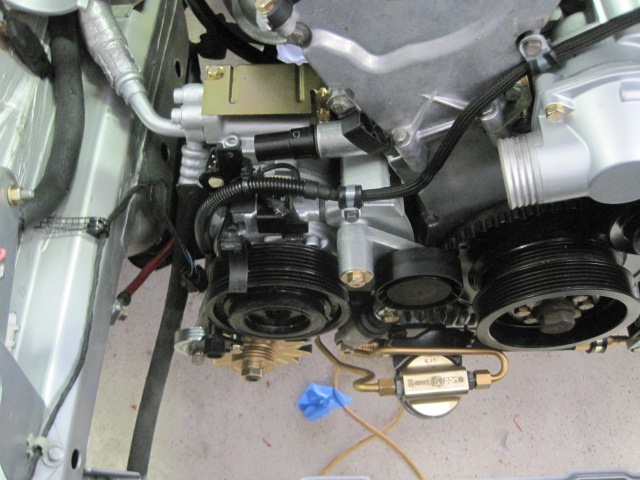
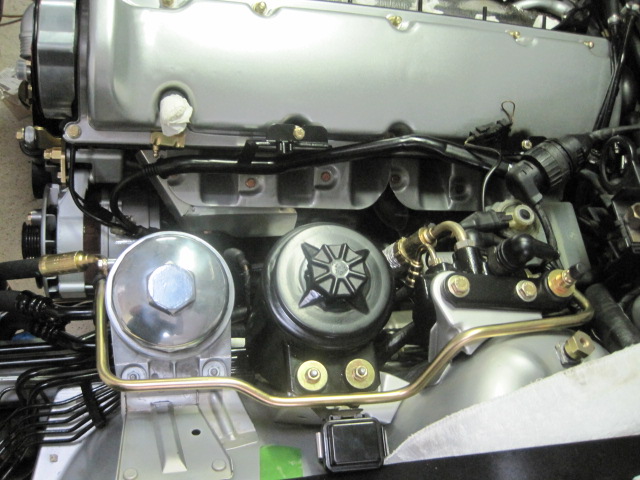
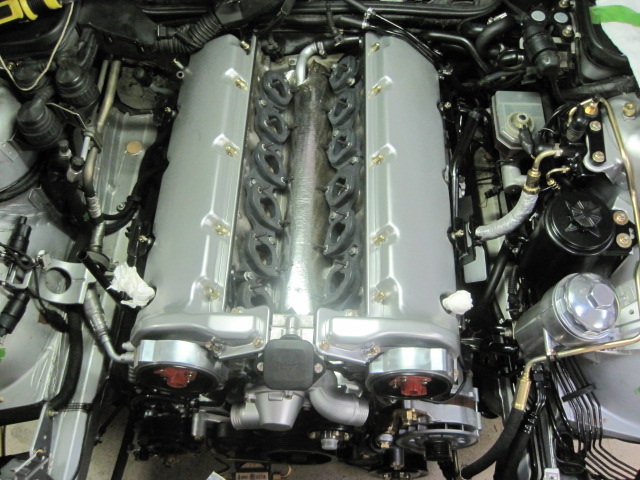
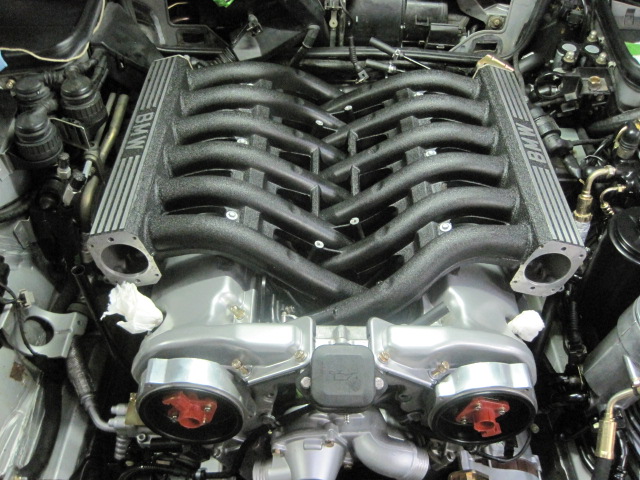
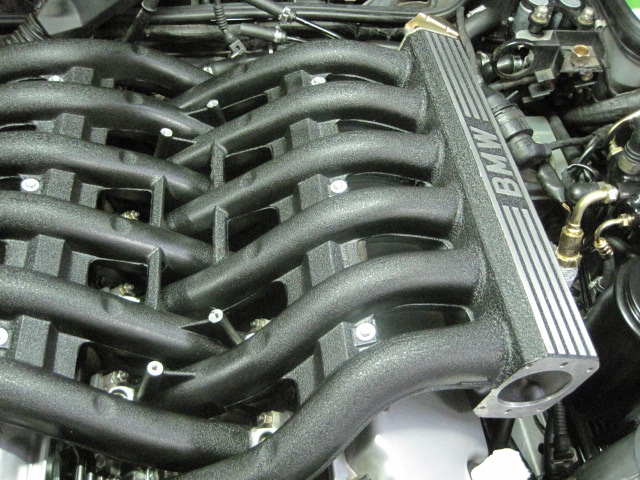
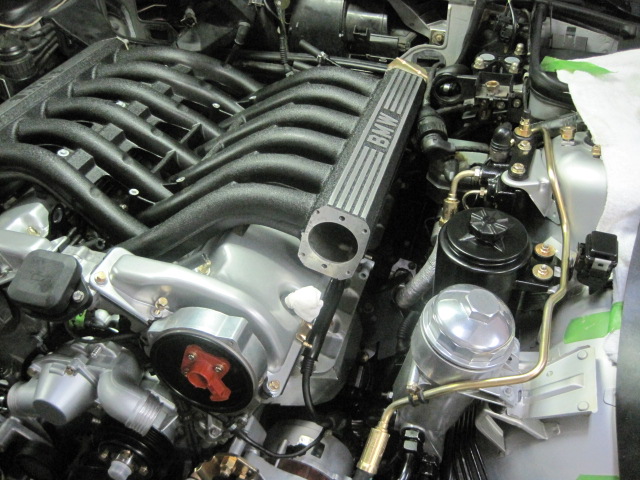
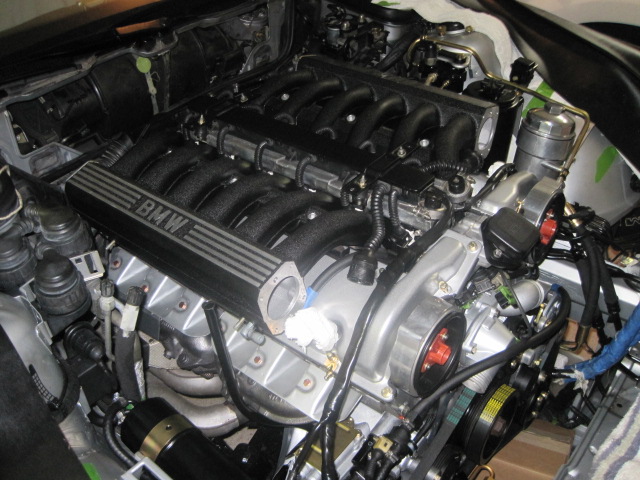
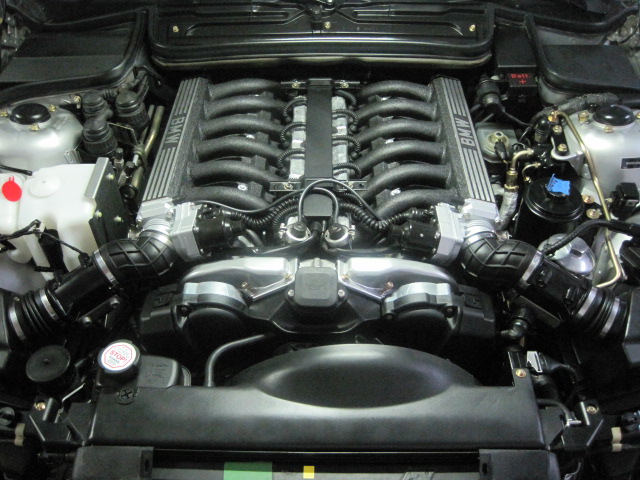
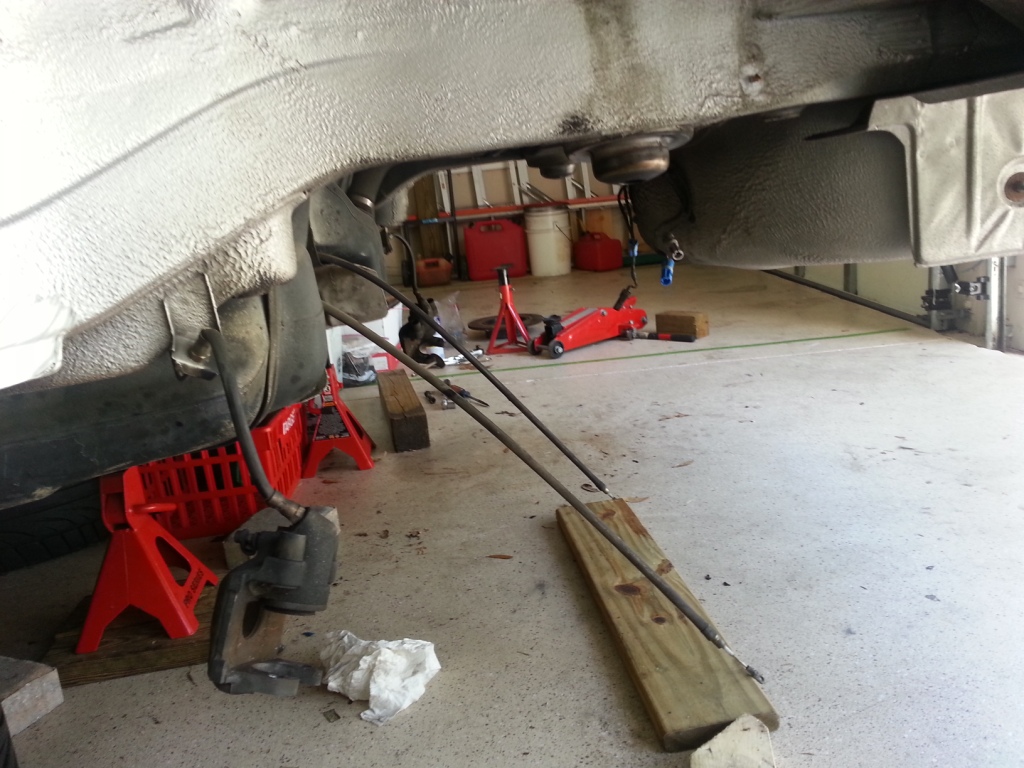
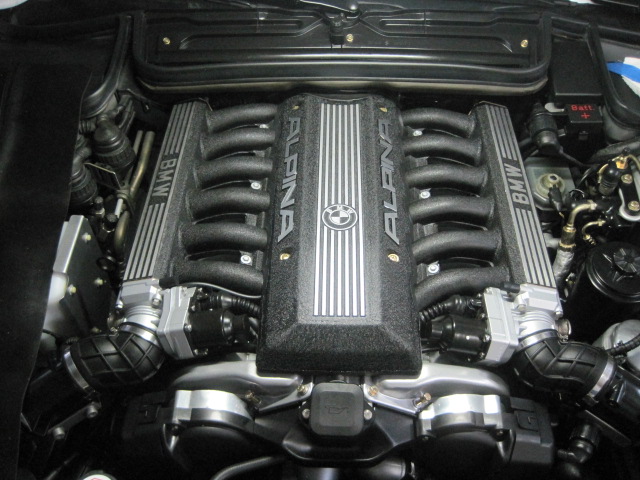
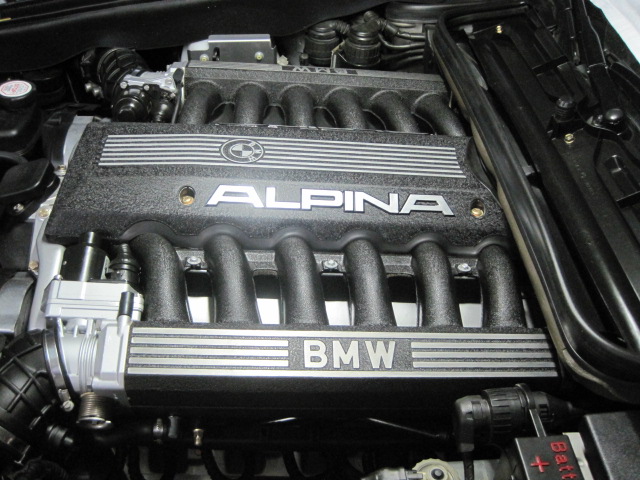
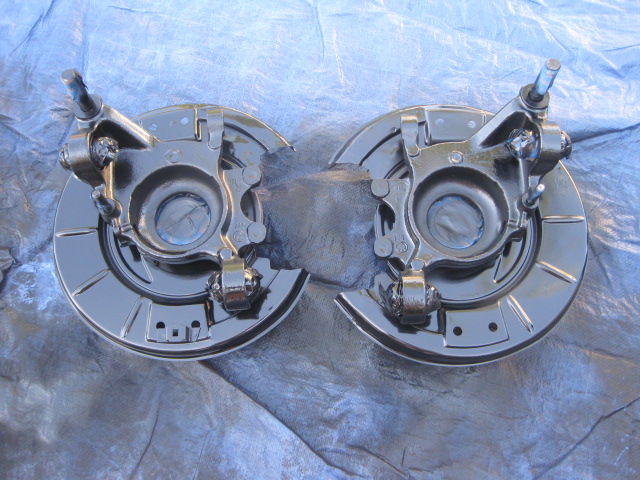
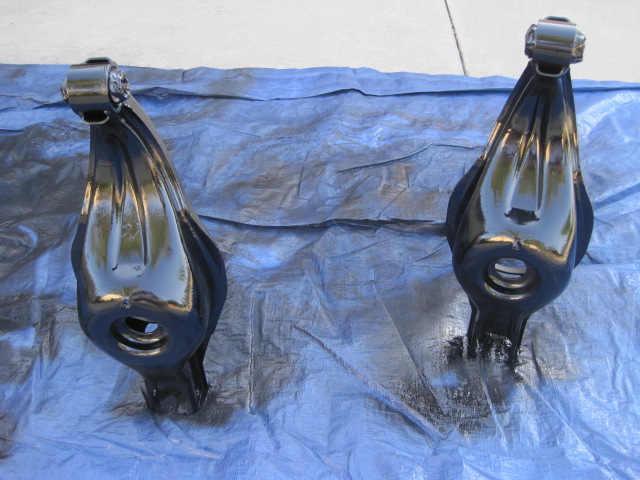
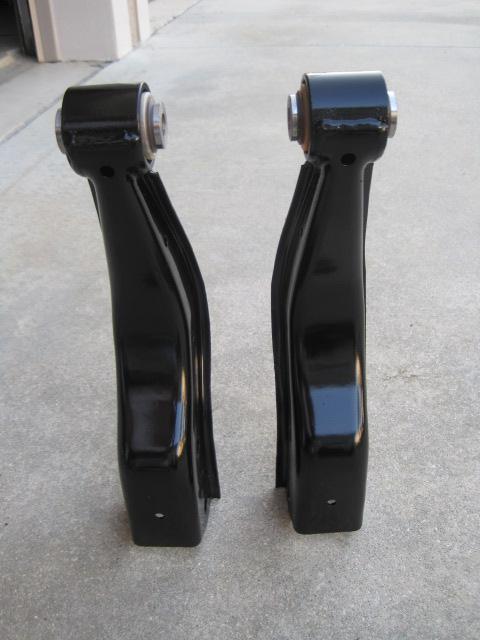
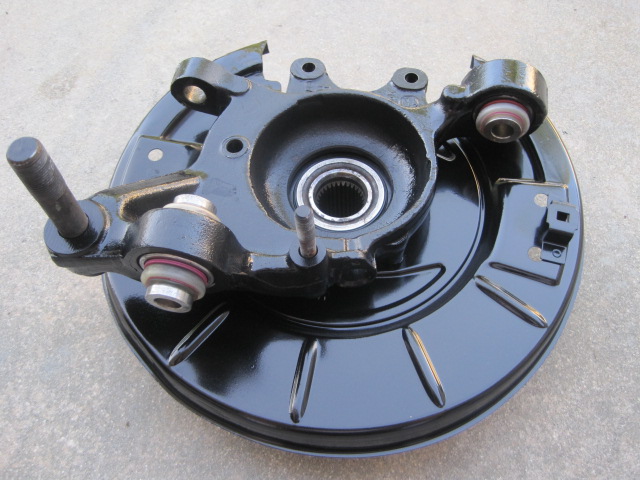
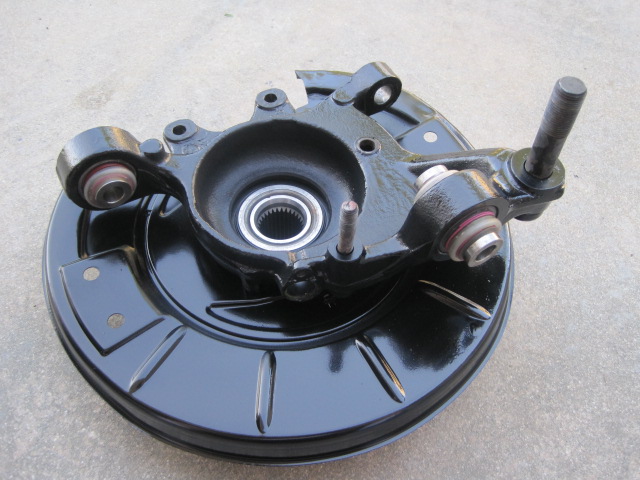
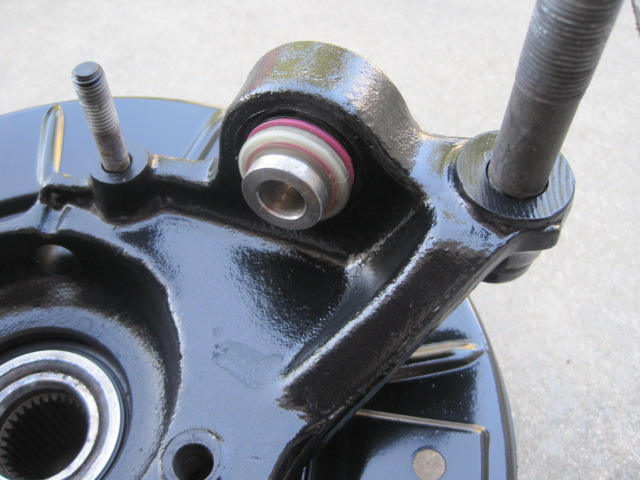
    Finally, after months of taking things off, cleaning, painting and replating items, this weekend I was able to begin to put items back onto the car. It was a small step, but very rewarding to put on the right motor mount and heat shield, Air Condition mounting bracket and compressor, and the high pressure line running down the right side of the engine. Small items I know, but again exciting to be finally putting something back on. More to follow....


    Well...the stars aligned and the heavens opened up and angels sang.......


    - - - Updated - - -


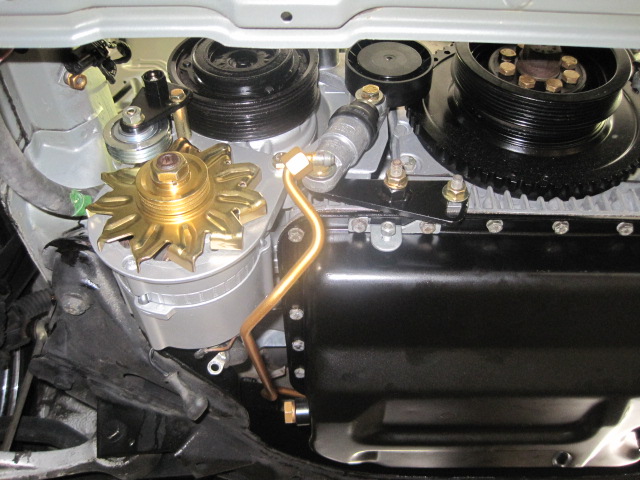
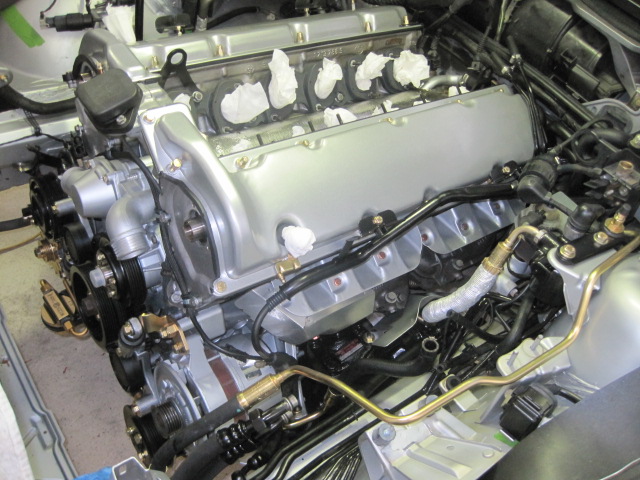
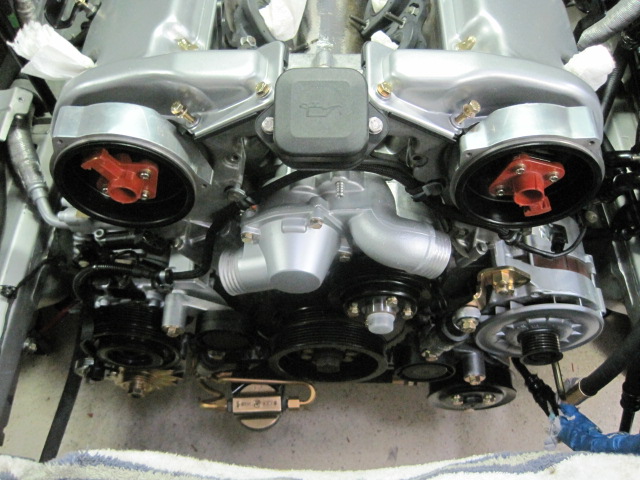
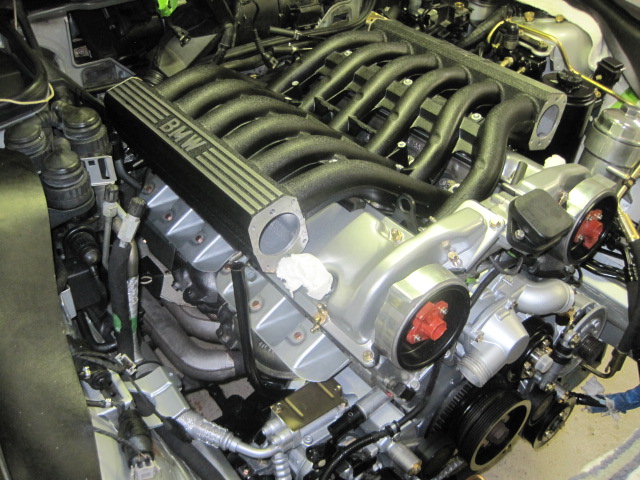
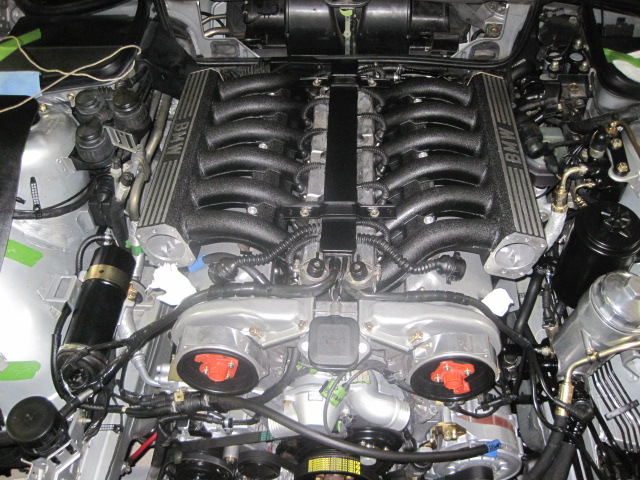
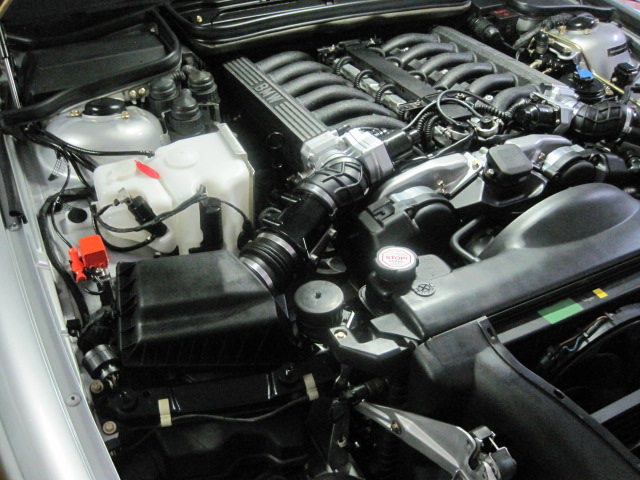
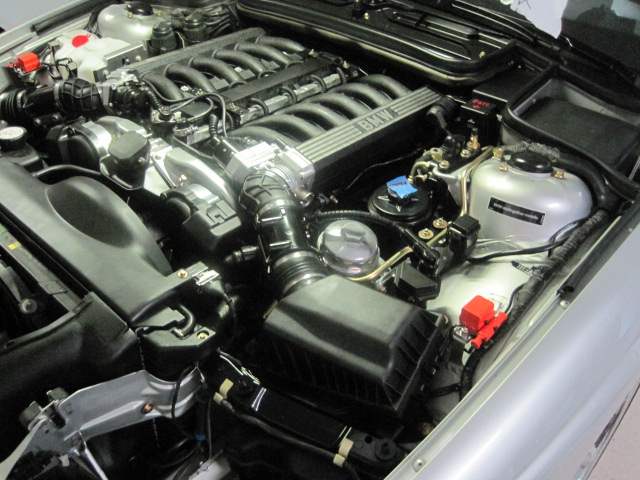
    Here are the pictures of the start of putting things back on....after months of taking things off, it was really enjoyable to start to put things back on...even it only a few.


    This is the passenger side motor mount, Pentoisin line, and A/C mounting bracket and compressor.


    BMW 850 CSi
    BMW 8er.org Clubs International (B8CI) Board Representative, USA and North America
    Editor, E31 NEWS International E31 Newsletter

  • UPDATE 4-21-2013
    -----------------------
    Was finally able to get back to the project .
    Here is a list of what was able to accomplish:
    1. Got the engine back onto the engine mounts
    2. New Banjo bolts and lock plates on the bolts.
    3. Placed the valley pan with new gasket and new bolts
    4. Mounted New Intake manifold gaskets
    5. Mounted the water tubes complete with new O rings (including the one that nobody ever sees - the small on on the bottom of the large tube.
    6. Mounted New Water Pump
    7. Installed the new CPS sensors
    8. Replaced the Alpina heat shield over the water tubes
    9. Removed the Oil Pan and tightened up all the bolts on the oil pump
    10. Painted the Oil Pan, cleaned the sensor and remounted with a new O ring
    11. Remounted the Oil Pan with new gasket
    12. Mounted the Cad plated A/C compressor Heat Shield
    13. Mounted the Secondary Alternator after refinishing
    14. Mounted the front fly-wheel
    15. Mounted the passenger side tensioner after replacing the wheel and shock
    16. Remounted the ground strap to passenger side engine mount


    Here are some pictures....lots left to do.


    Drivers side Motor Mount and Alternator/PS Pump bracket:


    Valley Pan Replaced with new gasket and new bolts


    Refinished Second Alternator with new Cad plated parts:


    Replaced new Intake Manifold Gaskets:


    The little O ring nobody sees on the large water pipe:


    Replaced Water Pipes and new water pump:


    Alpina water pipe heat shield in place:


    Oil Pan removed to exposes the oil pump. Tightened all the bolts:


    Refinished Oil Pan prior to remounting with a new gasket and O ring for the sending unit:


    View from the top of the new water pump, flywheel, tensioner, and secondary alternator:


    View from underneath - the subframe will be cleaned up before I am done :) :


    Another couple of views from the top:


    BMW 850 CSi
    BMW 8er.org Clubs International (B8CI) Board Representative, USA and North America
    Editor, E31 NEWS International E31 Newsletter

  • UPDATE 6/3/13
    --------------------------
    Well...I was finally able to get back to the car. It is nice to be putting things back on so here is the latest.
    1. Replaced the Aux water pump and valves with new hoses
    2. Ran the transmission cooler lines back up to the radiator area
    3. Dropped the transmission pan, cleaned everything and replaced the filter and gasket, and replaced the pan
    4. Ran the Pentosin lines, replaced the cleaned and polished ASC+T filter
    5. Placed the Power steering pump and pressure lines
    6. Placed new belt tensioners and pulleys along with replated and painted brackets
    7. Placed the Alternator and wires
    8. Placed the cleaned and powdercoated Pentosin canister and pressure lines, placed new filter
    9. Placed the polished Oil Filter housing , and reconnected the lines with new "O" rings
    10. Replaced the distributor housings, with new cam seals, gaskets, and rotors
    11. Re-routed the second alternator cable (I think I had it wrong when I first placed it)
    12. Placed the polished heat shields on both sides with new copper nuts
    13. Placed the repainted housing and alternator cable
    14. Placed the refinished intake manifolds (that bottom nut on #11 is a %$#@$^&*&%^!)


    Here are some updated pictures:


    New hoses on the Aux water pump and valves


    Polished ASC+T filter


    ASC+T Filter in place and hoses


    Alternater and new Pully adjuster and wheel with plated parts installed


    Plated pressure hoses installed, Powder coated Pentosin canister installed, and Polished Oil filter housing installed


    Getting ready to place the refinished Intake Manifolds


    Refinished Intake Manifolds installed


    I need a beer and a break....more to do!

    BMW 850 CSi
    BMW 8er.org Clubs International (B8CI) Board Representative, USA and North America
    Editor, E31 NEWS International E31 Newsletter

  • Zitat von 8Harry8;112187

    :winkwink: Congrats Roger


    I'll take a beer and a break now too, but I doubt that I would ever drive this Alpina after restoration if I was you!


    Harry - thanks. I will drive it some, but at least I will know it was clean again at one point! :driver:

    BMW 850 CSi
    BMW 8er.org Clubs International (B8CI) Board Representative, USA and North America
    Editor, E31 NEWS International E31 Newsletter

  • Awesome Project - I look forward to the pictures yet to come... What number on the register is your car ?


    I have #46, yet to get in on the road in New Zealand but will do so in the next 6 months...

  • Your car is my car's little brother! My car is #45, and a friend recently purchased #44.


    Zitat von Fearghus;112262

    Awesome Project - I look forward to the pictures yet to come... What number on the register is your car ?


    I have #46, yet to get in on the road in New Zealand but will do so in the next 6 months...

    BMW 850 CSi
    BMW 8er.org Clubs International (B8CI) Board Representative, USA and North America
    Editor, E31 NEWS International E31 Newsletter

  • #46 is a little sister to yours


    My car is also ex Japan and is in Black Metallic - her name is Salome >...
    She has a great looking brother in your car - was #44 ex Japan too ?


    Regards

  • Zitat von Fearghus;112286

    My car is also ex Japan and is in Black Metallic - her name is Salome >...
    She has a great looking brother in your car - was #44 ex Japan too ?


    Regards


    Yes...44 is also from Japan.

    BMW 850 CSi
    BMW 8er.org Clubs International (B8CI) Board Representative, USA and North America
    Editor, E31 NEWS International E31 Newsletter

  • Been a while since I updated this thread, so I thought I would try to add some pictures and say where we are now. I have to say that I have received some excellent support from members of this board as I have progressed (Reinhard and others)


    New fuel injectors and rails cleaned:


    Fuel rails in place


    7/7/13 Update
    -------------
    Was able to get some more things done over the 4th weekend. It seems unfair though...after cleaning and doing all the work, it seems like a lot if it is covered up...oh well . Here is a list of things I accomplished:


    1. New dist caps and rotors, and placed the plug wires on
    2. Vacuum hoses
    3. New radiator, new radiator hoses, and new overflow tank installed.
    4. New fan clutch, fan placed
    5. I realized that after placing all the items that I had not installed the bracket for one of the hoses that is made to fit on the 2nd Alternator bracket, so off came the fan and lower radiator hose to put the bracket on, then back on....
    6. Replaced the refinished front horns with newly painted brackets and reran the wiring.
    7. Finally figured out how to replace the transmission mounts (thanks Timm for the write up I found from you), so went through the procedure. The Alpina Cats were in the way, so I dropped down the exhaust with the cats, and the associated heat shield was removed. Transmission bracket came out..so of course all were cleaned, and the mounting bracket was repainted then put back into position. Exhaust hanger coming off the back of the transmission was cleaned and placed.
    8. Cabin filters were replaced (the old ones were AWFUL!!!!), the housing was cleaned and put back on with all the bolts and screws which had been cad plated again.
    9. Refinished DK motors were placed back on with new gaskets


    Next will come the front end with all the housings, intakes, air filter housings and hoses, then the lights.....


    Update 7/29/13
    --------------
    Was able to do a few more things this Saturday.
    1. Cleaned and refitted the MAFs and airfilter housings
    2. Cleaned and fitted the Right and Left air boxes. For those who have never seen them out of the car, they are huge. I had one which the seam had partially split, so I repaired that.
    3. Cleaned and fitted the center intake air duct
    4. Cleaned and replaced the front bumper
    5. Cleaned and refitted the front crash sensors


    I have decided to use Evans waterless coolant in the car, as everything was removed, all new hoses and heater core replaced, and the two drain plugs removed from the block for drainage. I have never used it before, but have researched it with very good results. There is a round sticker on the radiator cap, but I have a second cap without the sticker on it.


    Next will come putting back together the front headlights. Everything was taken apart and the brackets were repainted when the car was painted.


    Here are a few more pictures:


    Right air filter housing and bracket


    Left Air Filter box and bracket:


    Right Bracket and Alpina Plate:


    Air boxes and center vent duct installed with the bumper installed:


    Engine pics:


    Update 8/26/2013
    -------------------
    Most of the engine compartment is "almost" done, so I have just ordered a few things to complete it and sent off several items to be replated. The headliner, sunroof cover, A and C pillars and rear deck are at the shop (Headliner Express - highly recommended) being recovered and custom installing a 3rd brake light surround. After reading Steffen's rebuild of his rear subframe, and knowing what I wanted to do in the rearend, my only choice was to drop the rear subframe. Not that hard to do since the exhaust is off the car. So...several hours later it was out and on the dolly. Granted the car will be 22 years old in September (original BMW Build date was 9/91, and the Alpina build date was 11/91), but I thought everything would be in really good shape - especially since the car only has 23,000 miles. Well...was I wrong. Rubber bushings wear out as much from age as use, and I have attached a couple of pictures. So what started out as a cosmetic refresh/repaint and replating of all the bolts has turned into a full blown replacement of all the bushings. I think I am way past my mission creep turning into the Indianapolis 500!


    Rear end and subframe out:


    All the parts:


    Due to "stuff" I have not had the chance to get to much, but am finally getting back to it. This past weekend I picked up the custom headliner from Bill at Headliner Express, and will pick up the remaining A and C pillars, rear deck, sunroof panels, and sunroof motor cover today. My car did not come with the 3rd brake light, and for federalization it was installed on the rear deck. As the rear deck had to be recovered, I decided to move the LED strip up to the top of the window. Bill had to custom design a housing unit that totally looks factory. I have been waiting for to get the headliner and pieces done so I can start putting the interior back together. The rear pieces are out getting new ball joints pressed in. The remainder of the underhood items are at the CAD platers, and will be ready by Friday so I can finish under the hood.


    12/16/2013 UPDATE
    __________________


    Stuff accomplished this weekend:
    -- Placed new gates on the Sunroof cassette, and reinstalled the cassette along with a recovered sliding panel.
    -- Installed the new headliner with the modified third brake light installed. I did not get to the rear deck, A and C pillars as this took longer than expected, especially putting in the new gates, plus finding them in the various stashes I have place throughout the garage.
    I was not able to pick up the plated parts as there was a glitch at the platers, but they should be ready later this week.


    I also forgot to addd that a couple of weeks ago I got the dash back in place.


    Here are some pics:


    Broken sunroof gates. Both sides were cracked all the way through.


    Installed sunroof cassette and new gates:


    Here is the new headliner with the high 3rd Brake light incorporated. Bill and the team at Headliner Express did the custom work and recovered the board:


    12-28-13 Update
    --------------------
    Not able to do too much as it is the Holidays, plus a full work schedule, plus spending time with the family, but I was able to finish the acoustic cover. I have the black plugs for the screw access holes, but have not put them on yet. The cover was refinished to match the intakes. Screws were replated. New emblems were added. The Rubber seal was taken and cleaned and reattached. I found the best way to clean it after experimenting with several different methods to get the yellow sealer off was simply to sit down and carefully scrape it flat with a flat razor blade. Then, simply clean it with Dawn soap.
    I do not have the front air baffle on yet in front of the cover, but it will go on soon. Hope everyone is having a Happy Holidays and here are some pictures:


    Here is what I accomplished on Saturday:
    -- New hood pad installed
    -- More cleaning on parts of the rear end (the car's, not mine )
    -- Rear deck shelf, rear sunshade, rear seatbelts installed with all the trim
    -- New C-pillars installed. Even the new ones are a pain and even succeeded in breaking two of the top tabs off
    -- able to add some small trimming around the new 3rd brake light


    2/24/14 UPDATE
    --------------
    Started to do some of the fun stuff:


    --Started putting the trunk back together - speakers, some of the trim, etc. Did not put the side trim on yet as I have not reinstalled the shocks and need to get to the top to finish them.
    --Placed the trunk trim panel and lights.
    --Placed the new ALPINA and B12 5.0 Emblems on the trunk along with a new Roundel. I photographed everything with measurements before the emblems were taken off, so they went back on where they were originally.
    --Placed the Door Handles.


    Small Stuff..but it seems that everything takes longer than expected, especially when cleaning and polishing the lights, cleaning and relubricating all the door handle parts, plus getting my big hands in there to hook up everything


    3/10/2014 Update
    -----------------
    I was able to get to some more work in the interior yesterday. I redyed the Alpina stripes on therear seats and added some Hydefood leather treatment. Placed the recovered A pillars, rear seats, center console and side trim (they have been out almost 2 years!!!). Also took some pictures of the rear badges I placed last week. Next up will be taking the front seats in to have them touched up. I will redye the Alpina stripes back to their original color before putting them back into the car, and installing the Alpina Wood console.


    Here are some pictures.


    Seats with Hydefood leather treatment done just before installing:


    Redyed Alpina stripes in original Alpina Colors, I picked up the tip on how to do it here at 8er.org:


    Rear seats back in place after nearly 2 years being out!


    New emblems:


    The rear license plate holder comes from the new 1 and 6 series:


    4/7/2014 Update
    ----------------
    I was finally to do some more work yesterday. I have received the rear suspension pieces back with the new bearings. I got everything painted and detailed. On the rear springs I found ALPINA stamped into the springs. I also spent some time under the rear of the car cleaning getting everything ready to put back together and back on. On the rear springs, I noted the correct paint markings, and reduplicated them on the refinished springs. Here are some pictures:


    More to come!!!!!

    BMW 850 CSi
    BMW 8er.org Clubs International (B8CI) Board Representative, USA and North America
    Editor, E31 NEWS International E31 Newsletter

  • Zitat von 8Harry8;119115

    :winkwink: Nearly +1 on Timm's opinion, but what the heck made you use the Lucas instead of Bosch injectors, Roger?!?


    Harry...I know better than that. Evidently I put a "before" picture up. The new ones ARE Bosch! :)

    BMW 850 CSi
    BMW 8er.org Clubs International (B8CI) Board Representative, USA and North America
    Editor, E31 NEWS International E31 Newsletter

  • It is a work of art! :adore:


    What happened to the acoustic cover to make it look like the intake runners? :roll:


    Front of engine is missing part 1723620 but I am sure this is well tucked away in a box ;)


    Looks like you´re on a straight to the finishing line here :top:


    :winkwink:
    Reinhard

Jetzt mitmachen!

Sie haben noch kein Benutzerkonto auf unserer Seite? Registrieren Sie sich kostenlos und nehmen Sie an unserer Community teil!