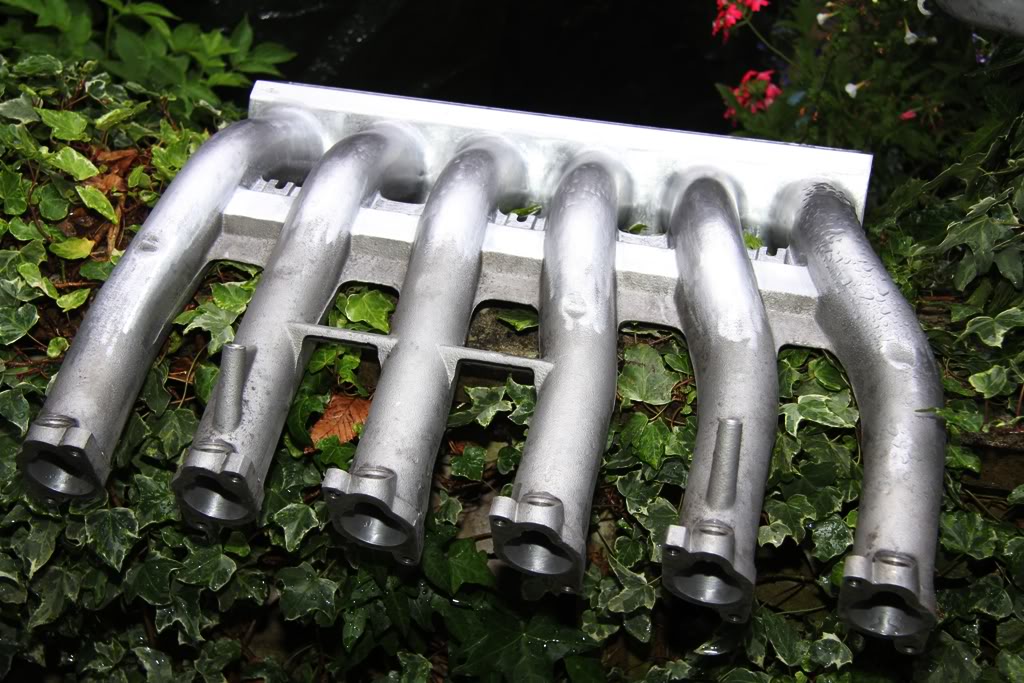
A few weeks ago I did on post on doing the banjo bolt job and since then, as I had the intakes off I thought I would tidy them up a bit.
As I am going to do a post on refitting the intakes, I decided that trying to integrate a post on what I did to clean up the intakes at the same time would make the post cover too many procedures all at once so I will show what I have done to the manifolds first, then do a post on refitting them.
I wanted to clean up the insides as well as the outsides and did them both pretty much at the same time so please try and accept that the pics may not present the procedure entirely in the correct order.
As I wanted to present the intake flow with as little turbulence as possible, I offered up the intakes to the new intake manifold gaskets, and marked them around the gasket profile so that there would be a smooth flow from the manifold through the gasket.
With the marks done in marker pen, I roughed-out the intakes with a grinding wheel to remove the inner seams, and then with a coarse flapper wheel.

Next was an intermediate grade flapper wheel and then a fine one, followed finally by a ball hone. Left to right here shows stage 1, 2 and 3.

and the final finish was with a rotary mop with some polishing paste as used for normal aluminium polishing on a bench grinder type polishing wheel.

With the internals done, it was time to tidy up the outside. So starting with a cutting disc on a angle grinder, followed by a coarse then fine file, then a course and fine flapper wheel, electric finger belt sander and finally by hand with some wet and dry abrahsive paper, I cleaned off the casting seams from the manifolds......

including the flashings along the runners.......

around the inner face where the runners meet the plenum......
and the huge casting seam along the outer face.

So now rewind the process a few days to where I milled the top face of the plenum flat......(Sorry, mobile phone pic!!).....
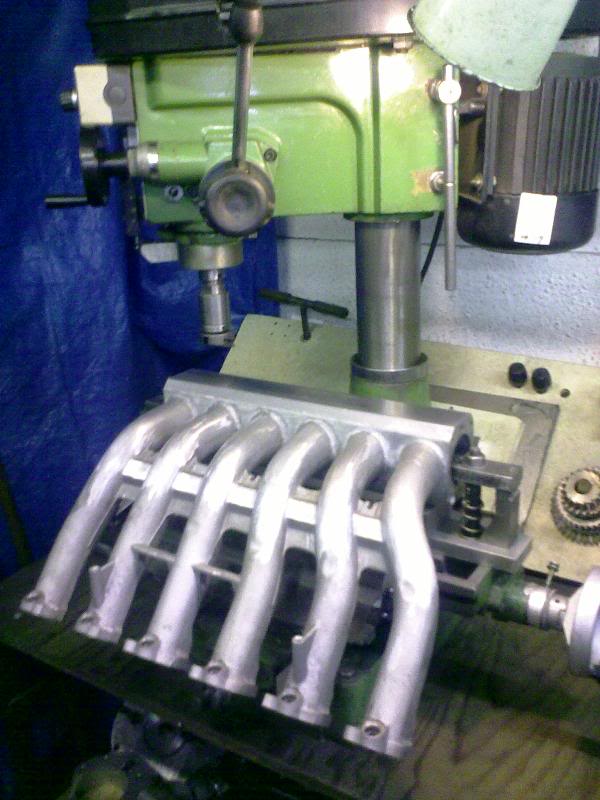
followed by a 1.0mm recess in the top face.......
Same pic, different relevance. ![]()
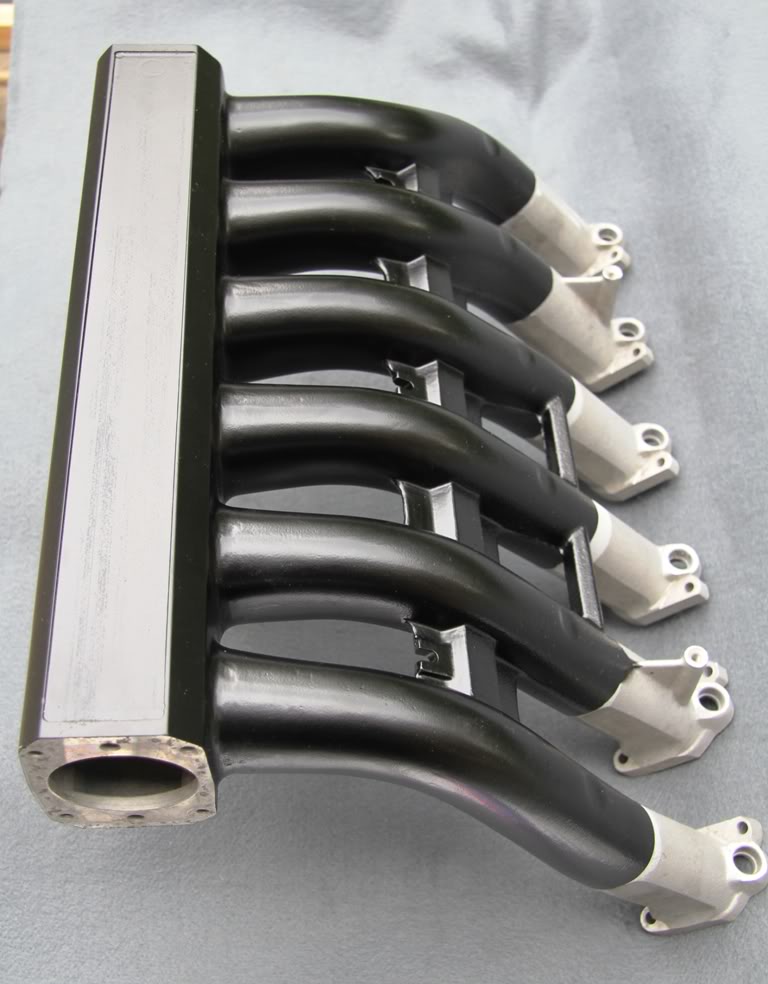
Next job was to fit a pair of spare end plates to each plenum to seal them, plus a few gloves over the end of each runner to seal them up too. (Yes, I did put bolts into the remaining stud holes where the studs had been removed) and then silica blast them for a smooth, but keyworthy surface.

I then etched the immaculately clean manifolds and then powder coated them Satin Black.

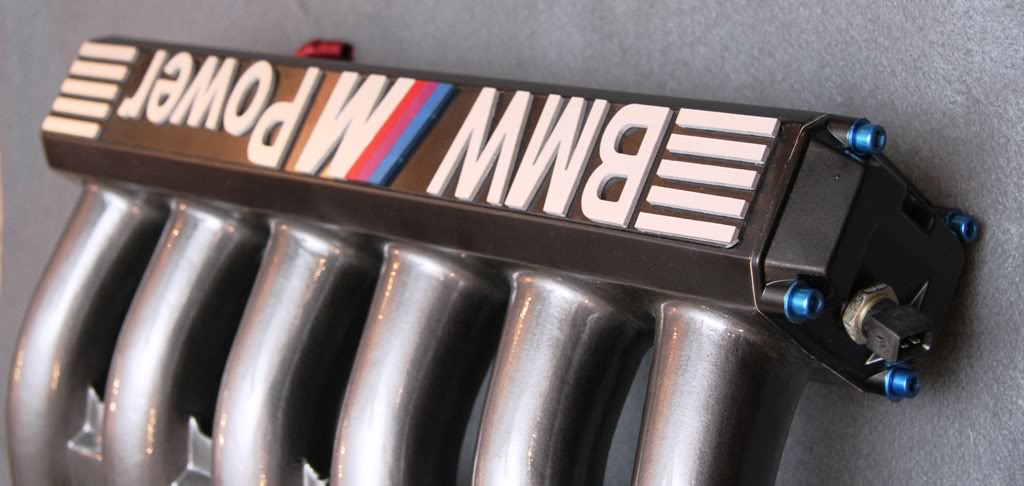
As I will be running a pressureized intake, I replaced the push-in vacuum elbows by drilling and tapping the holes M10 to accept these threaded unions for the vacuum/pressure hoses with a larger bore and flow rate for better breathing of the crankcase.

and using new gaskets, refitted the powder coated rear end plates complete with temperature sensors and new crush washers.

Next on the agenda was to black-chrome the intake runners.......

and fit the new plenum plaques that I had made.
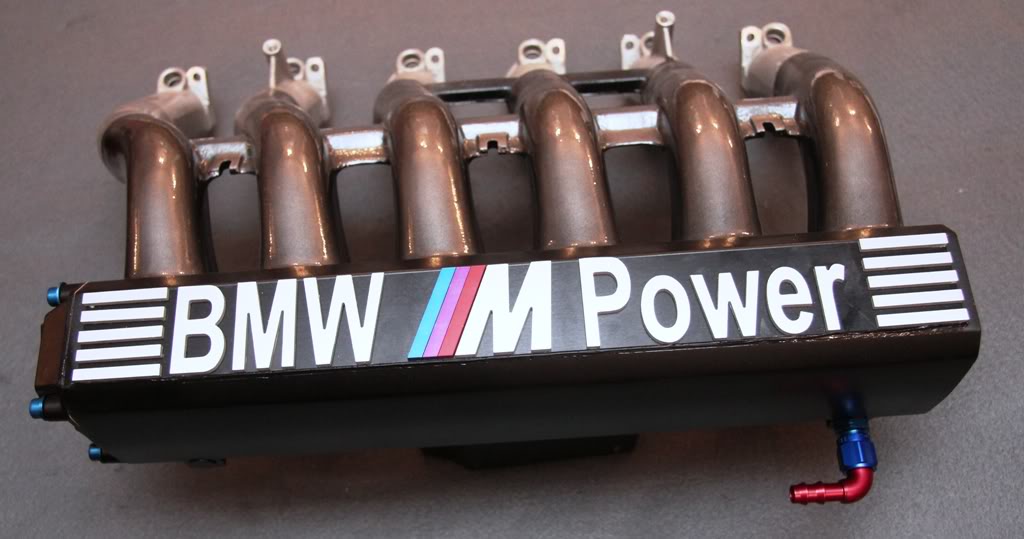
These were all anodised so the colour should stay true and bright and remain free from corrosion and as the backing plate was milled from 1.0mm thick plate, it sits flush into the pre-machined recess.
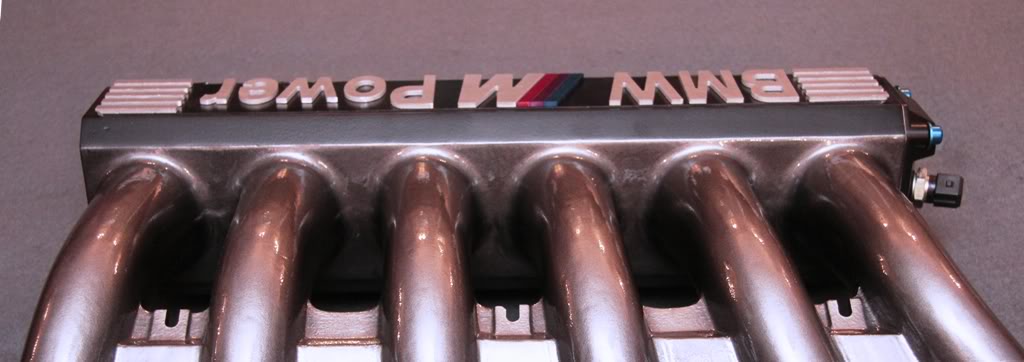
and with all the different lighting conditions I have taken the pics in, this is the truest pic of the actual colour and finish.
So there we have it, intakes tidied up a bit and ready to refit.
8Tech.
Tidied up my intakes a bit.
-
-
Very nice Gerry, they cleaned up nicely and look brill. If you can get a snap up when they're fitted, that'd be great. I say it each time, but I admire your work no end, top quality.

-
Top Quality Mate looks superb
BTW
What on earth are you going to do once the Csi is finished

-
Excellent work Gerry, they look the dog's dangley bits now!
-
Gerry, You should find some more of these intakes from Breaker's yards and finish them as you've shown to sell to customers.. or even on an exchange basis. Really nice work. BTW, where does the BMW M-Power logo come from?
-
 Gerry, so what do you do in your spare time????
 -
Zitat von arnie;81799
BTW, where does the BMW M-Power logo come from?
I made that by laser cutting the letters and plaque, individually anodizing the letters and plaque and then assembling the whole lot.
8Tech.
-
Zitat von anguswolfendale;81805Gerry, so what do you do in your spare time????
Play with my car.
8Tech.
-
Very nice indeed Gerry
-
As with all your work Gerry - Superb and top notch
-
Make sure you don't scratch them getting those little bas***d nuts on.
-
Very nice!
Now I'm going to have to do something with mine. -
Blimey!!! They are stunning.....
-
I wonder who will win Best In Class at Gaydon next year.

-
Im stunned
They just look awesome, your dedication and attention to detail never ceases to amaze.
Jetzt mitmachen!
Sie haben noch kein Benutzerkonto auf unserer Seite? Registrieren Sie sich kostenlos und nehmen Sie an unserer Community teil!